Creating 'The Tree at Anstey's Cove'
Publication date: 18 May 2020
Here's the finished, two-colour, version of the print. I've also produced a single-colour (black) edition. To buy either please click here.
Keep scrolling to find out how I produced this print...

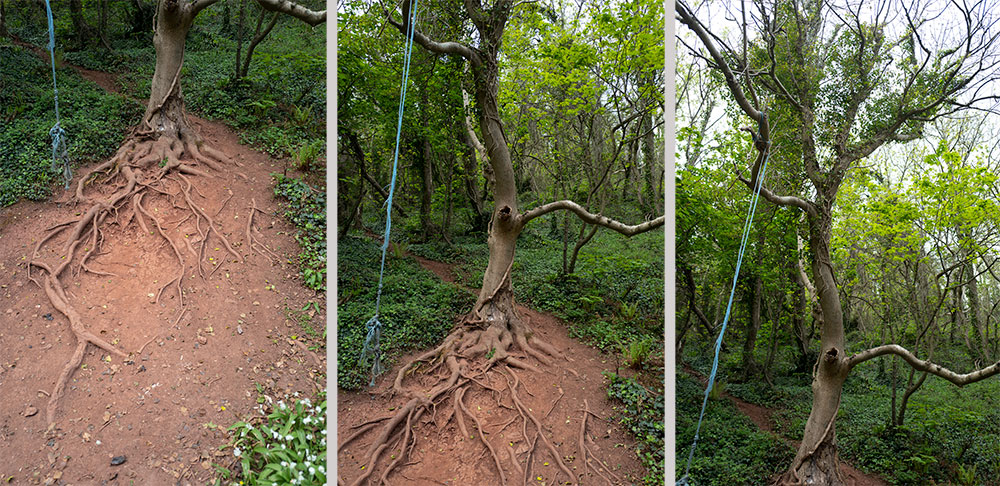
Until I have a chance to work on a particular image I can't be sure it's going to work for me. In this case, the roots were a powerful element, the line of the trunk had an appealing elegence, and the tree had a definite 'presence' - but I knew it would take a lot of work to turn these elements into a print.
I took a series of photos (above) because I couldn't get the whole tree into one picture without backing away and losing the detail I needed.
Here's the finished, two-colour, version of the print. I've also produced a single-colour (black) edition. To buy either please click here.
Keep scrolling to find out how I produced this print...
Anstey's Cove is part of the coastline that surrounds Torquay, in South Devon. I live about 25 minutes walk from this place.
To get to the Cove you walk down a steep hill that takes you through a wooded landscape where you'll pass a tree which has a swing-rope hanging from one of its branches. The tree's roots are exposed - the tree itself is dead - ivy has wound itself around its branches.
To get to the Cove you walk down a steep hill that takes you through a wooded landscape where you'll pass a tree which has a swing-rope hanging from one of its branches. The tree's roots are exposed - the tree itself is dead - ivy has wound itself around its branches.
Until I have a chance to work on a particular image I can't be sure it's going to work for me. In this case, the roots were a powerful element, the line of the trunk had an appealing elegence, and the tree had a definite 'presence' - but I knew it would take a lot of work to turn these elements into a print.
I took a series of photos (above) because I couldn't get the whole tree into one picture without backing away and losing the detail I needed.
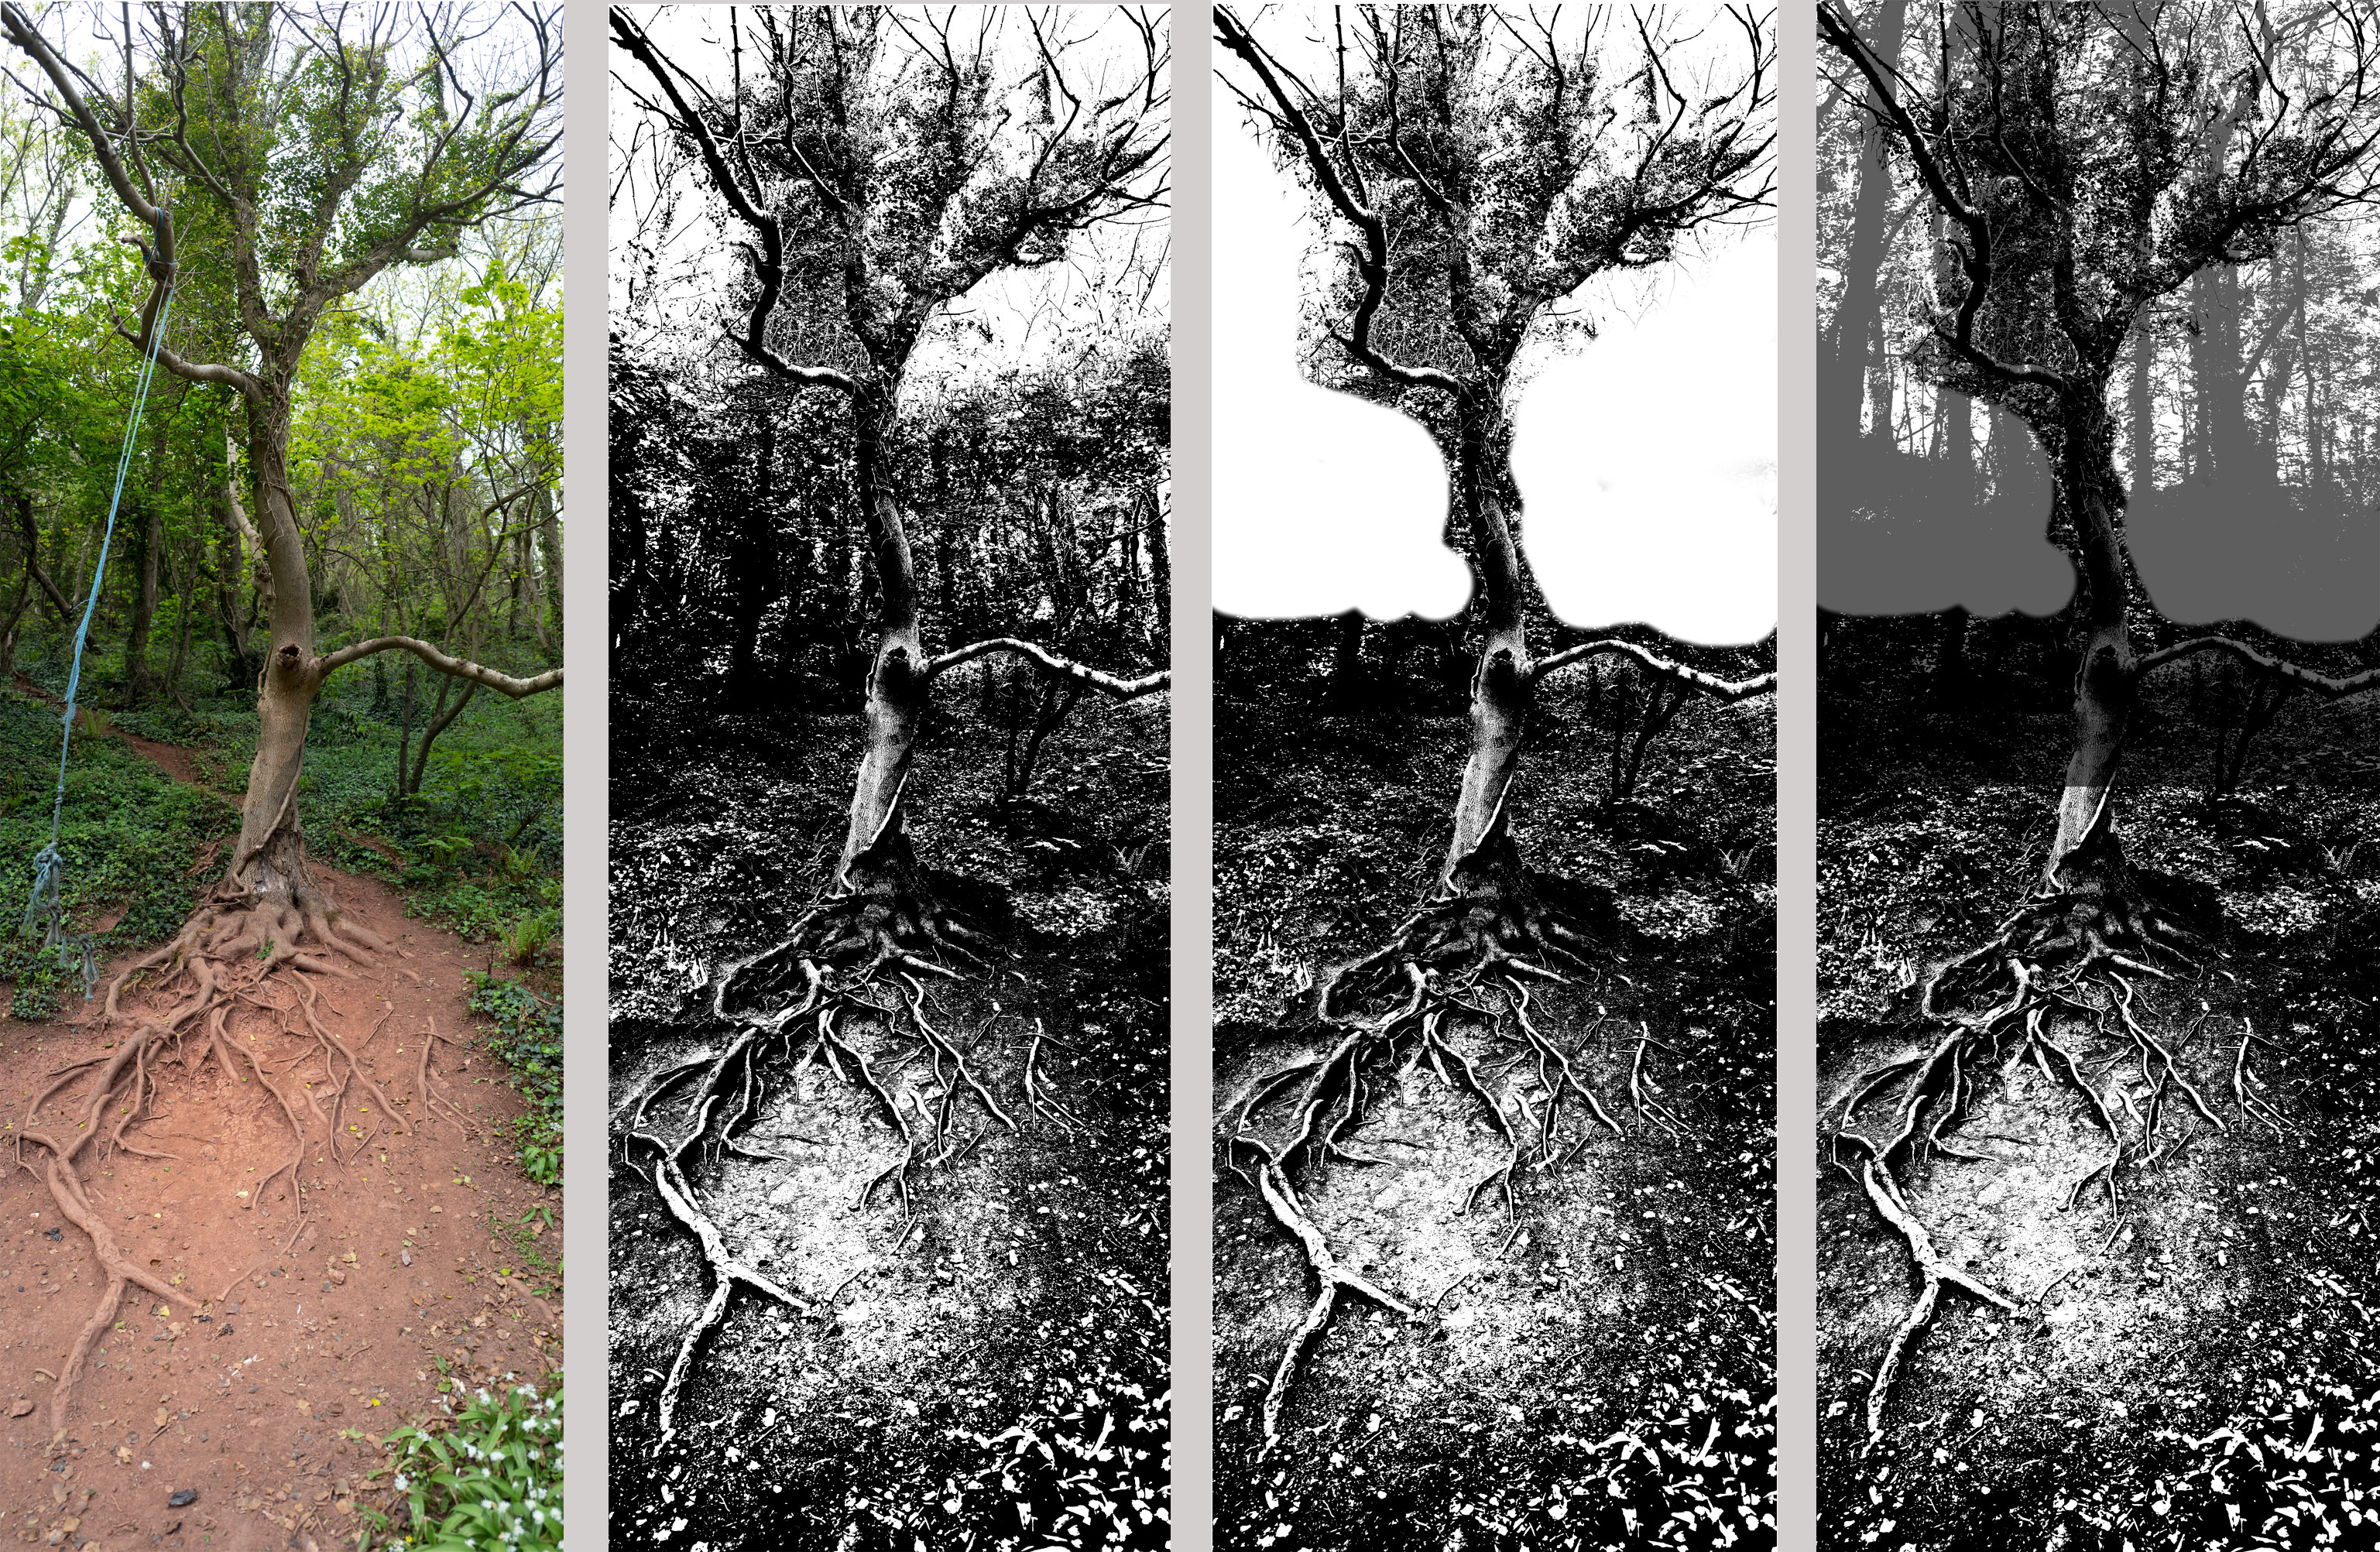
It takes hours to combine a series of photos (using Photoshop) so the joins don't show. I know there are software tools that will perform this kind of task, but I prefer to avoid any unwanted software 'edge manipulation'. The are also issues with persepective - even when you take the photos in a tight sequence, the branches in one will appear at a different angle in the next.
The picture above shows the final 'stitched image' (on the left). With that done, I convert all the colour and tone to black and white (second image). The background trees were a mess, so I'd taken another photo to replace them - so the third image shows the cut-away background, and the fourth the placing of my preferred background.
It took me about ten hours to prepare this image - there were countless additional adjustments and paste-ins along the way.
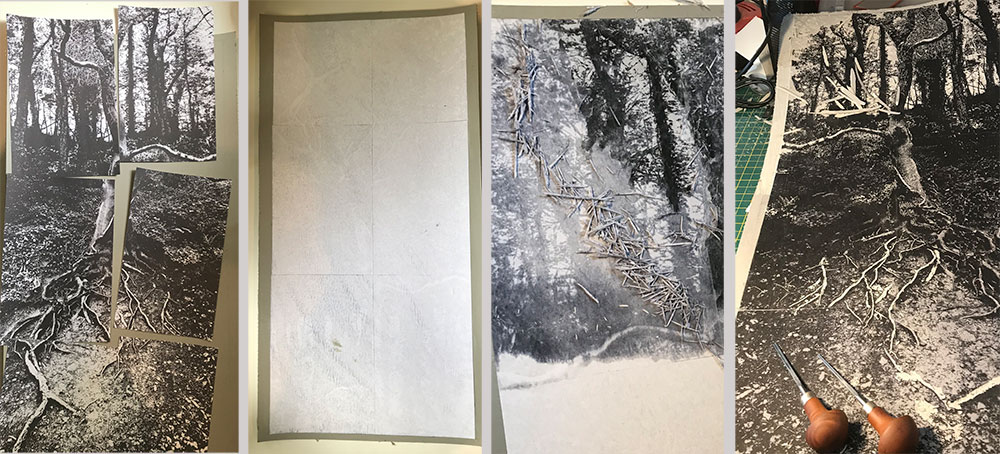
The next stage is to get the image onto the lino so I can start cutting.
To do this, I print the picture onto standard printer paper - in pieces because the printer I use for this only prints A4 (first image above). Then I coat the lino with PVA glue and carefully place each printout face-down onto the glue (second image above). After leaving it overnight to dry, I dampen the paper and, in a series of similar actions carried out over a few hours (allowing the paper to dry between each attempt), I gently rub away as much of the paper layer as possible, leaving only the ink layer on the lino. The trick is obviously to remove as much paper as possible - if you don't achieve this, then the first cut with the cutting tool will cause the remianing paper to lift the ink off the lino and you're back to stage one!
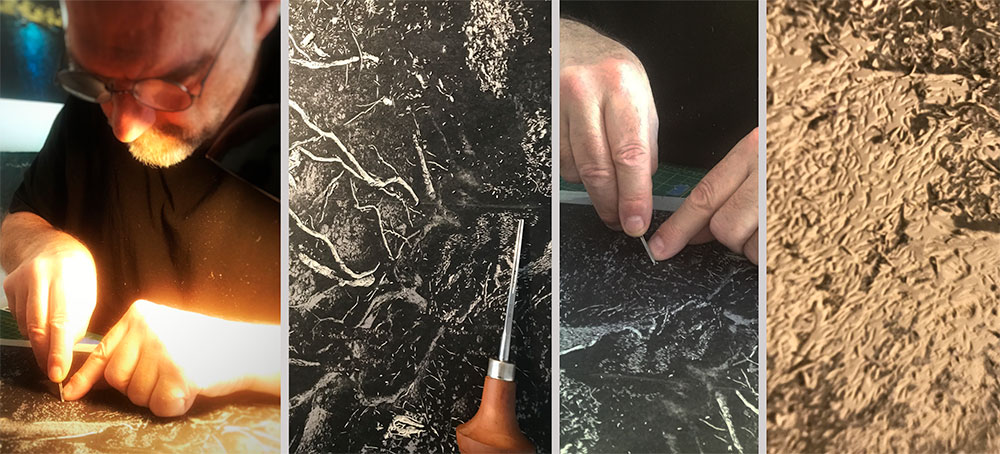
The fourth image shows the inked mask on the lino - the process of cutting has just begun.
To do this, I print the picture onto standard printer paper - in pieces because the printer I use for this only prints A4 (first image above). Then I coat the lino with PVA glue and carefully place each printout face-down onto the glue (second image above). After leaving it overnight to dry, I dampen the paper and, in a series of similar actions carried out over a few hours (allowing the paper to dry between each attempt), I gently rub away as much of the paper layer as possible, leaving only the ink layer on the lino. The trick is obviously to remove as much paper as possible - if you don't achieve this, then the first cut with the cutting tool will cause the remianing paper to lift the ink off the lino and you're back to stage one!
The fourth image shows the inked mask on the lino - the process of cutting has just begun.
It took me just over 50 hours to cut this block (for the black print layer).
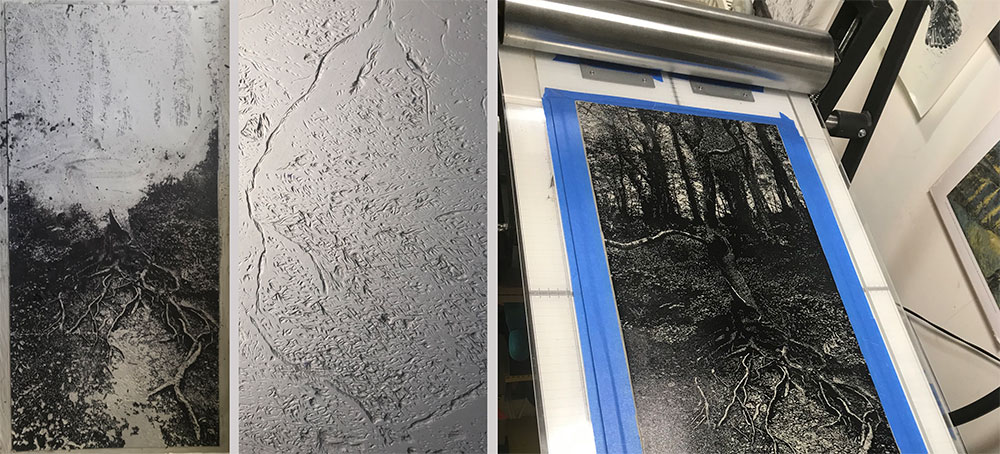
With the cutting of the block finished, I scrub away the remains of the ink mask (first image) which reveals the cutting in its temporarily pristene state (second image). The third image shows the block inked and ready to go.
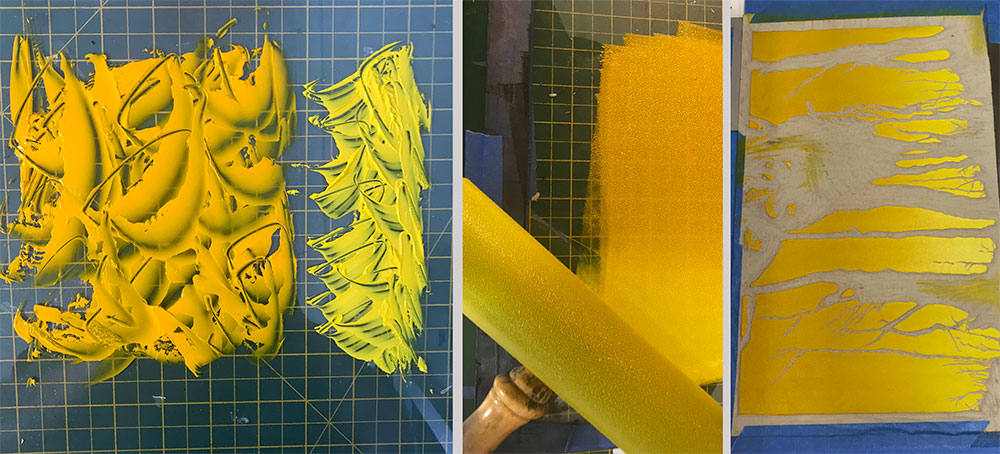
Then it's back to the cutting board(!) to prepare the block that will carry the background colour. This block only took about 6 hours to cut. The first and second images above show the preparation of the colour grade, the third shows the block inked and ready to go.
When this background colour is dry on the paper, I overprint with black using the first block.
Printing at this size (68cm x 32cm) on an etching press is tricky - the pressures are so great that registration can be a challenge - as can the habit of the paper to shift as it goes between the rollers, which can cause the image to double-print.
To print the two-colour edition took about 90 minutes per print (taking into account wastage). I stopped when I had 10 acceptable prints. The total edition will be 20 - if people like the print enough I'll finish the rest of the edition later on.
If you have any questions feel free to email me - you can also join my mailing list (the link is in the footer below).
Here's the finished print again...
Connect


My newsletter: