The ideas behind 'End of Day'
Publication date: 10 June 2022
I've produced two limited edition sets using this image - the first is an edition of 22 linoprints and the second is an edition of 4 linoprint collages (these use the print described below, plus a section of a different print I produced recentl).
This article is not about the technical process that resulted in these two works, but about the thought process that resulted in their creation.
Each of these works is currently for sale:
End of Day - a limited edition of 22 linoprints - the first half of the edition is available for £100 (plus postage and packing if it is purchased from outside UK) - the second half of the edition will be £250 per print (with no charges for postage) - click here
In the Morning - a limited edition of 4 linoprint collages - the first half of the edition is available for £100 (plus postage and packing if it is purchased from outside UK) - the second half of the edition will be £250 per print (with no charges for postage) - click here
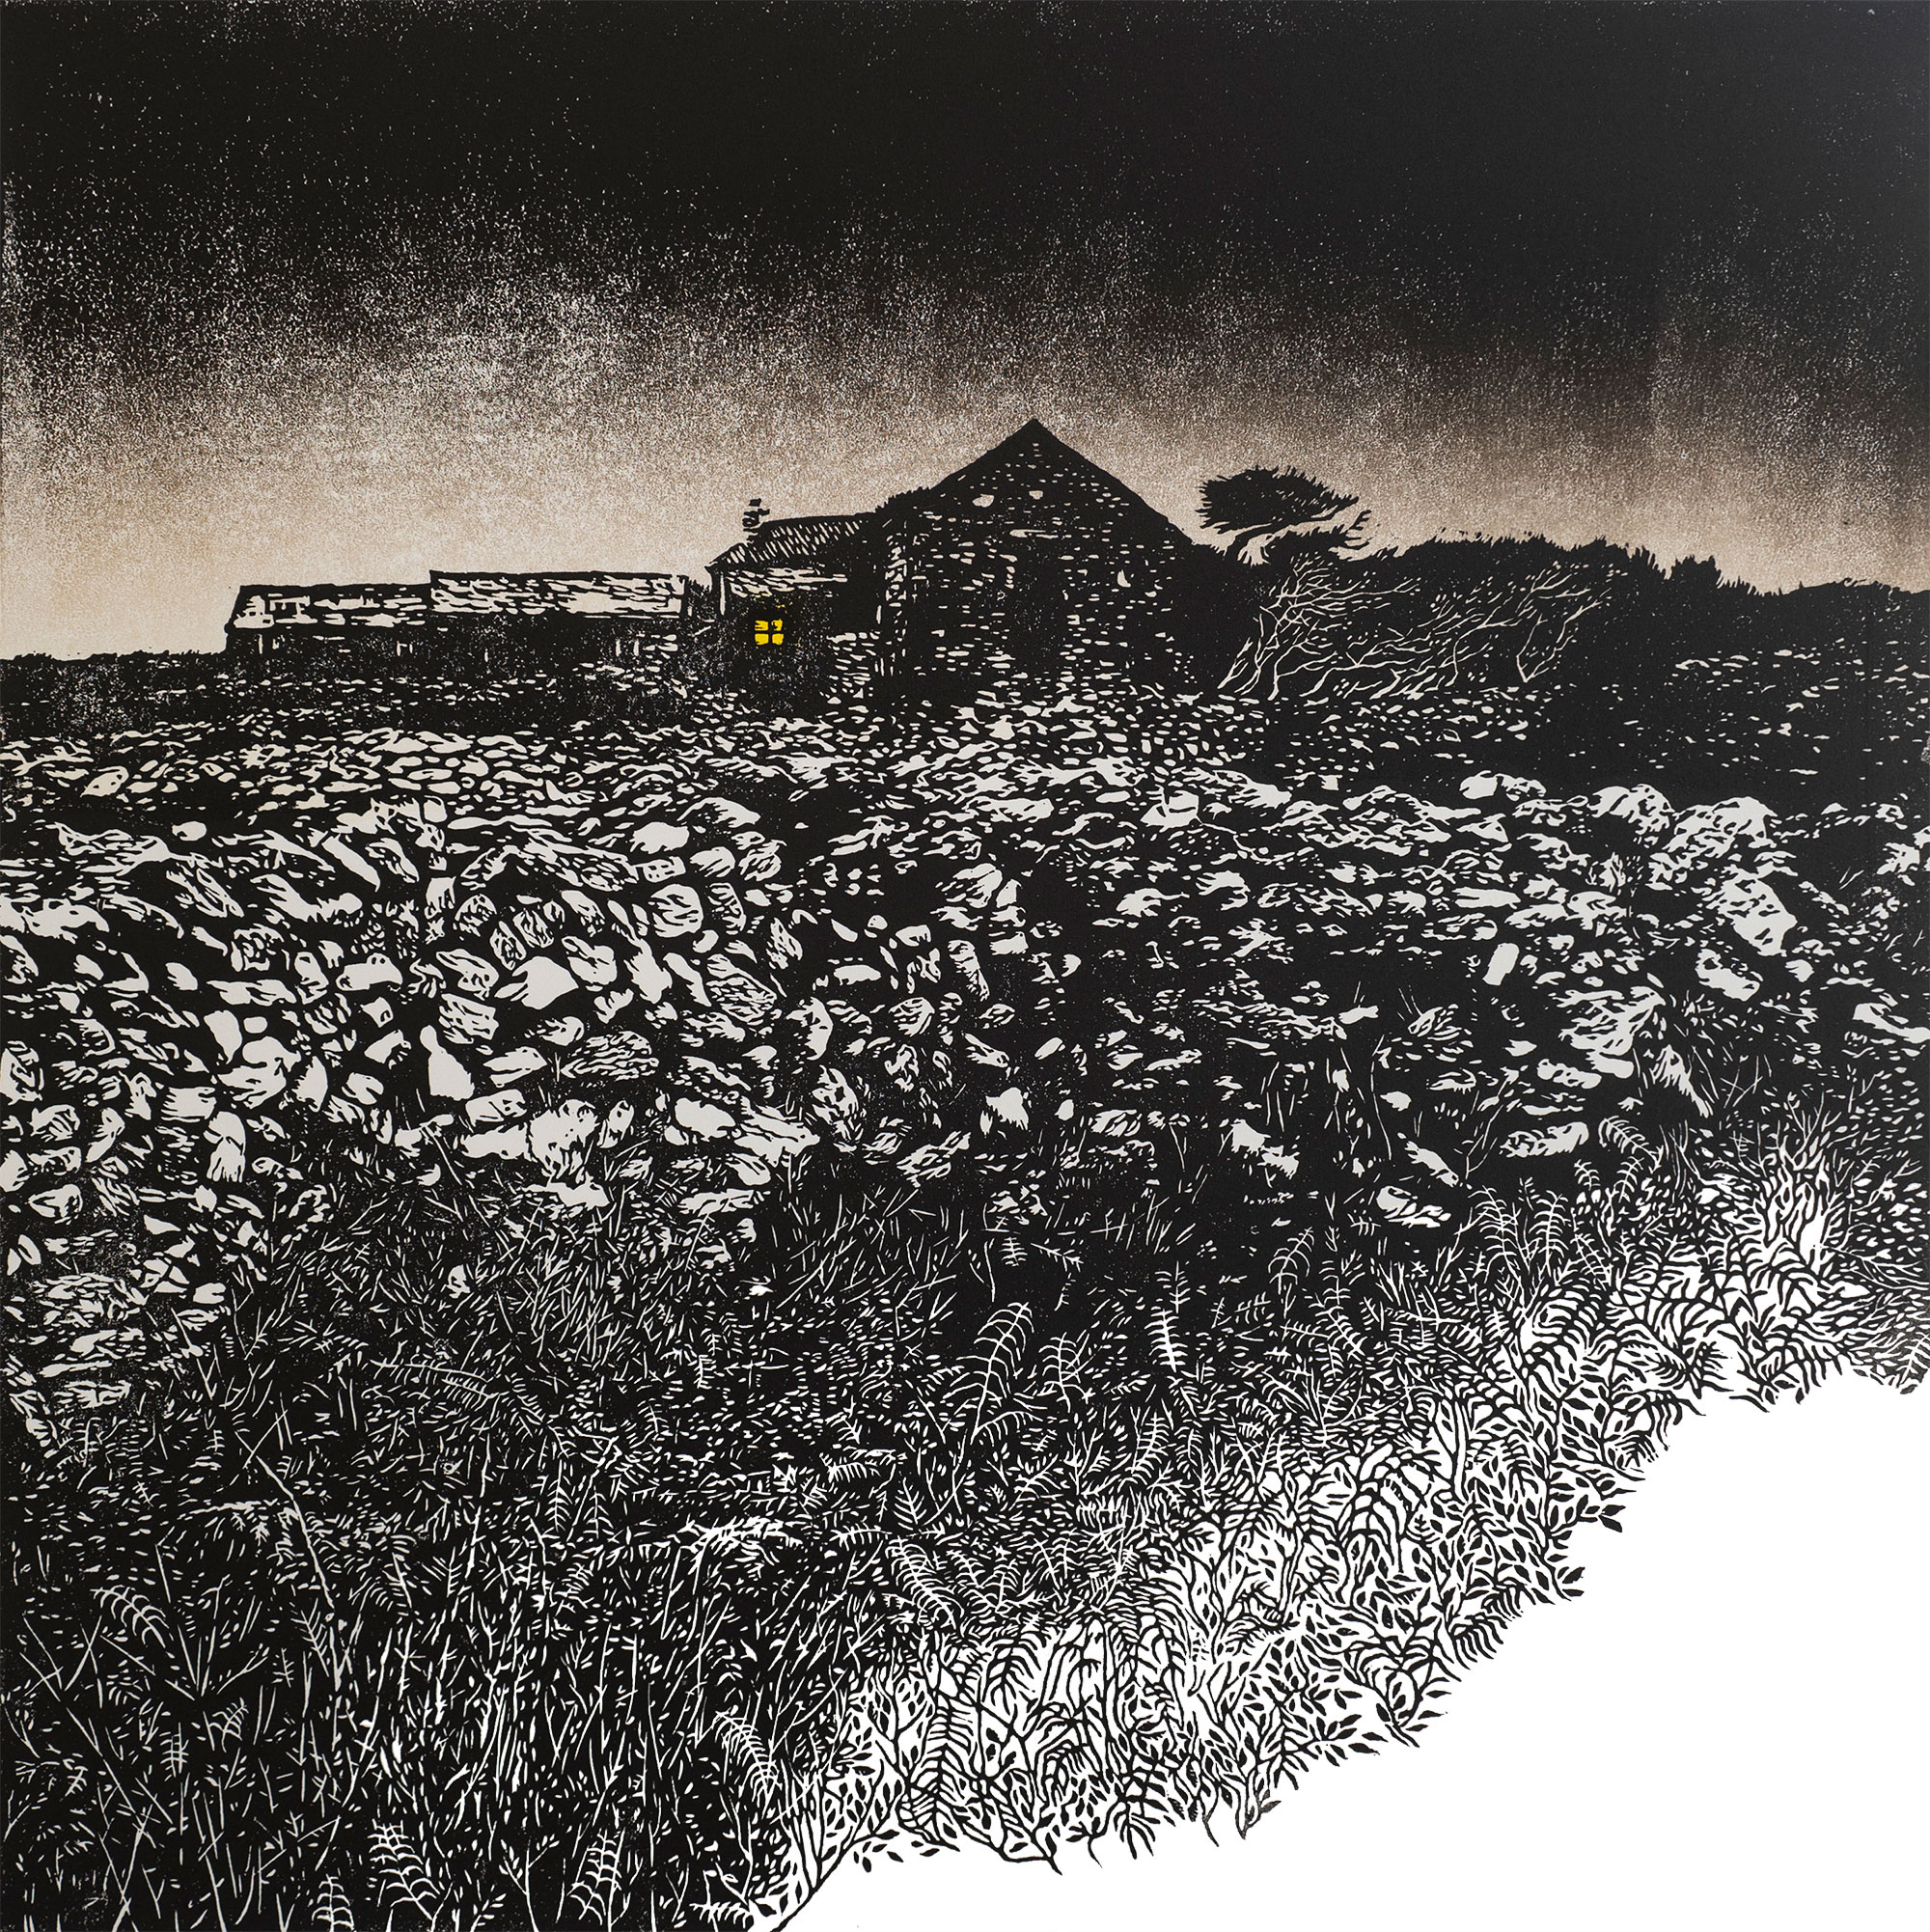
Here are the two finished artworks:

About this scene:
You can click on the photo to see it in more detail.
The photo depicts a small group of buildings in Penwith, in the far West of Cornwall, that have been variously modernised and adapted (there are a lot of properties in this area that are used as holiday lets or second homes). There are telephone poles, a parked car, bits of building work carried out to make the properties more saleable or rentable, and there are power lines, modern guttering and even a growth of pampas grass sprouting from a garden.
In the midground are rows of stone walls. While there are signs of modern repair, these are part of a connected network of walls that date from the Bronze Age, and they're reported to be the oldest in-use archeological artifacts on the planet (yes, you read that right!).
In the foregound there's bracken growing out of the ancient field soil.
Creative step 1:
My interest in this scene was driven by what it reveals about its past, rather than what it says about it's recent state. I wanted to uncover the look of the place as it might have been before the buildings, which lwere probably once a farmstead, were modernised.
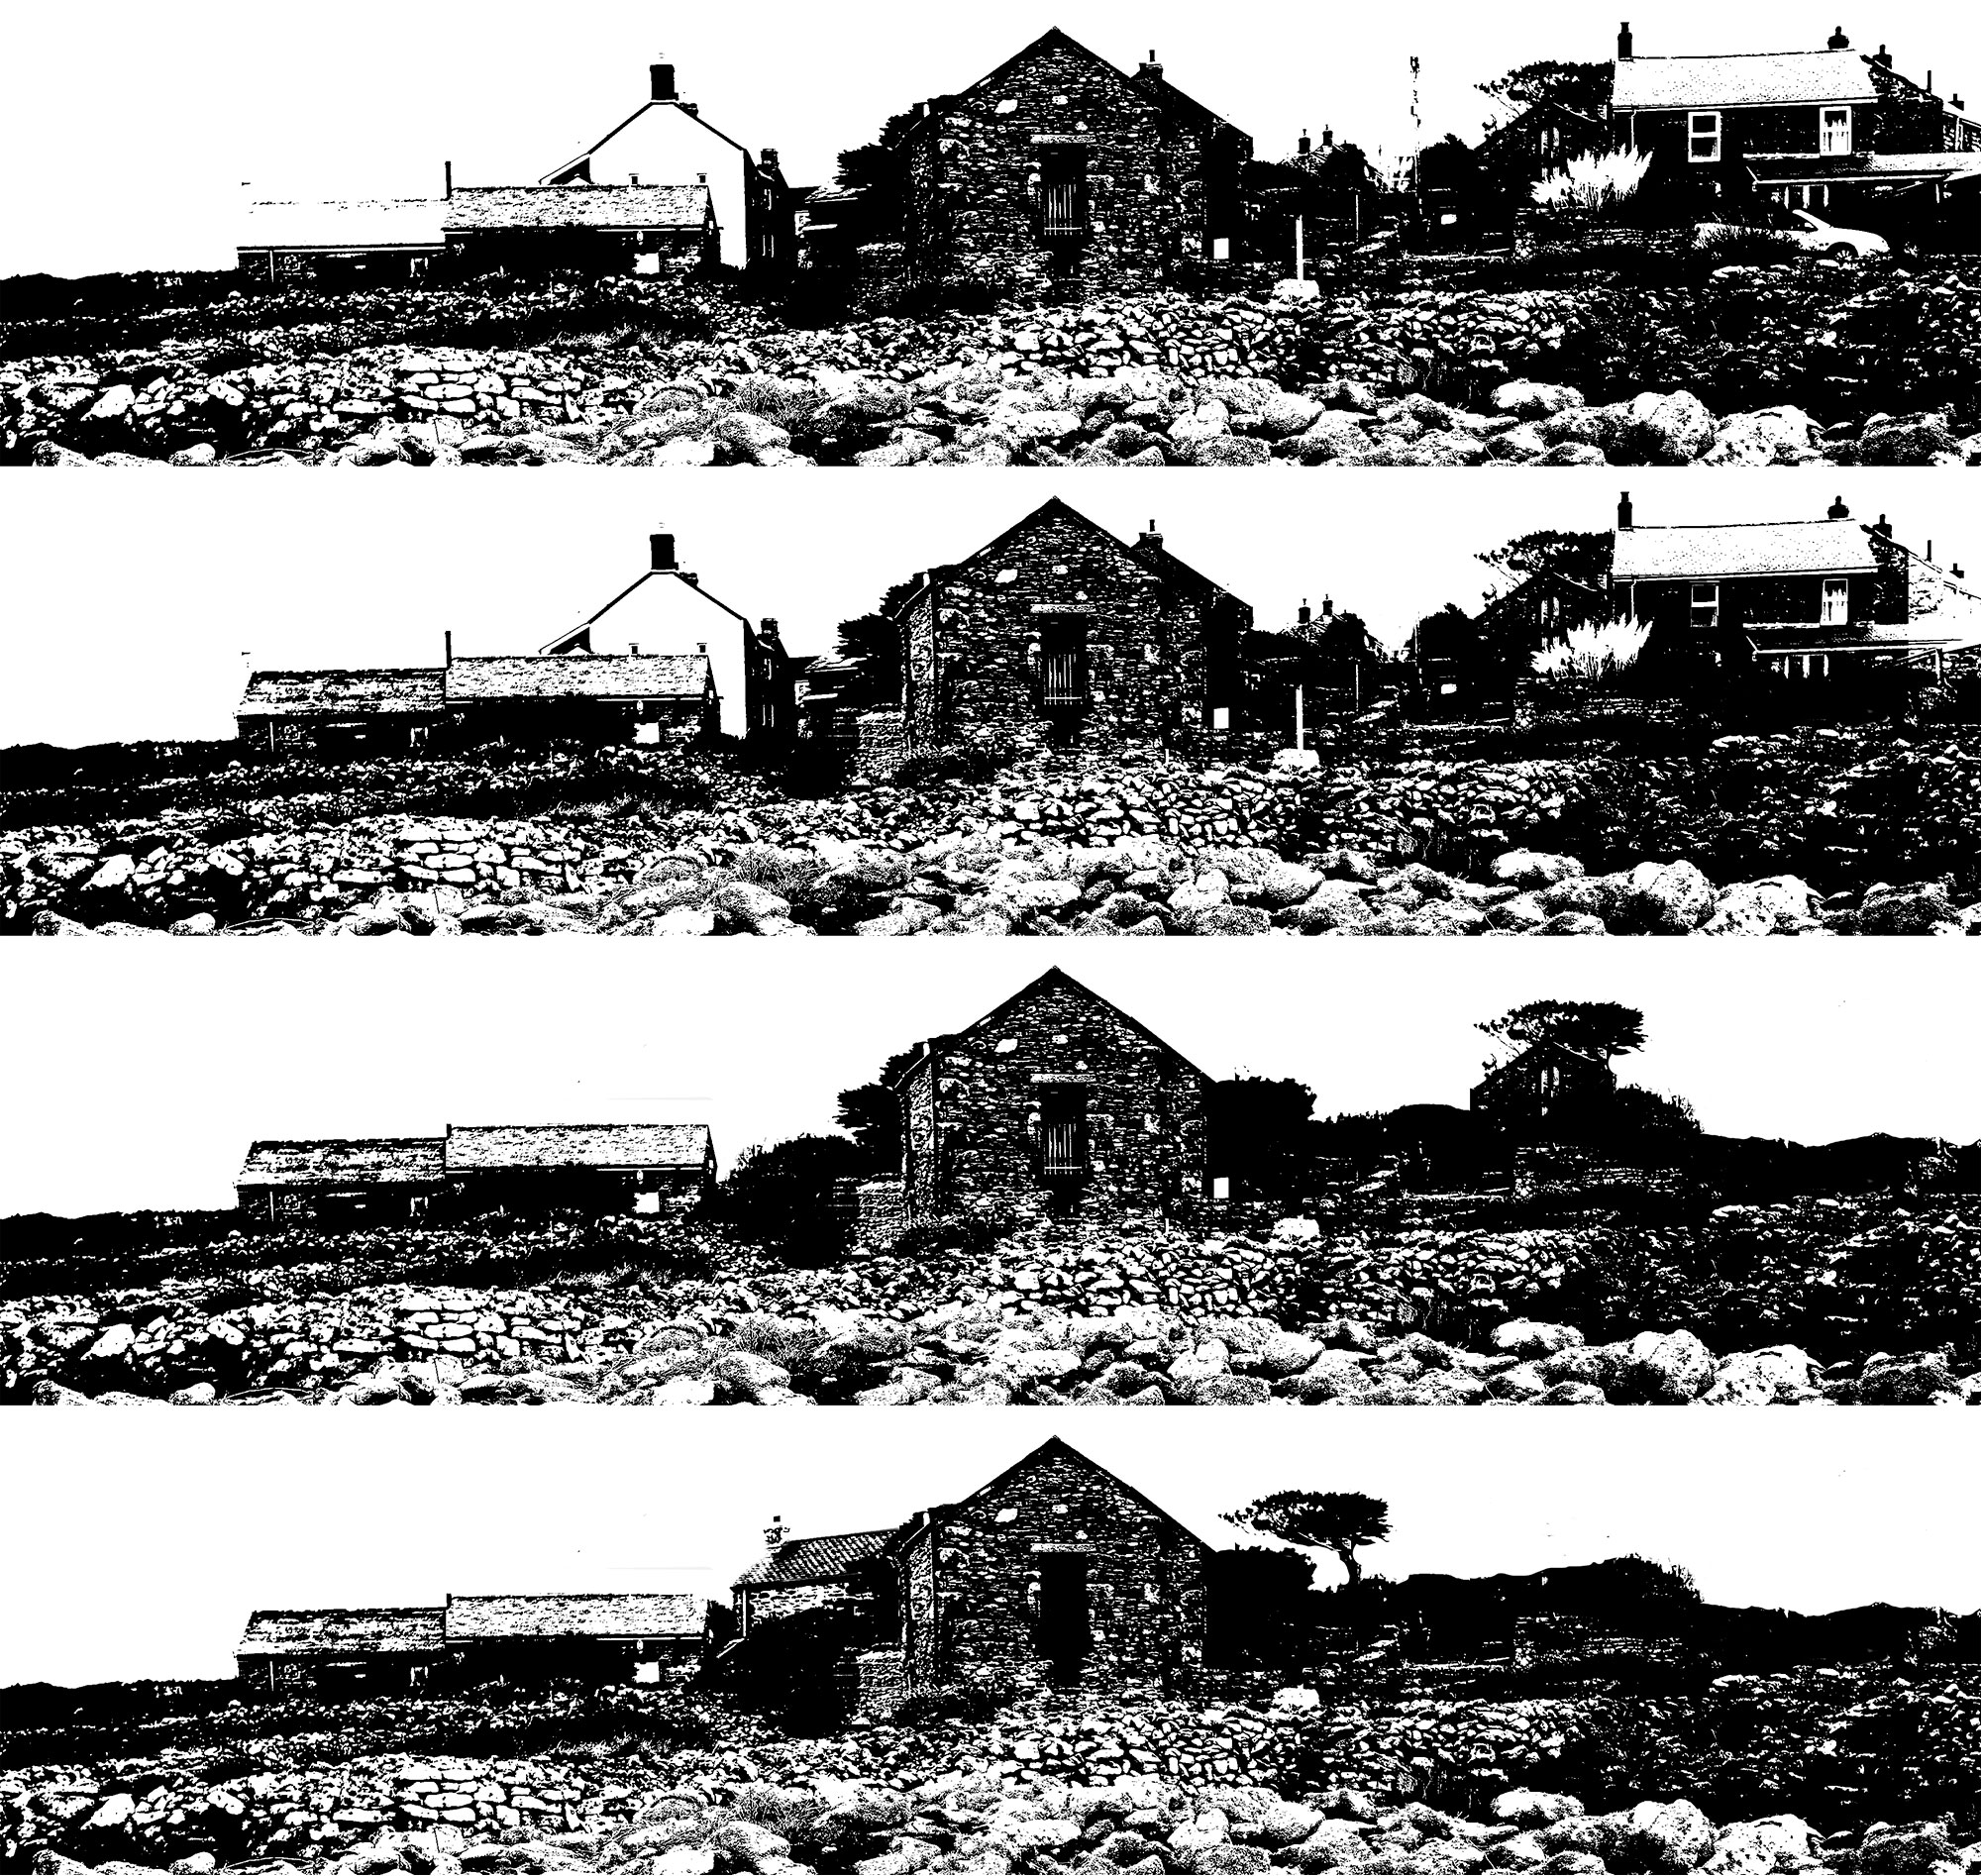
So I worked on removing all signs of modern times. Then I used a little artistic license to move the building from the far right of the photo to place it just behind the building that looks like a barn.
I wasn't trying to make changes that would result in an historically accurate representation of this particular group of buildings, but, rather, I wanted to make an image that gave a sense of how this kind of settlement may once have looked prior to its 'repurposing'.
The following sequence of images shows how I changed the layout of the buildings and trees to achieve what I felt was a more representative scene:


I've produced two limited edition sets using this image - the first is an edition of 22 linoprints and the second is an edition of 4 linoprint collages (these use the print described below, plus a section of a different print I produced recentl).
This article is not about the technical process that resulted in these two works, but about the thought process that resulted in their creation.
Each of these works is currently for sale:
End of Day - a limited edition of 22 linoprints - the first half of the edition is available for £100 (plus postage and packing if it is purchased from outside UK) - the second half of the edition will be £250 per print (with no charges for postage) - click here
In the Morning - a limited edition of 4 linoprint collages - the first half of the edition is available for £100 (plus postage and packing if it is purchased from outside UK) - the second half of the edition will be £250 per print (with no charges for postage) - click here
Here are the two finished artworks:
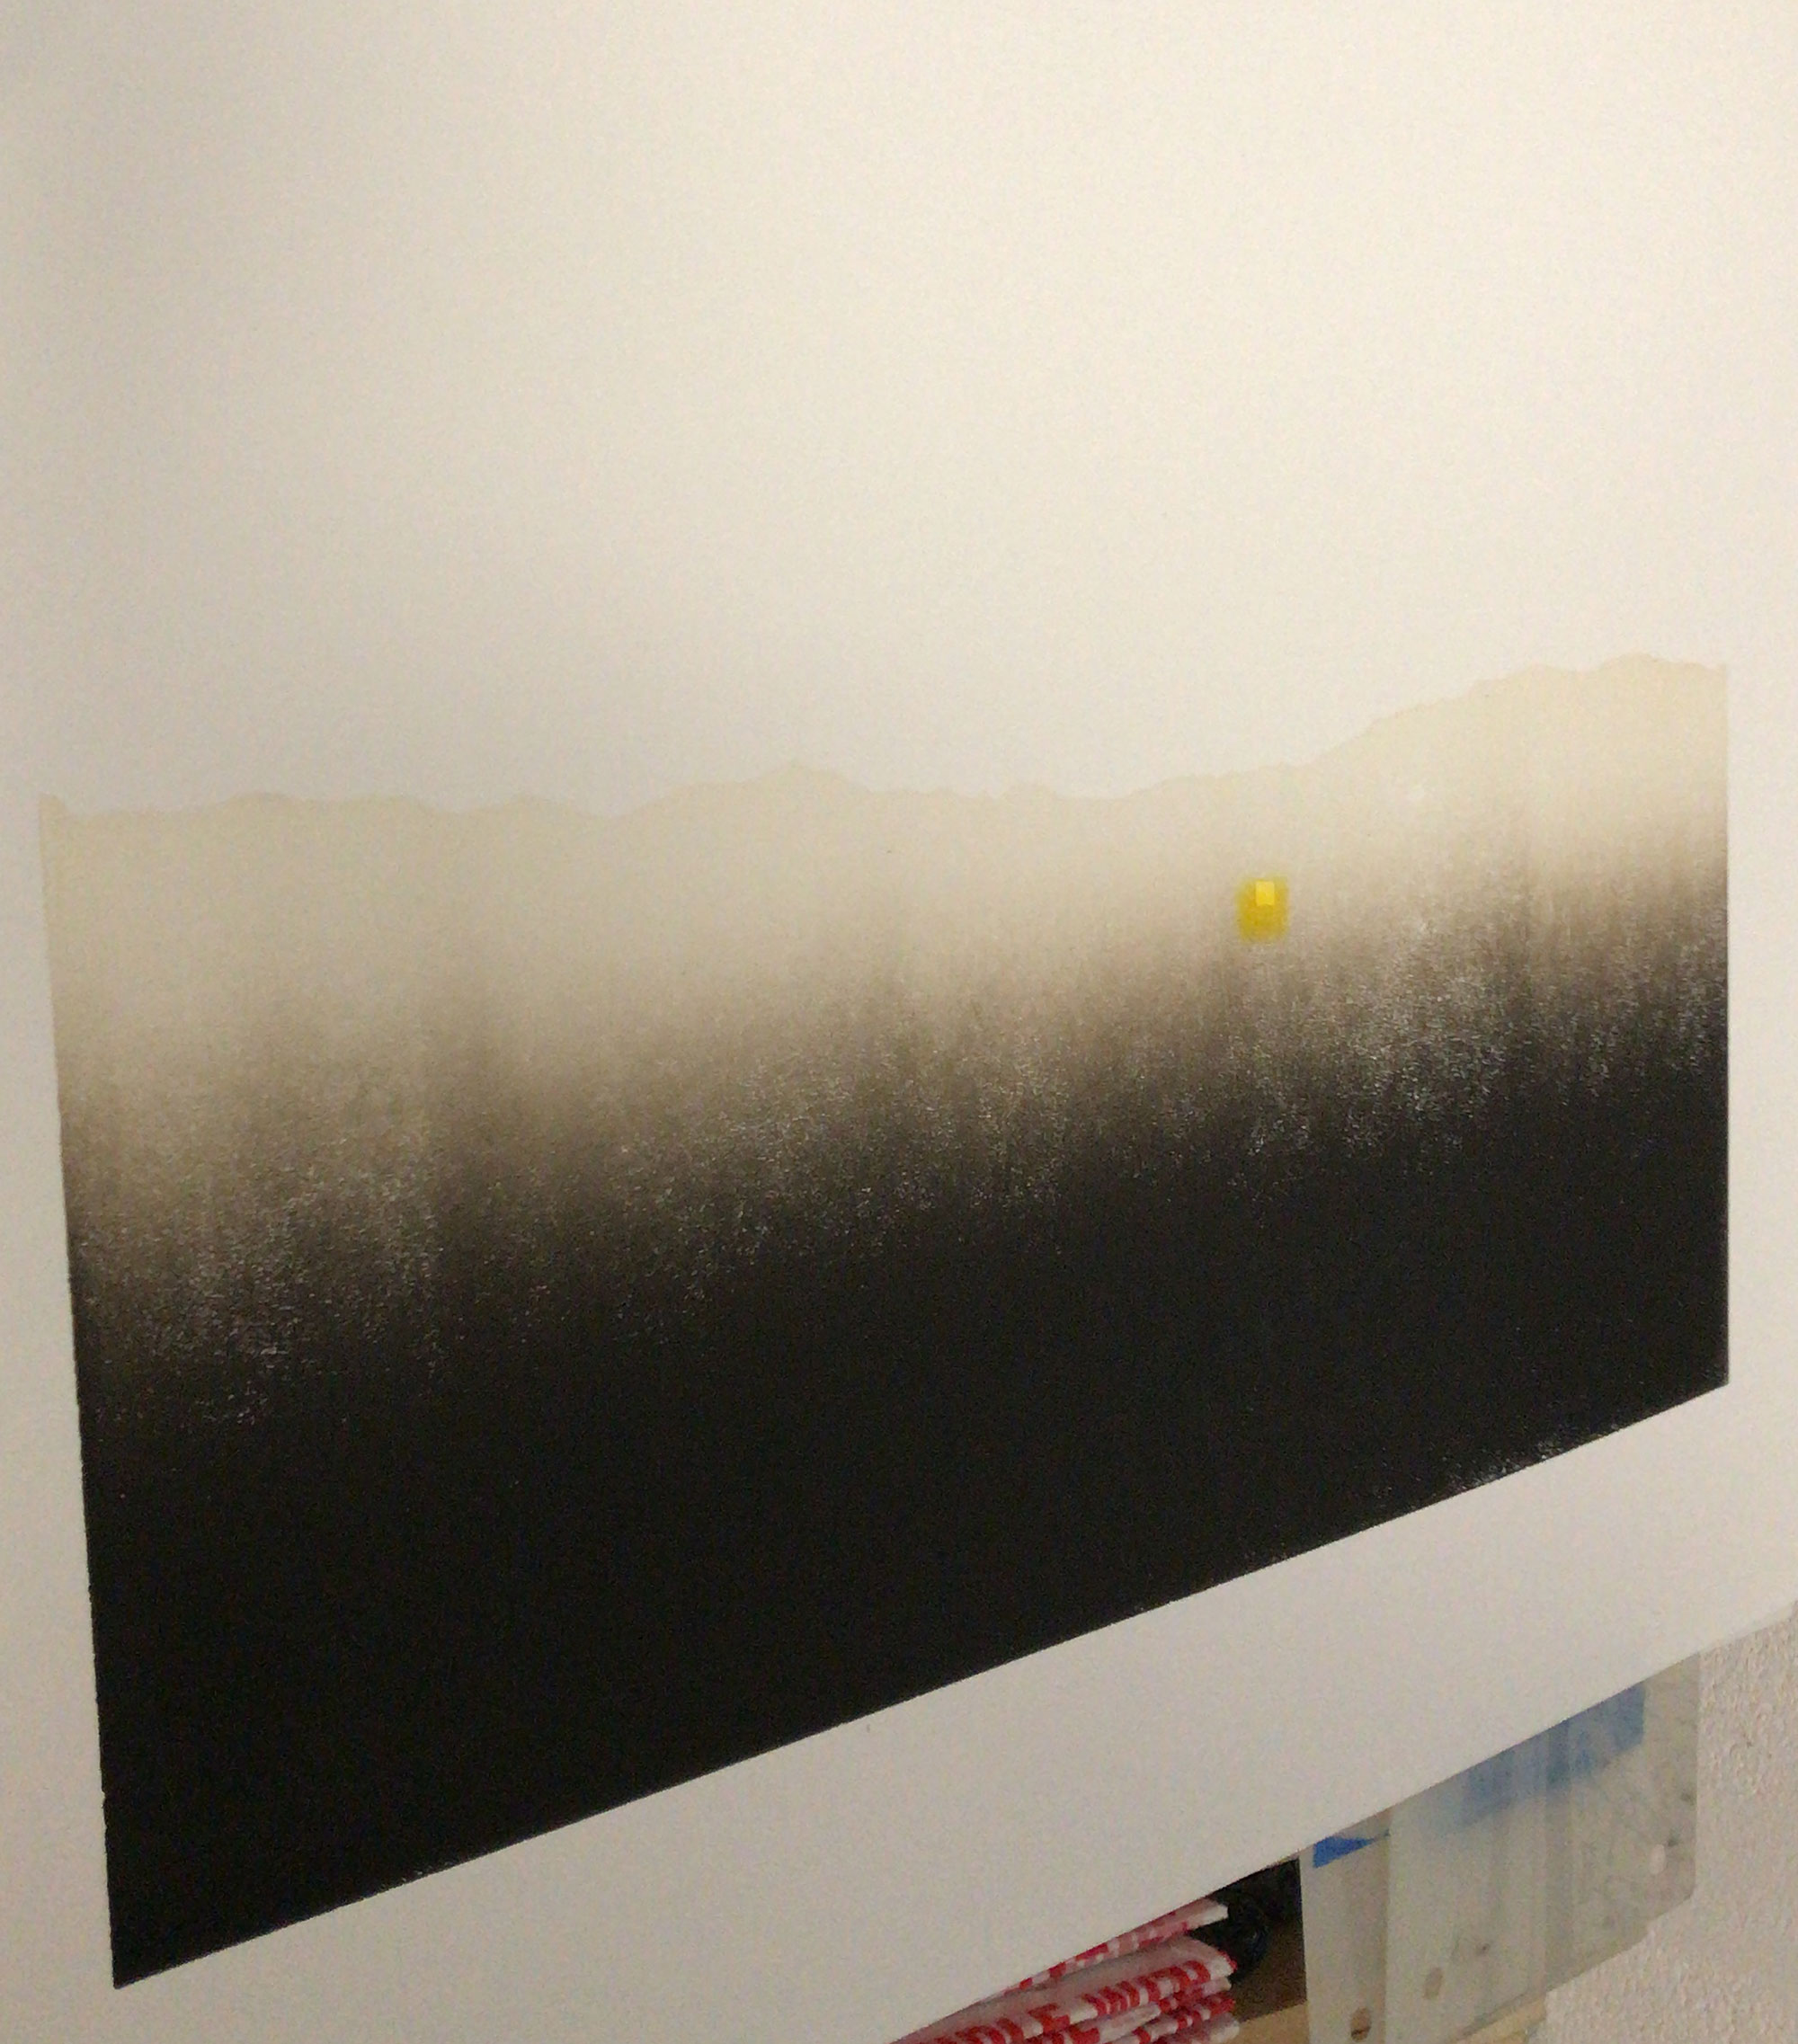
Above: End of Day
Above: In the Morning
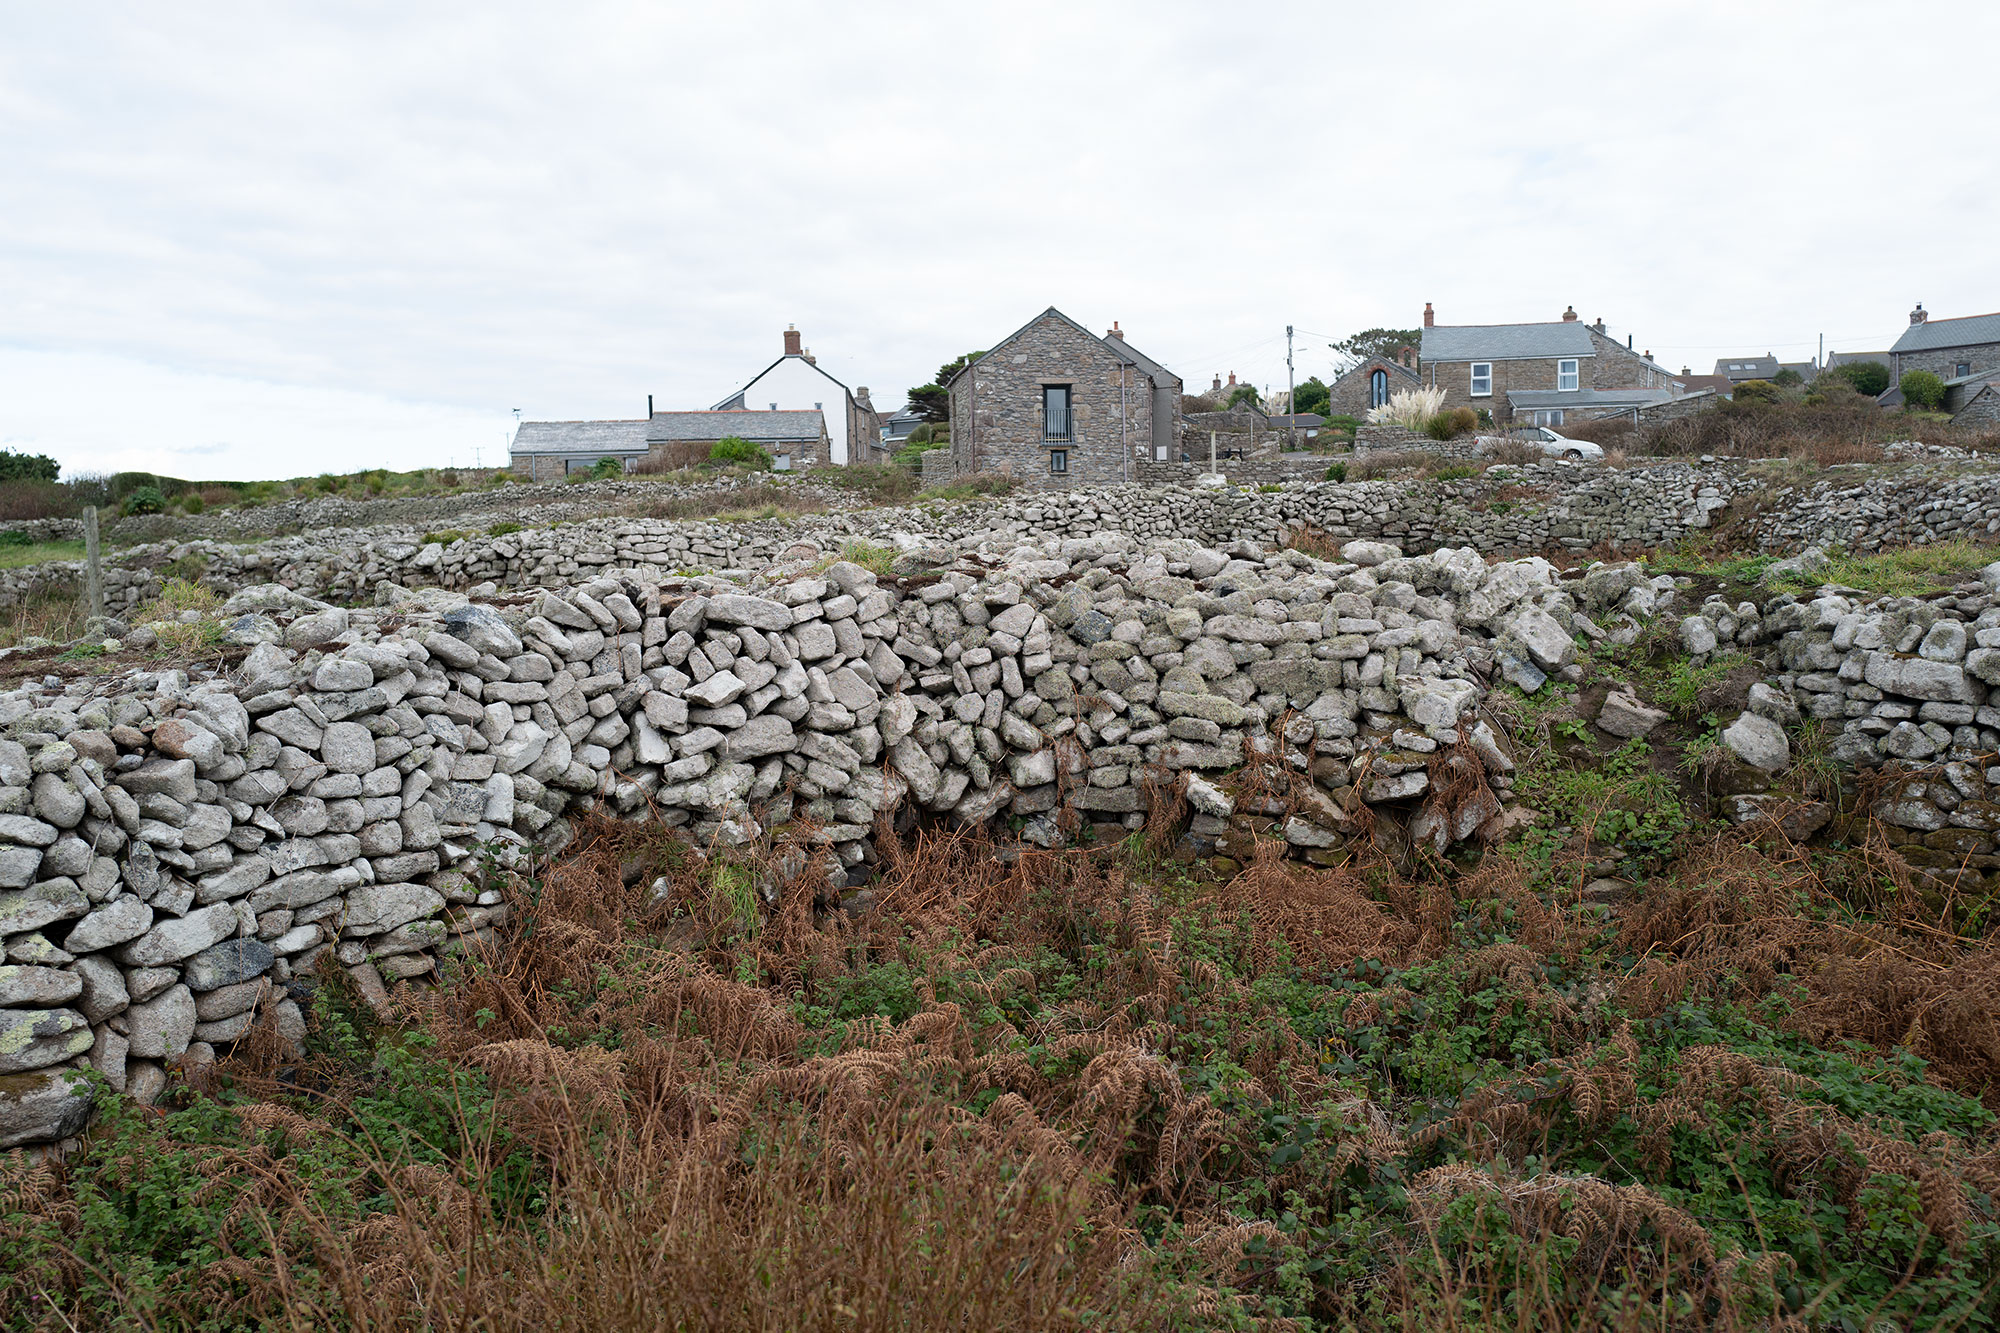
And here is my original photograph:
And here is my original photograph:
About this scene:
You can click on the photo to see it in more detail.
The photo depicts a small group of buildings in Penwith, in the far West of Cornwall, that have been variously modernised and adapted (there are a lot of properties in this area that are used as holiday lets or second homes). There are telephone poles, a parked car, bits of building work carried out to make the properties more saleable or rentable, and there are power lines, modern guttering and even a growth of pampas grass sprouting from a garden.
In the midground are rows of stone walls. While there are signs of modern repair, these are part of a connected network of walls that date from the Bronze Age, and they're reported to be the oldest in-use archeological artifacts on the planet (yes, you read that right!).
In the foregound there's bracken growing out of the ancient field soil.
Creative step 1:
My interest in this scene was driven by what it reveals about its past, rather than what it says about it's recent state. I wanted to uncover the look of the place as it might have been before the buildings, which lwere probably once a farmstead, were modernised.
So I worked on removing all signs of modern times. Then I used a little artistic license to move the building from the far right of the photo to place it just behind the building that looks like a barn.
I wasn't trying to make changes that would result in an historically accurate representation of this particular group of buildings, but, rather, I wanted to make an image that gave a sense of how this kind of settlement may once have looked prior to its 'repurposing'.
The following sequence of images shows how I changed the layout of the buildings and trees to achieve what I felt was a more representative scene:
Creative step 2:
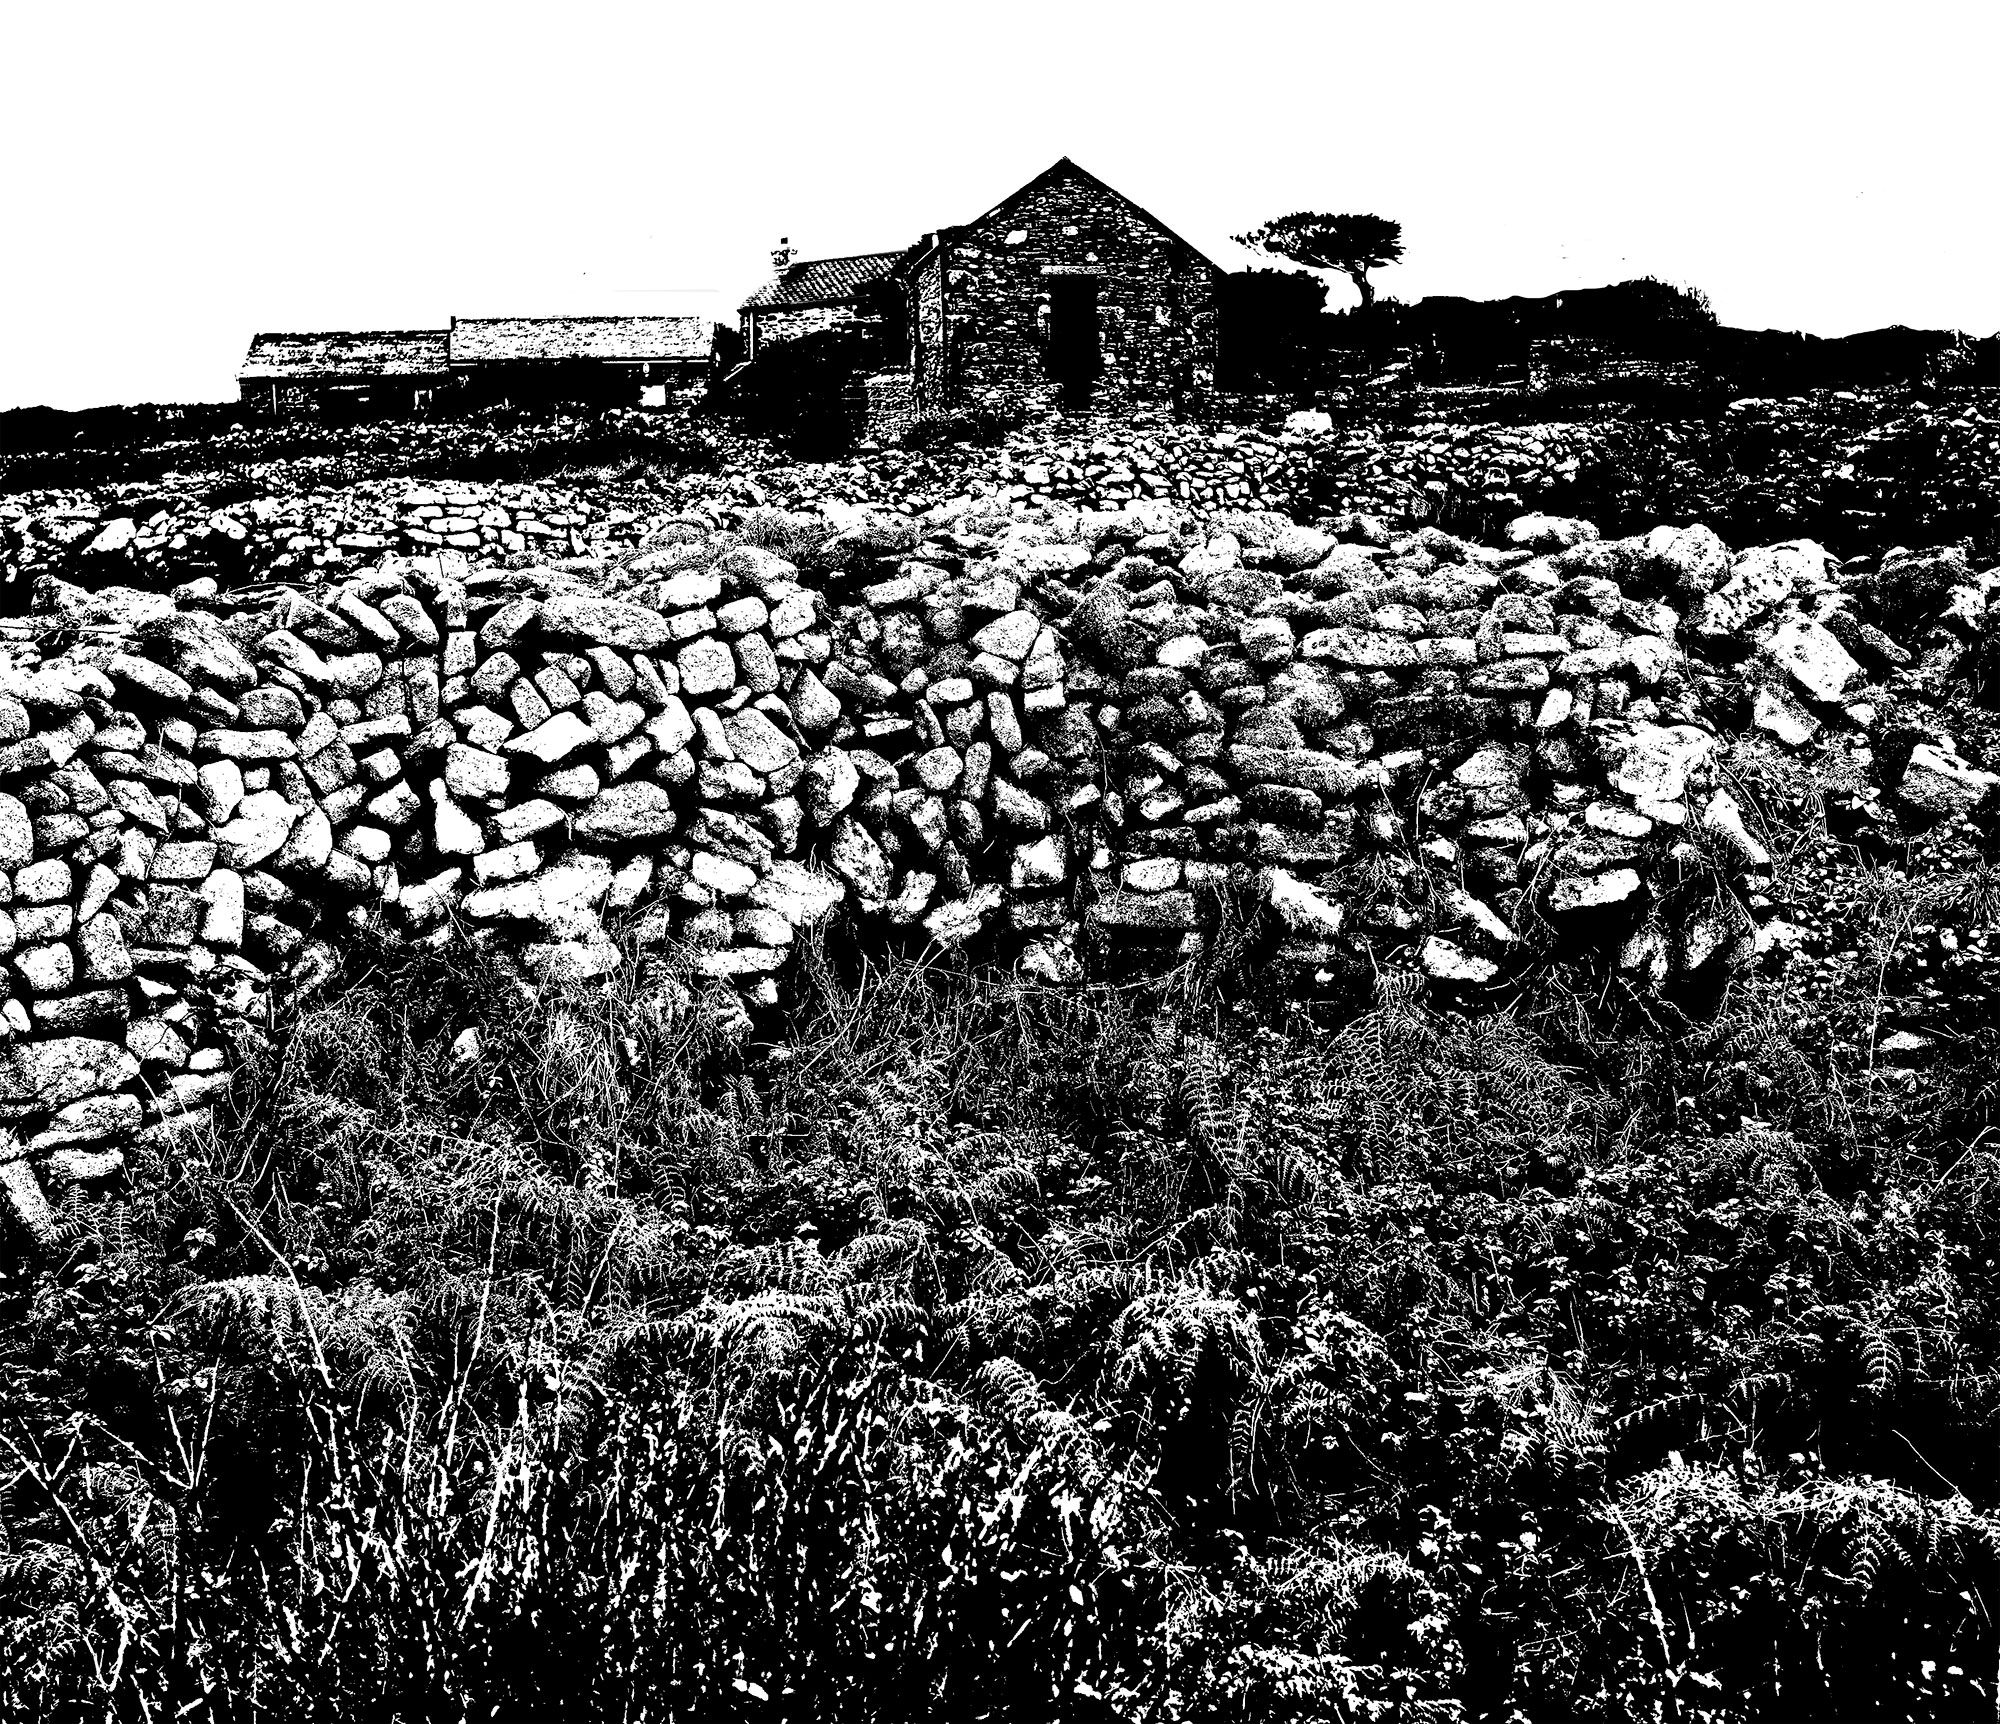
My plan was to cut this image pretty much as you see it here:
My plan was to cut this image pretty much as you see it here:
I started the cutting from the bottom left-hand corner (let's agree to ignore that fact that I was actually cutting with the image reversed!). As I progressed up towards the lower part of the wall I got a stong sense of a diagonal running from the bottom left to the top right corner of the image - accentuated by the tree I'd placed to the right of the barn (to further emphasise this flow, I flipped that little tree horizontally, as can be seen if you compare the above images with the final 'End of Day' print.
I wanted to further accentuate that diagonal, so I decided to cut away the undergrowth content in the bottom right of the image.
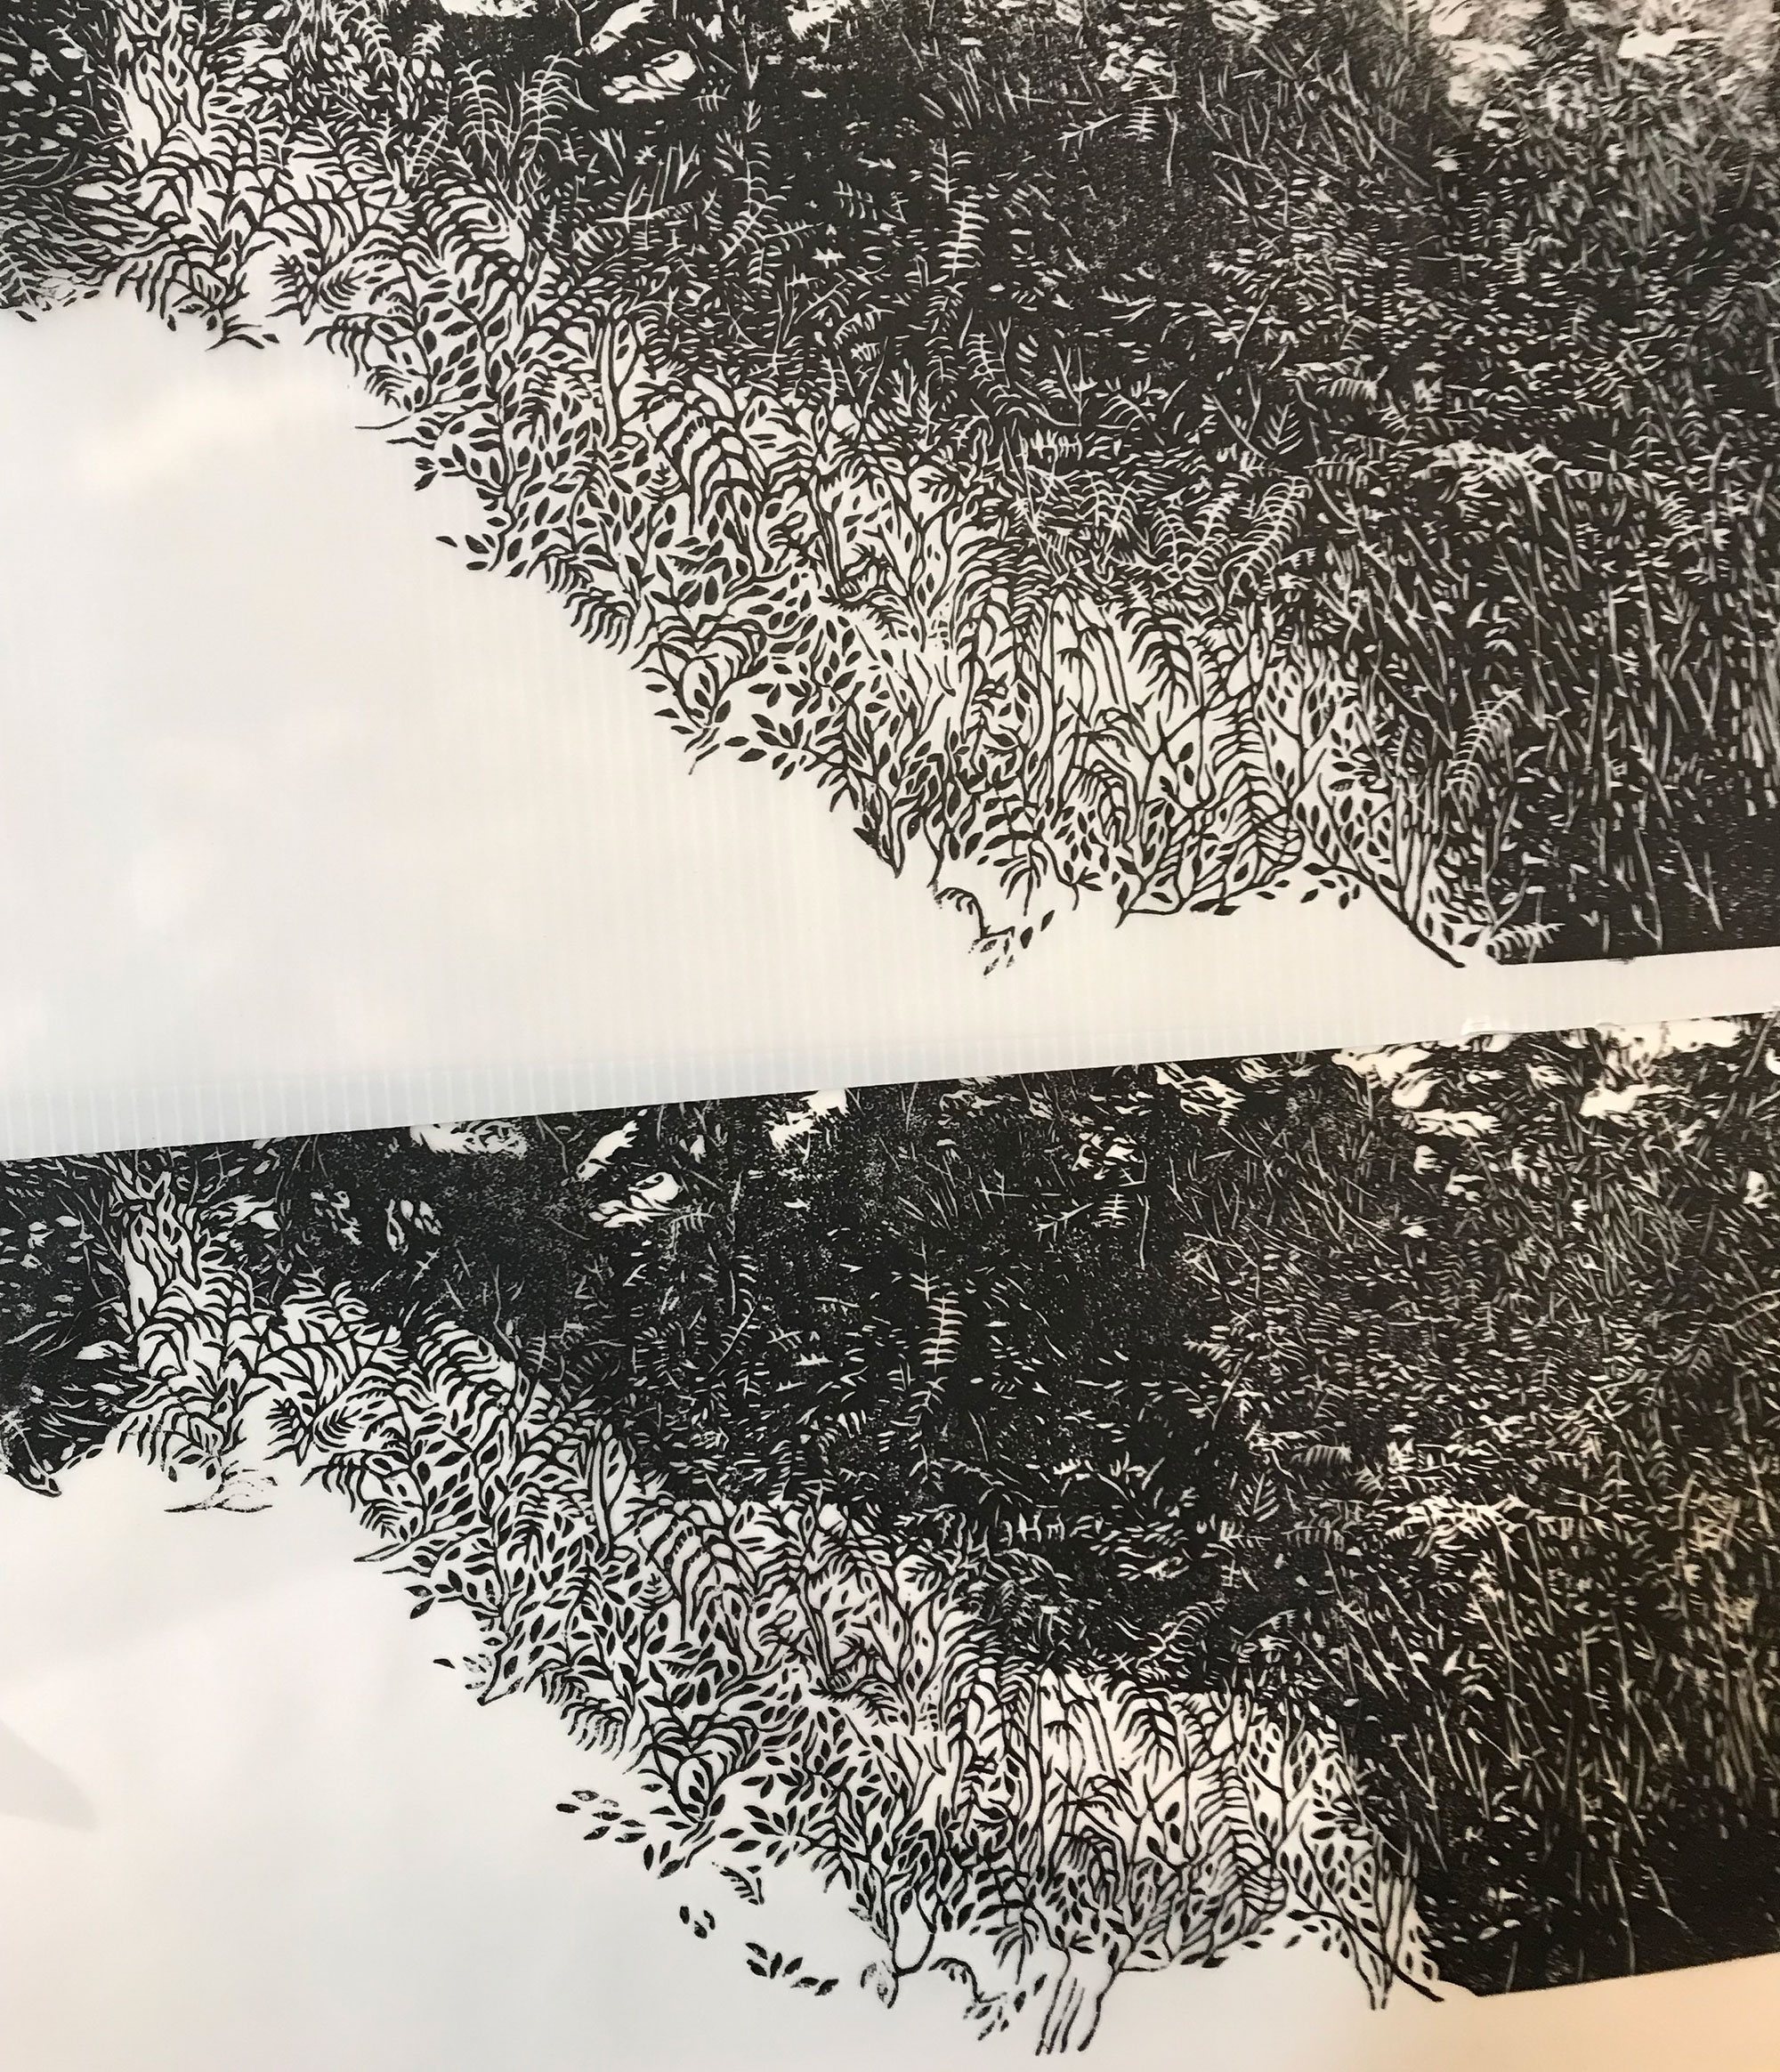
This created a problem - how to remove the foliage without leaving a hard edge-line. I realised that the only way to achieve this would be to have the remaining undergrowth 'overlapping' into the white space I planned to create.
And this led to a second problem - the undergrowth I wanted to retain was white on black - so to create an acceptable edge, I needed to transition the plants so they became black on white. Tricky.
I drew my black-on-white plants onto the lino, then I took a very long time to cut their shapes, merging them into the white-on-black plants so as to avoid an ugly diagonal line.
I have to admit that it took me about 40 hours before I ended up with this:
I wanted to further accentuate that diagonal, so I decided to cut away the undergrowth content in the bottom right of the image.
This created a problem - how to remove the foliage without leaving a hard edge-line. I realised that the only way to achieve this would be to have the remaining undergrowth 'overlapping' into the white space I planned to create.
And this led to a second problem - the undergrowth I wanted to retain was white on black - so to create an acceptable edge, I needed to transition the plants so they became black on white. Tricky.
I drew my black-on-white plants onto the lino, then I took a very long time to cut their shapes, merging them into the white-on-black plants so as to avoid an ugly diagonal line.
I have to admit that it took me about 40 hours before I ended up with this:
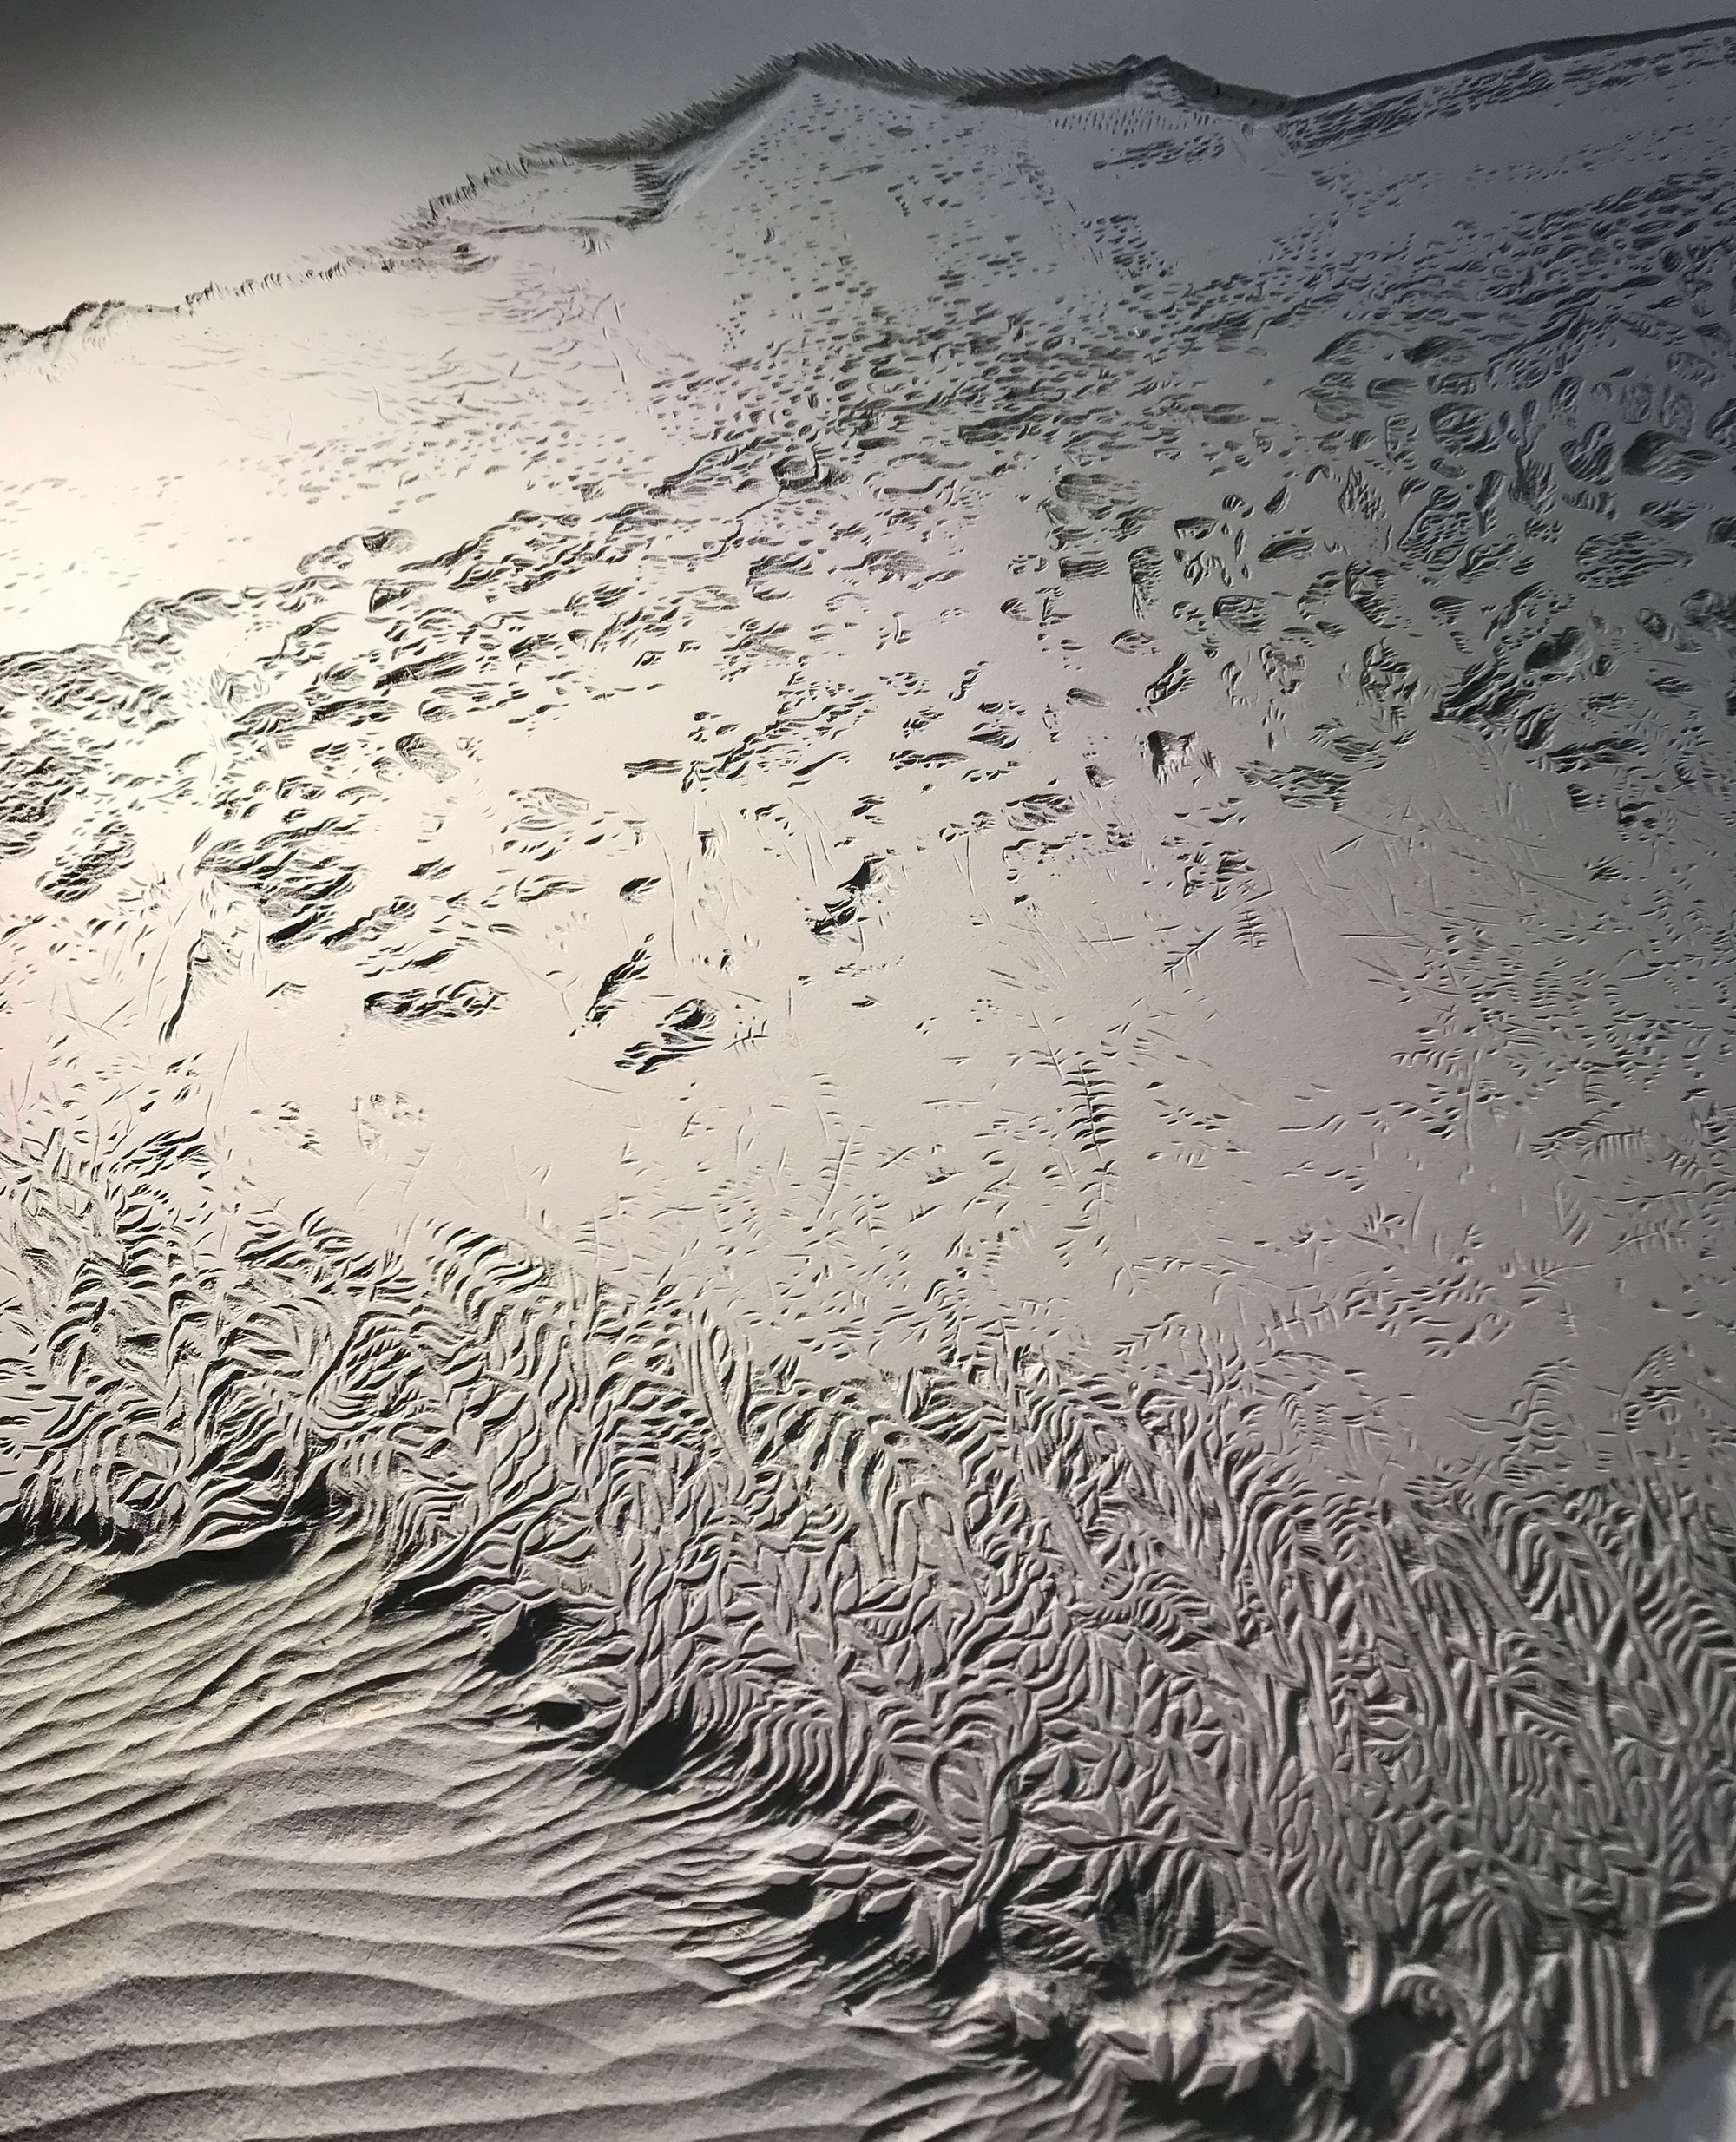
One reason why this took so long was because I wanted to match the weight of the black-on-white plants with their white-on-black counterparts. That's difficult to do, because you can always cut quite a fine white line - it's basically a single stroke of the gouge, but a black line requires that you cut away the lino on each side of the line you want to print - and as you get close to making the line thin enough, you run the risk of slicing through it, or the lino bends away from the cutting tip of the gouge, making it difficult to remove any more lino.
Above: The block towards the end of cutting
Below: Two stages towards getting the foliage transition to work (the earlier version is at the bottom if this photo - you can see the hard edge-line that I was trying to avoid)
Below: Two stages towards getting the foliage transition to work (the earlier version is at the bottom if this photo - you can see the hard edge-line that I was trying to avoid)
Creative step 3:
I added white tree branches to place some texture/pattern over the bushes to the right of the farmhouse to further accentuate the diagonal.
Creative step 4:
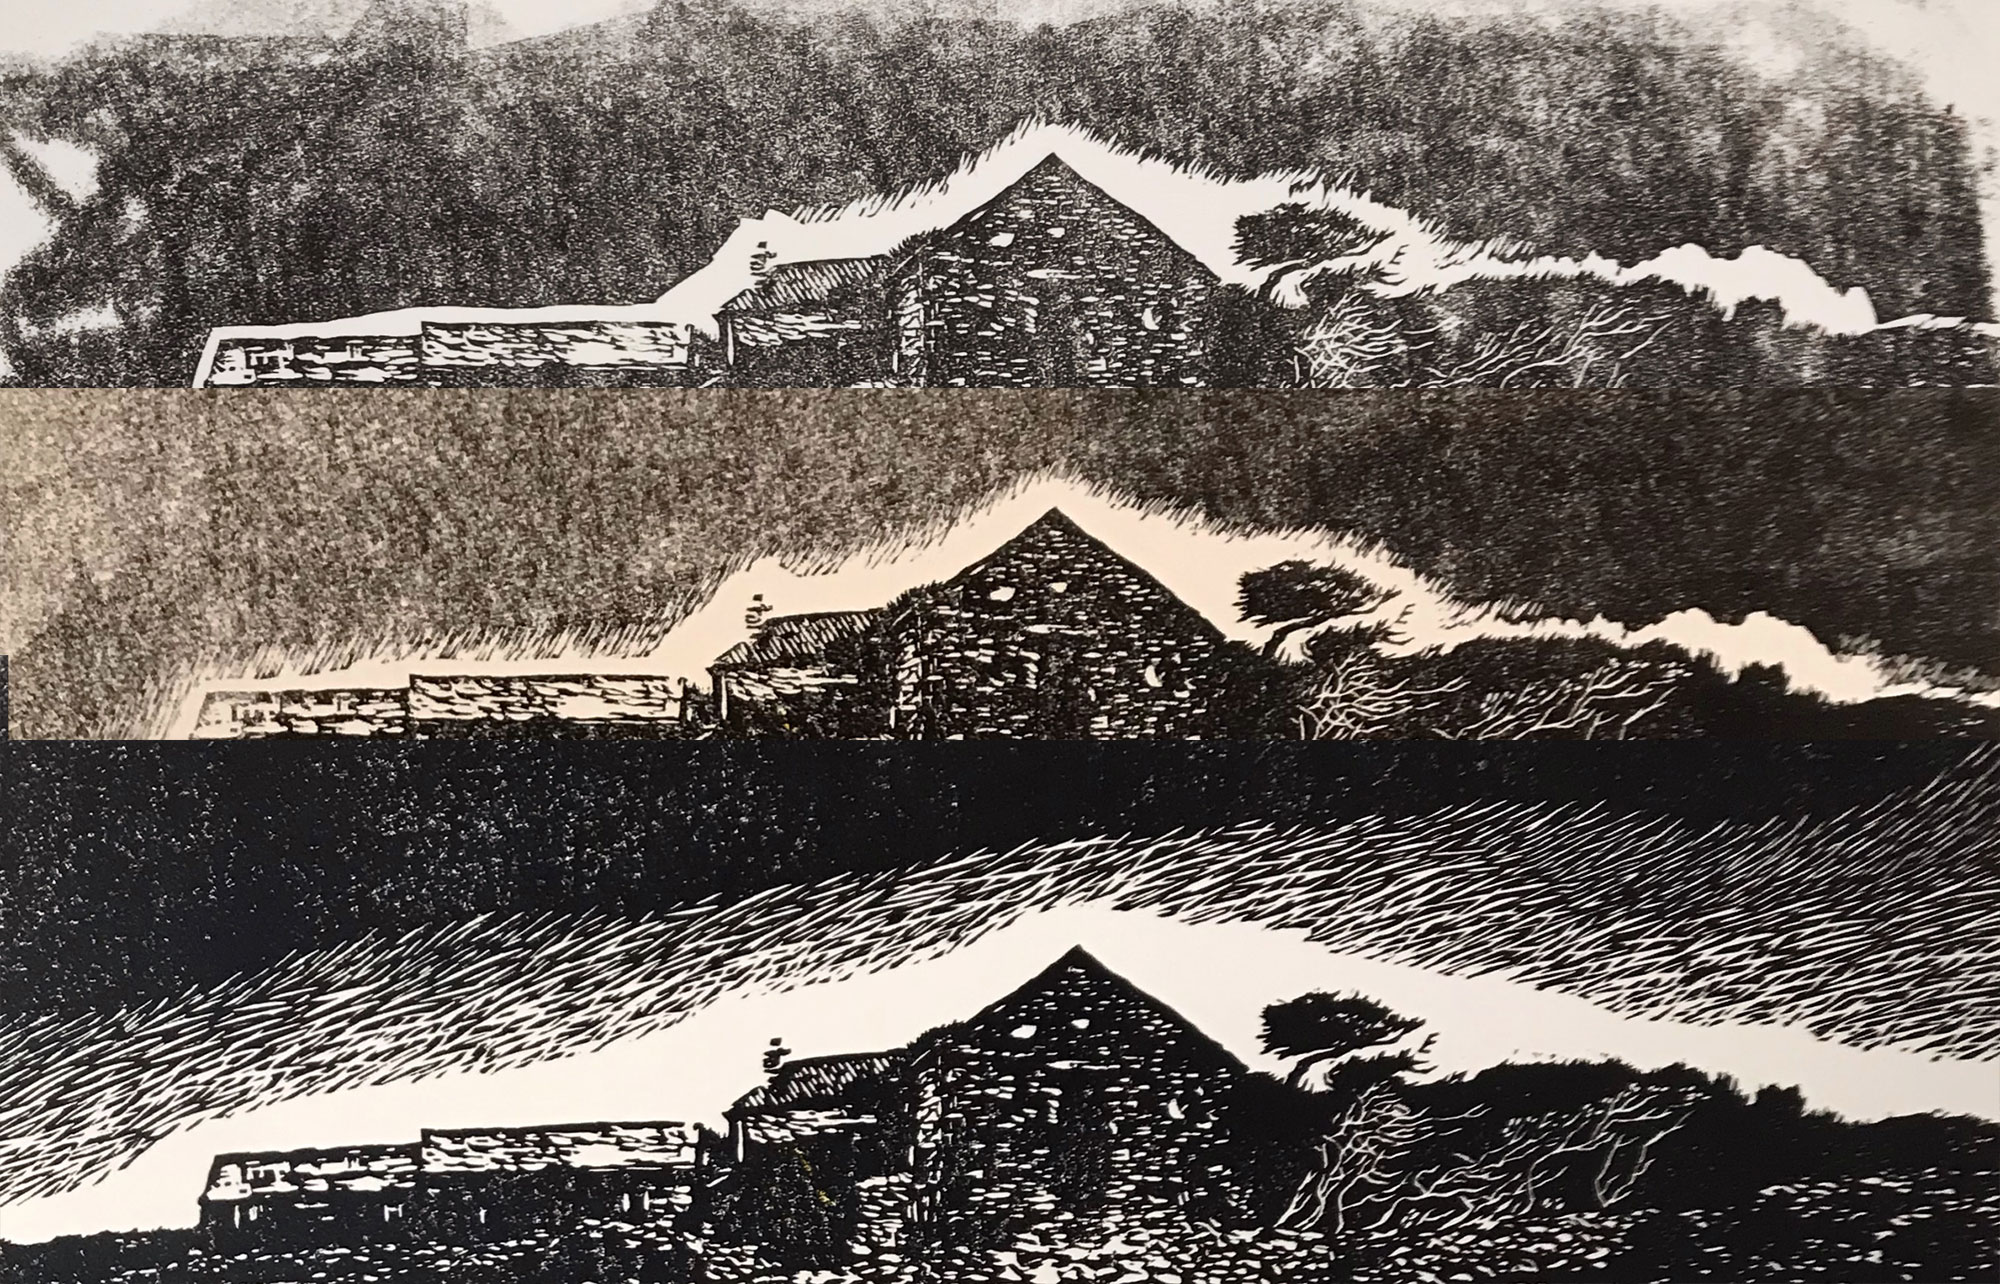
While I was cutting, it occurred to me to print the image in horizontal bands of grey, to give the impression of a landscape bathed in sea mist. That's when I should have heard the Gods of Lino beginning to chuckle in the background...
Creative step 5:
Various attempts to make the sky work... all failed...
I added white tree branches to place some texture/pattern over the bushes to the right of the farmhouse to further accentuate the diagonal.
Creative step 4:
While I was cutting, it occurred to me to print the image in horizontal bands of grey, to give the impression of a landscape bathed in sea mist. That's when I should have heard the Gods of Lino beginning to chuckle in the background...
Creative step 5:
Various attempts to make the sky work... all failed...
And here's what made the Gods of Lino roll about on the floor for longer than was really necessary... bands of mist... yeah, right...
Creative step 6:
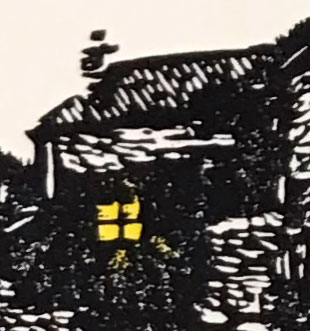
But one idea came to me that did work... I was looking at the building I'd brought into the scene and found myself imagining a window looking into an interior lit with a yellow bulb... now I think about it, I can see this was literally a lightbulb moment...
But one idea came to me that did work... I was looking at the building I'd brought into the scene and found myself imagining a window looking into an interior lit with a yellow bulb... now I think about it, I can see this was literally a lightbulb moment...
The introduction of this very small element changes everything - it becomes the focal point of the picture both visually and by suggesting a narrative... someone is inside that building - what's going on?
But before I gave that much more thought I was taken by the idea that the image as a whole describes the passage of time - from the timeless undergrowth in the foreground, to the 3000 year-old stone walls, to the building that could have been standing there for over 200 years, to the electric light that is illuminating a room in the observed present.
Creative step 7:
I abandoned my earlier ideas for the sky, replacing them with a dedicated block that carried a grade made of black ink mixed with burnt umber that fades into extender.
As I write this, the day after finishing the print, I'm inlined to this the sky is too dark.
Here it is, hanging upside down to dry - with the yellow for the window in place.
Creative step 8:
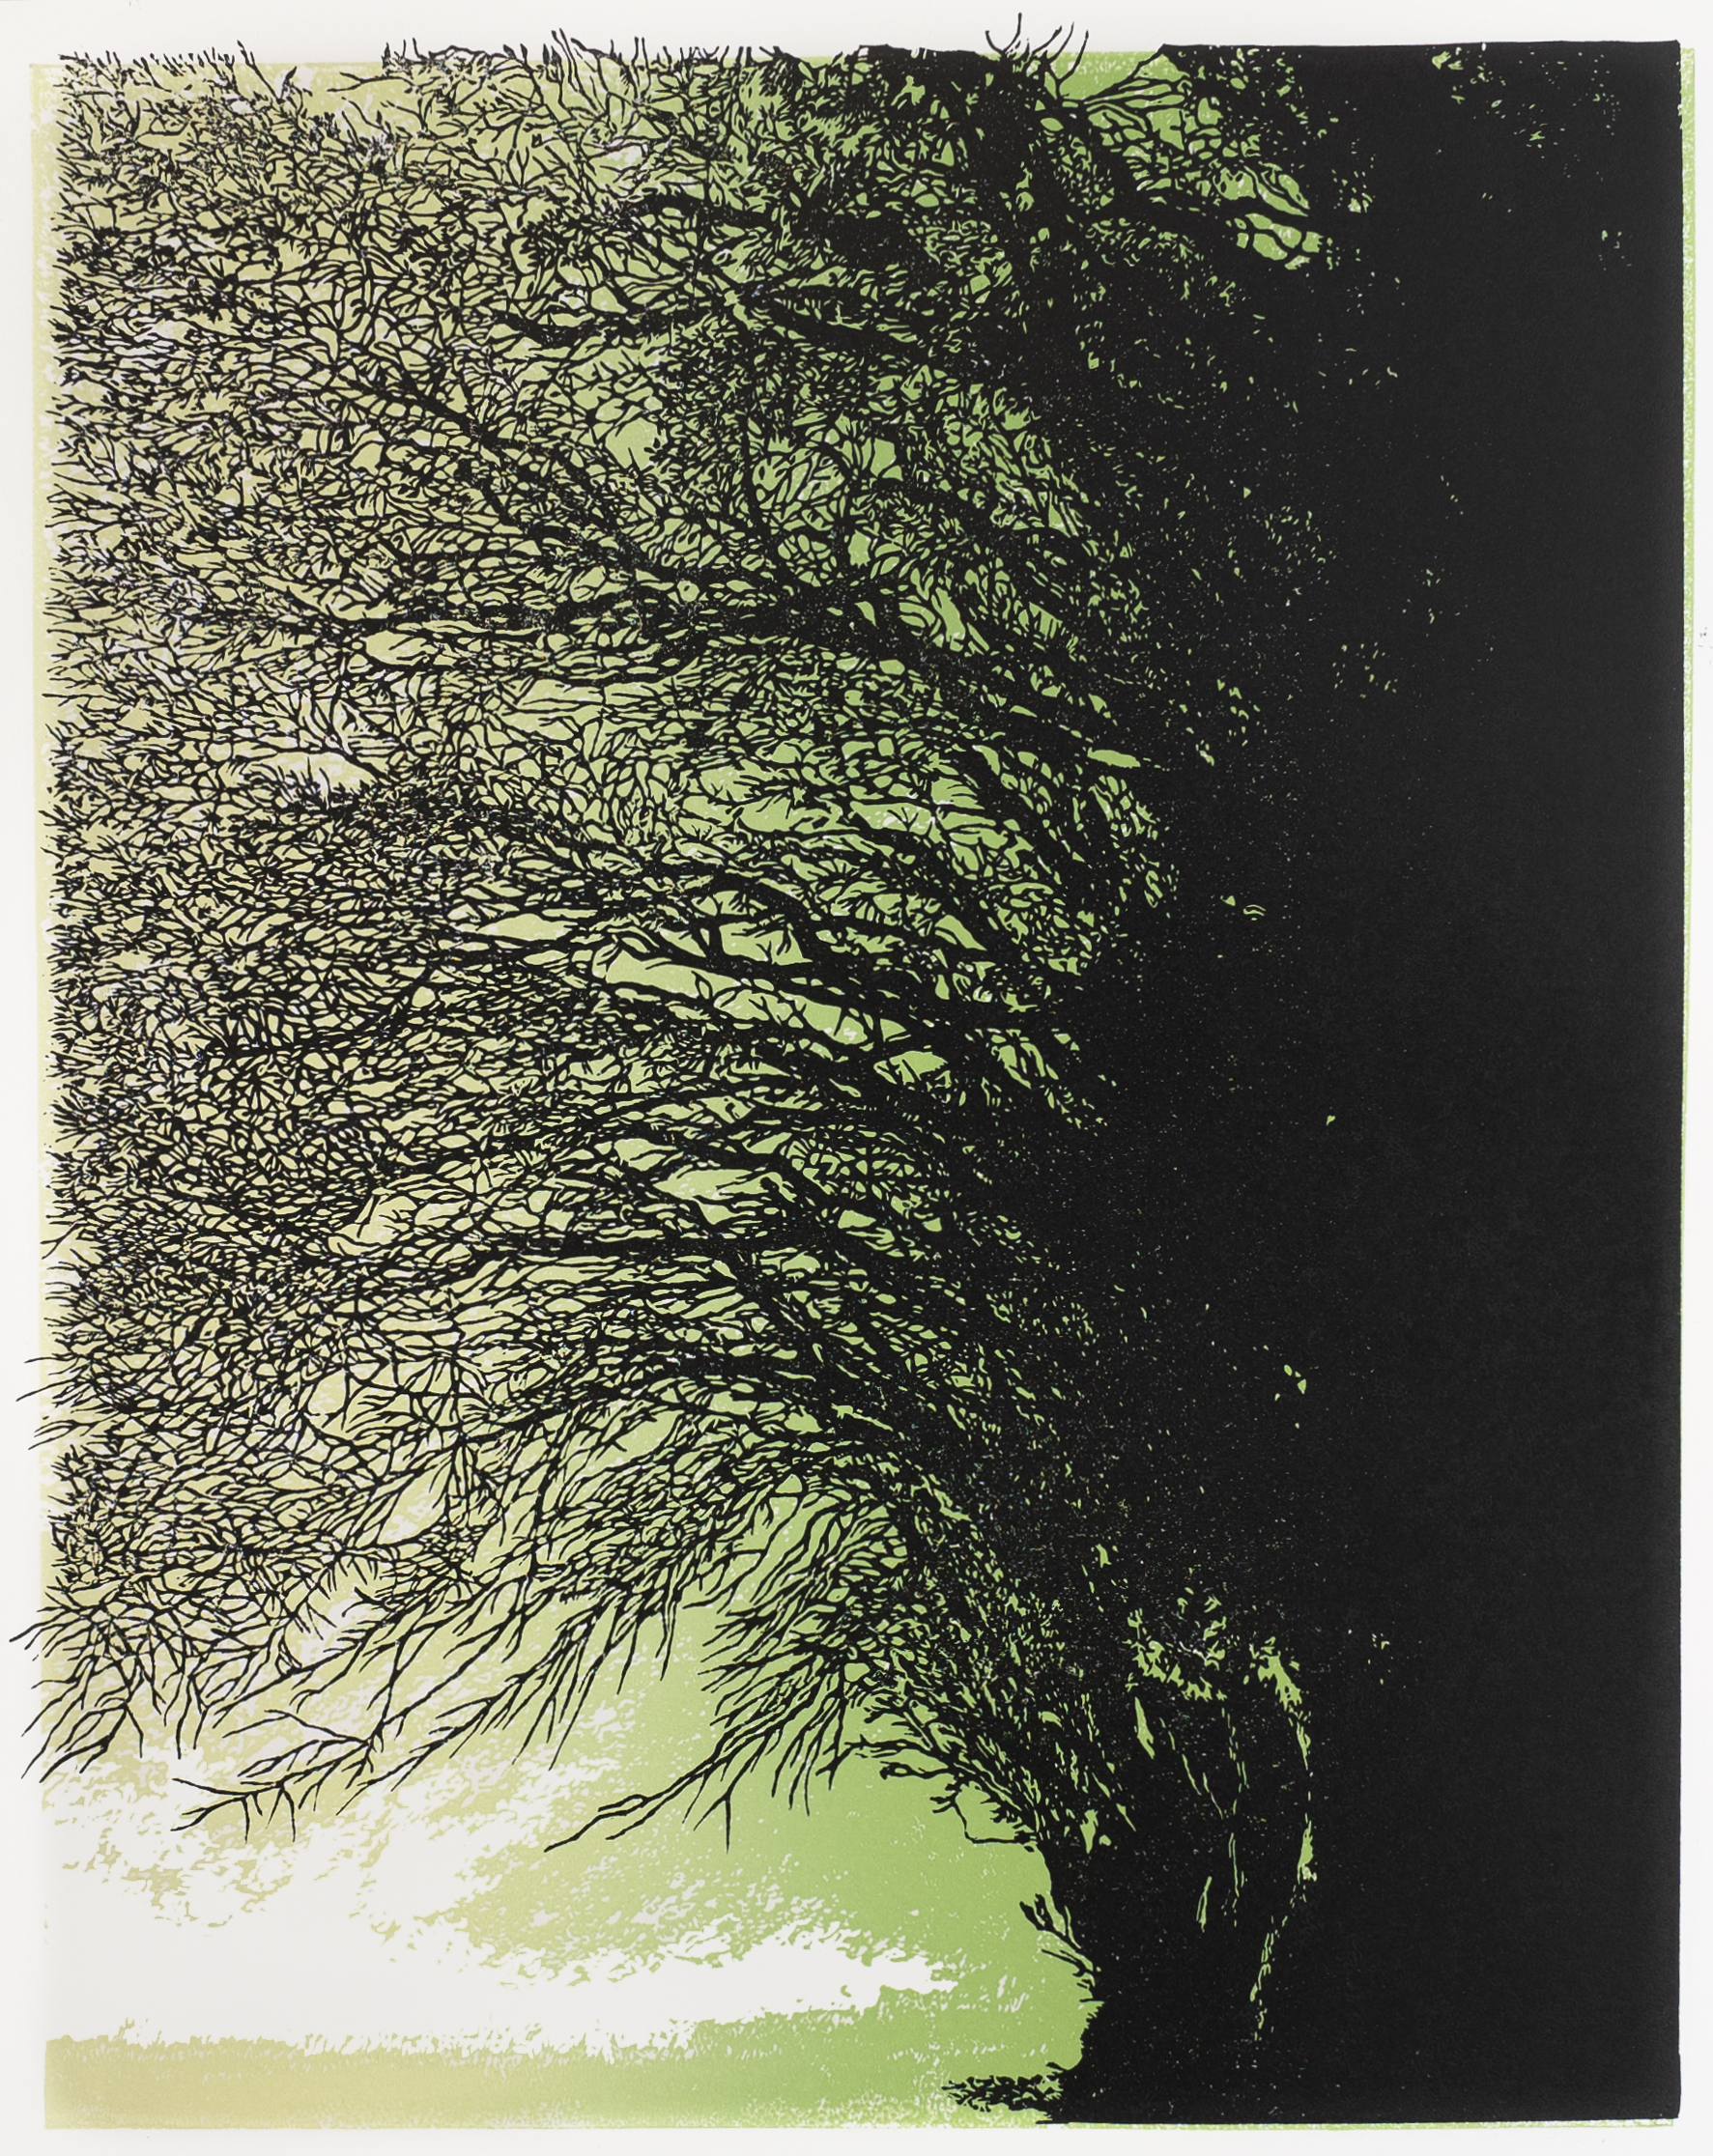
With the main edition printed and a small number of proofs left lying on my desk I decided to cut away the sky area from one of them, then I laid what remained over a proof of my print 'Breathe' that I'd made a month before:
With the main edition printed and a small number of proofs left lying on my desk I decided to cut away the sky area from one of them, then I laid what remained over a proof of my print 'Breathe' that I'd made a month before:
Above: "Breathe' - more information here
I particularly like the way the branches in 'Breathe' work as trees for 'In the Morning' (scroll back up the top of this page to see what I mean).
Creative step 9:
My final creative thought in all this had to do with titling the two images. In my mind, 'End of Day' was actually an image of a pre-dawn morning, but I was swayed by friends who saw it as the other end of the day, which I was happy to accept... because I don't have to be control of everything...
But I got my way with the collage which became 'In the Morning' :-)
Connect


My newsletter: