The making of Arrival
Publication date: 23 April 2022
'Arrival' is a limited edition of 18 reduction linoprints. The print size is about 40 cm wide (I'll add the correct dimensions when I remember to measure the print next time I'm in the studio!).
This print was finished on 22 April, 2022.
You can buy your copy of 'Arrival' from my shop by clicking here!
A 'reduction' linoprint is a print that is usually made from a single block (or matrix) of lino, as opposed to a print that is made from a series of blocks where each block is cut to carry a different colour.
The reduction method generally requires less cutting and, because you're always working from the same block at each stage of the printing, where the block is fixed in place in relation to its registration tabs, it's easier to register at each stage of printing the image. On the downside, you destroy parts of the block as you progress with the print, which means there's no going back if you make a mistake, and there's no opportunity to print additional copies once you've finished the edition.
I usually go down the multiblock route, but decided not to for this print, which is actually quite an adventurous subject for this method!
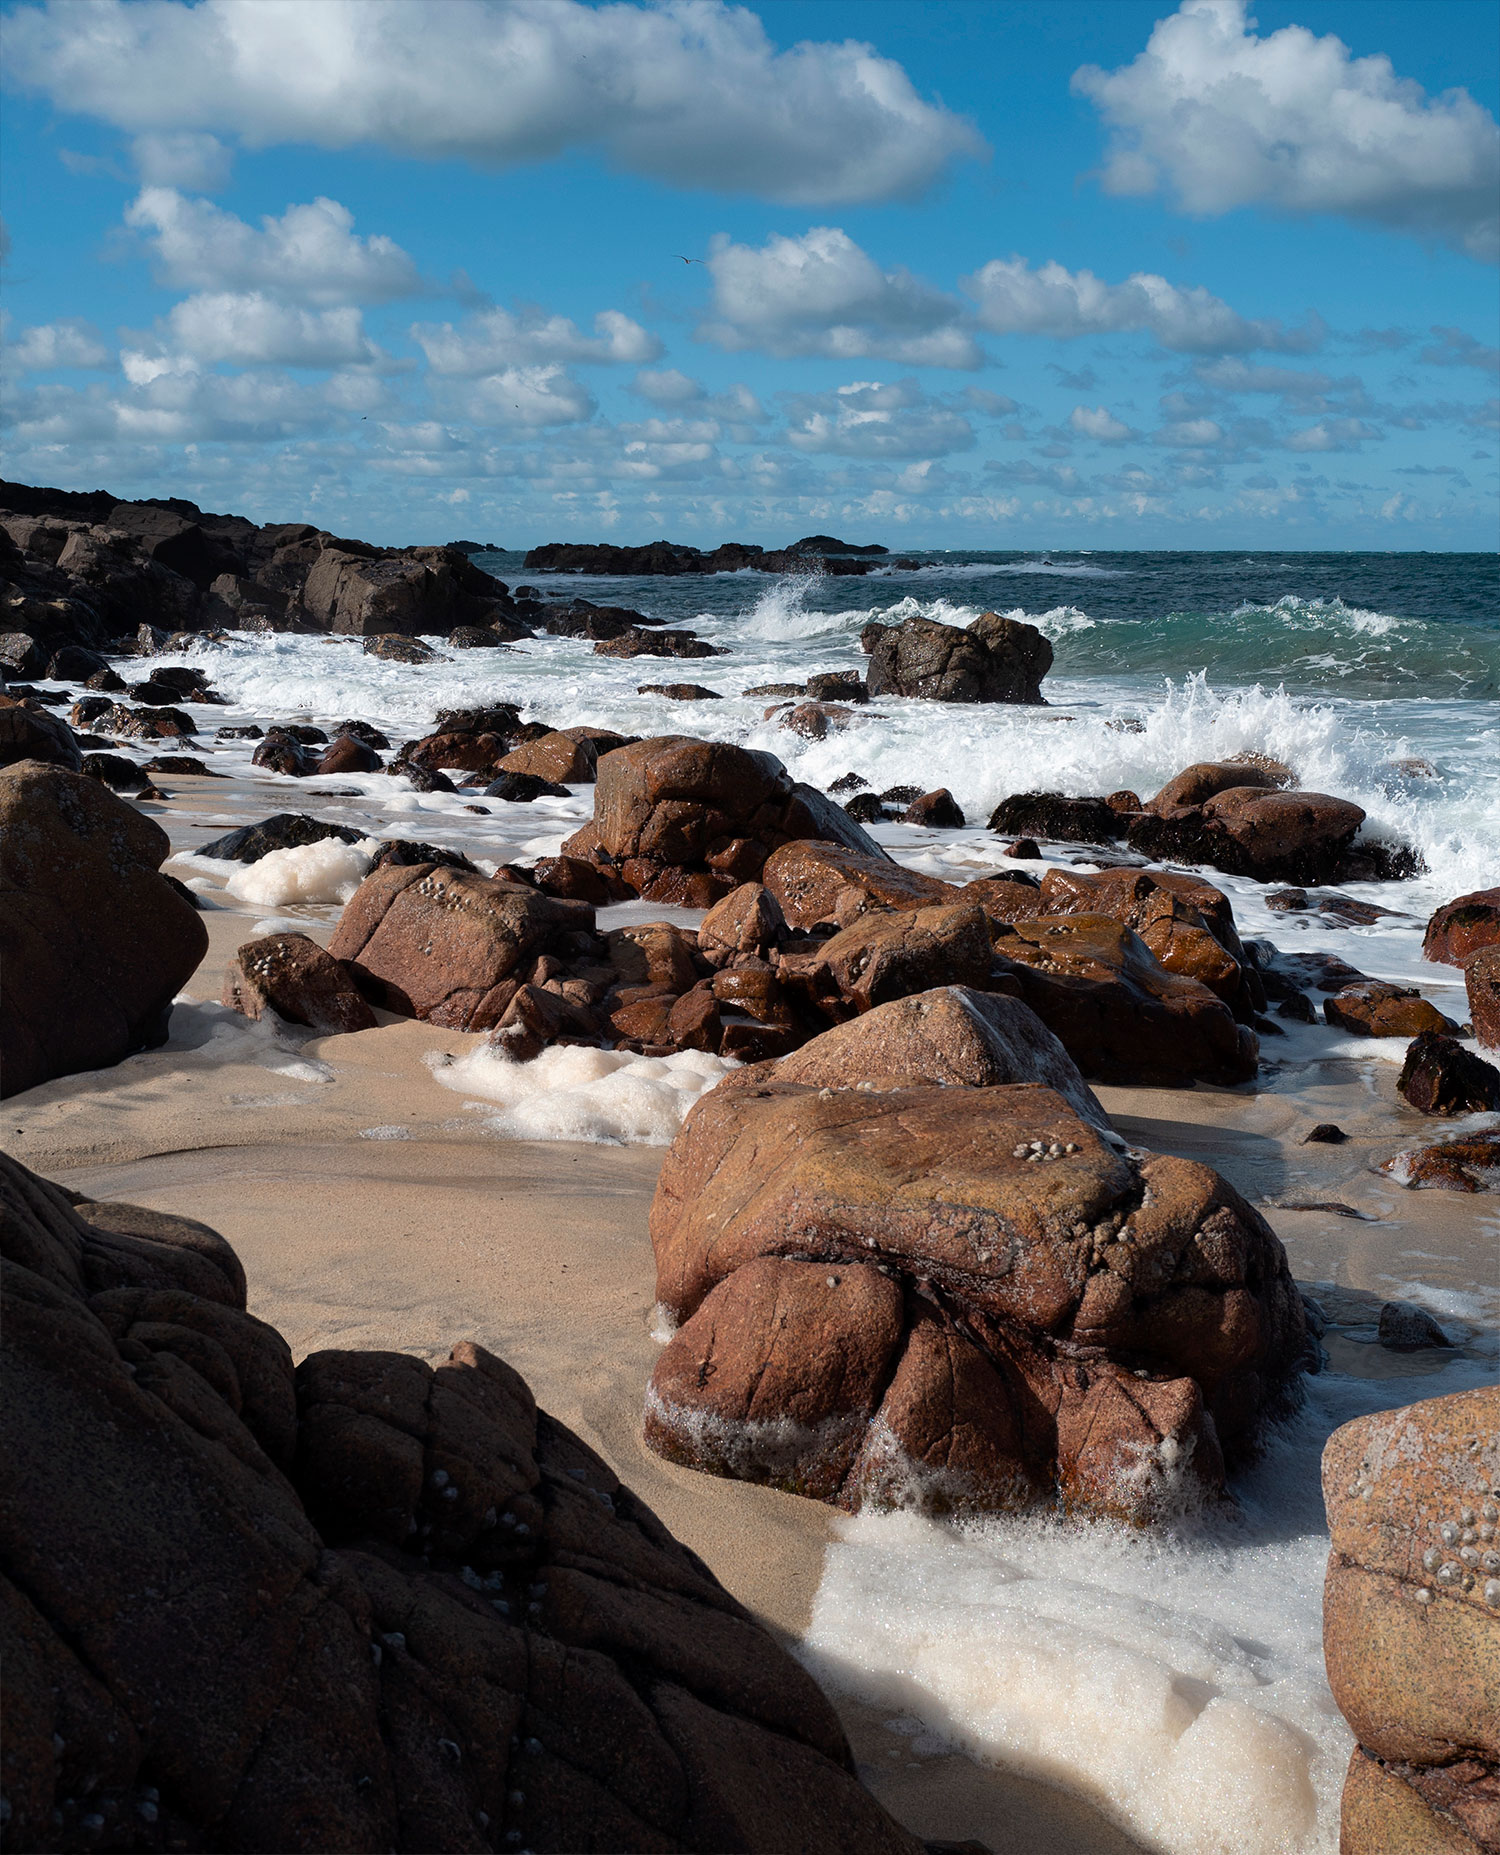
Above: Image 1 - the original photo
The journey begins with this photograph that I took in Penwith, Cornwall during March 2022.
I spent quite a bit of time (about a day's work) in Photoshop moving and removing elements of the photo in order to achieve the composition I wanted to work with. When I finished messing with nature I converted the image to pure black and white and transferred it over to my iPad.
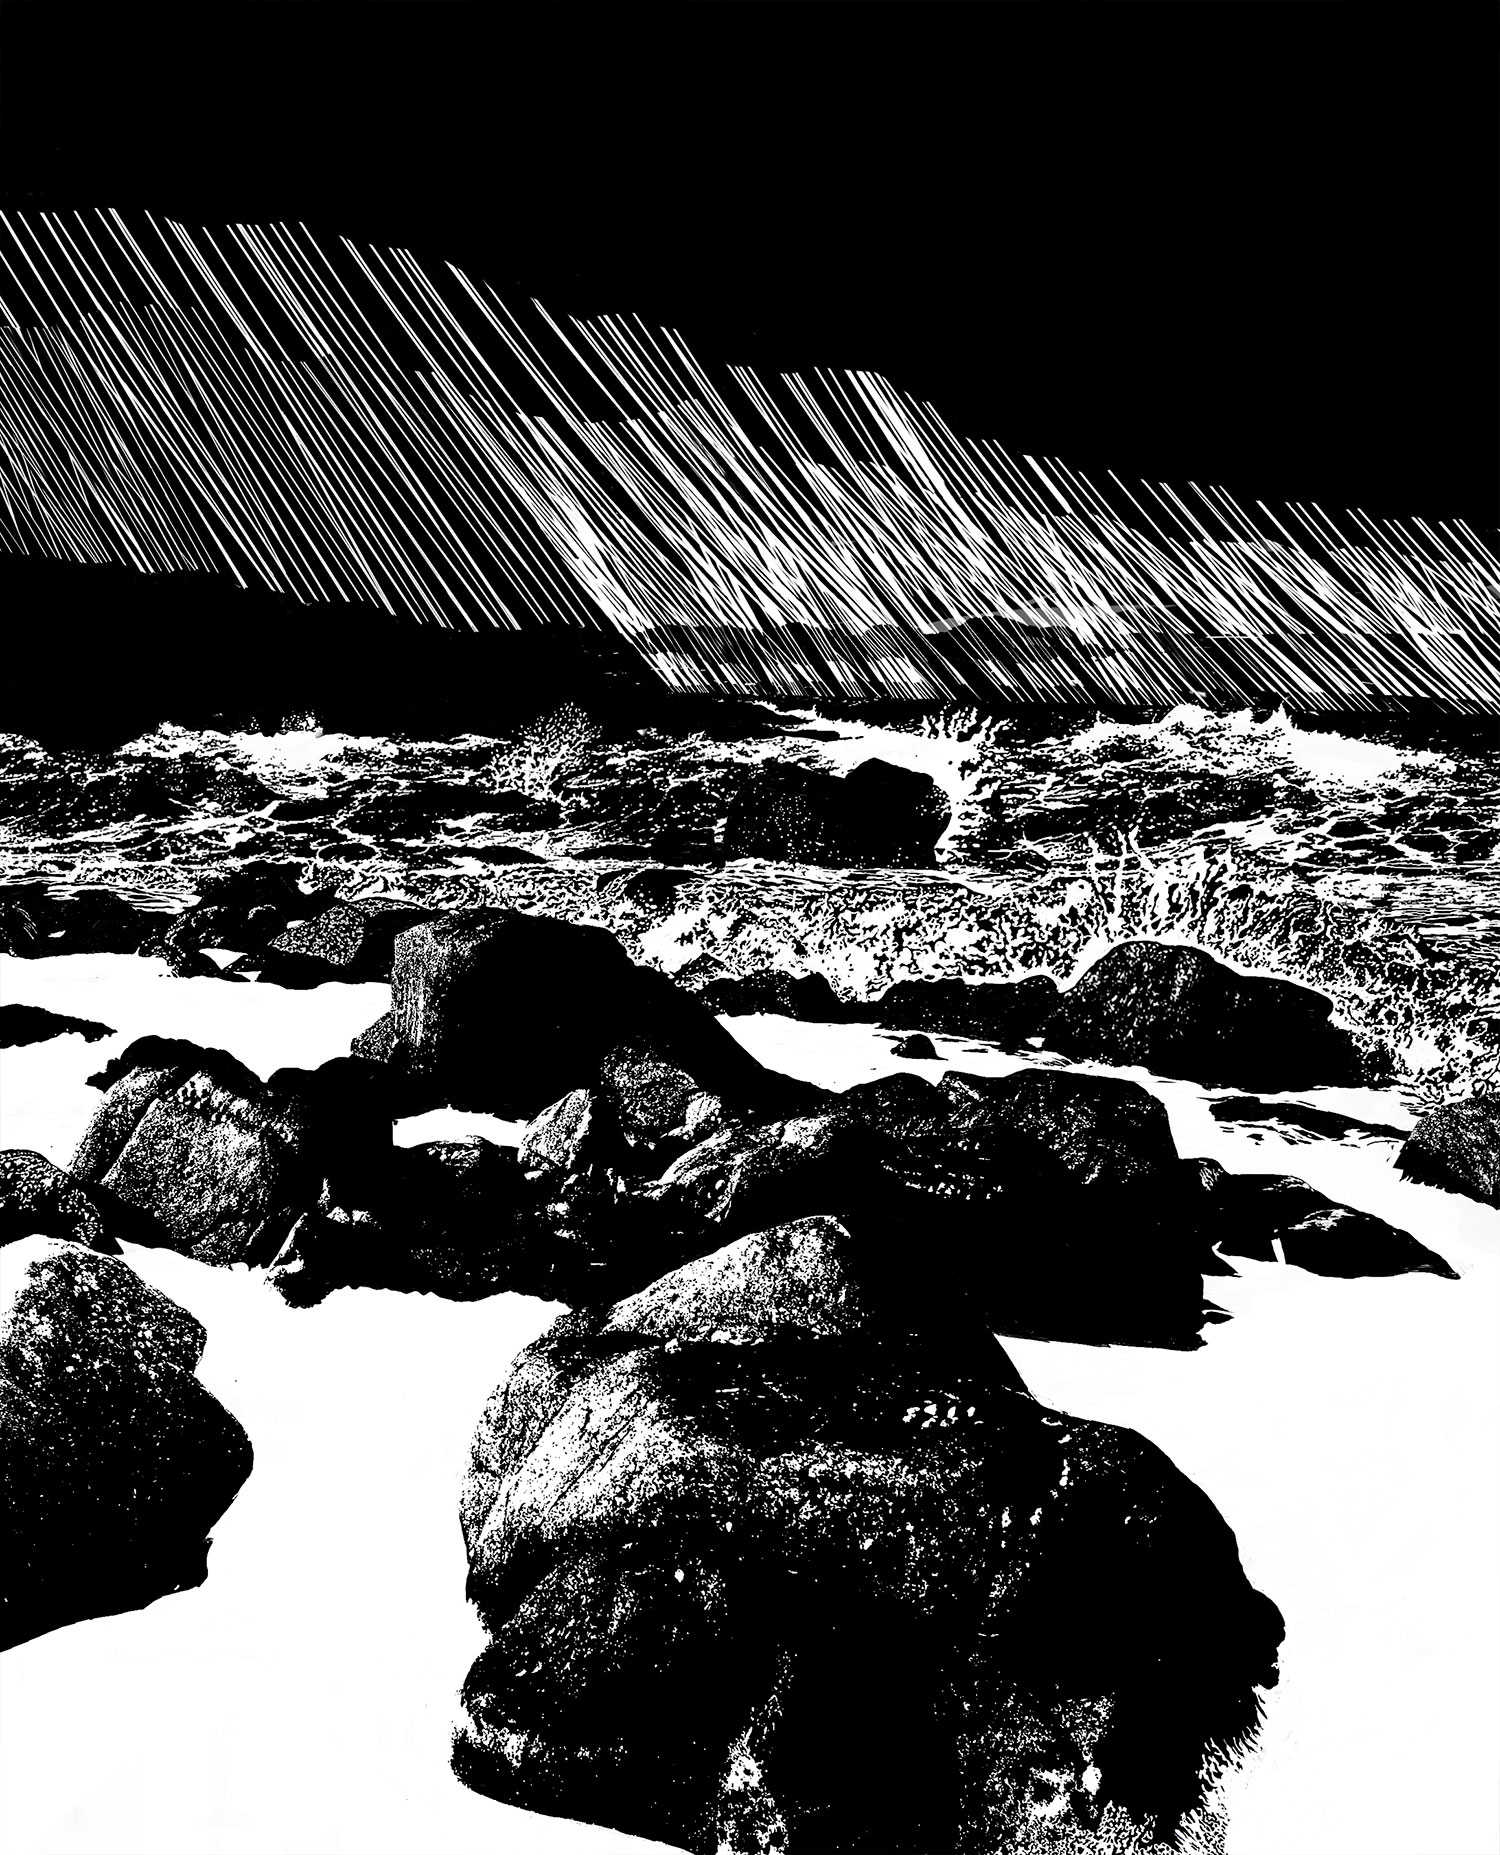
Above: Image 2 - the drawn image
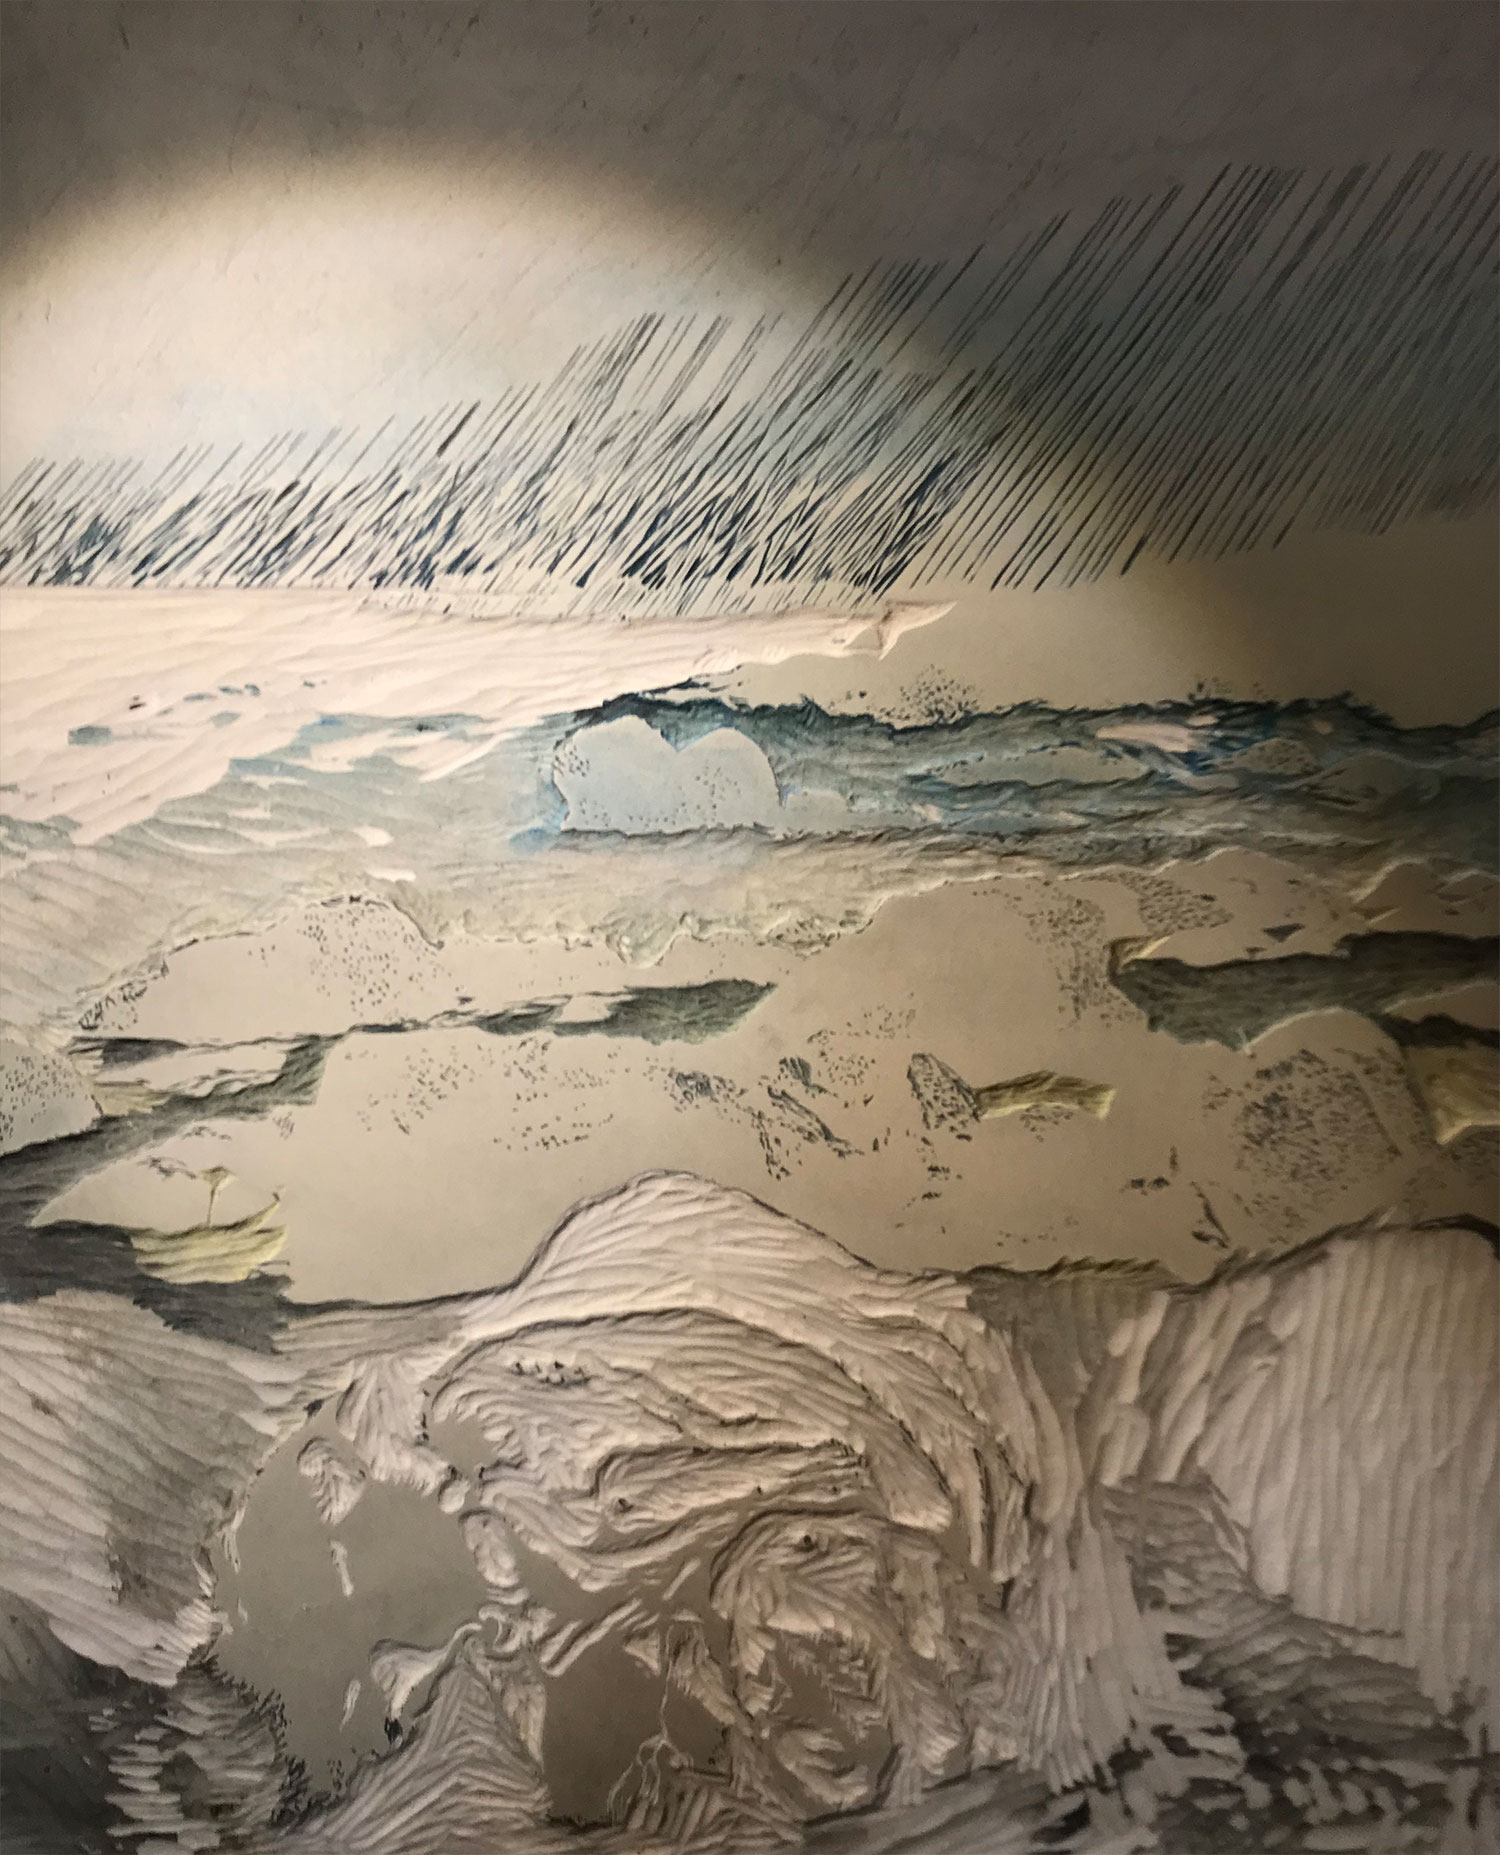
Working with the image that I'd created in Photoshop, I began the more intense process of developing it using the drawing tool, Procreate, on my iPad.
Procreate keeps a note of the amount of work done on an image. In this case, I spent 43 hours refining it - adding a lot of drawn elements, re-imagining the surface of the water, adding the rain and clouds. In fact, according to Procreate, this stage involved over 27,000 pen strokes! The result is the image above.
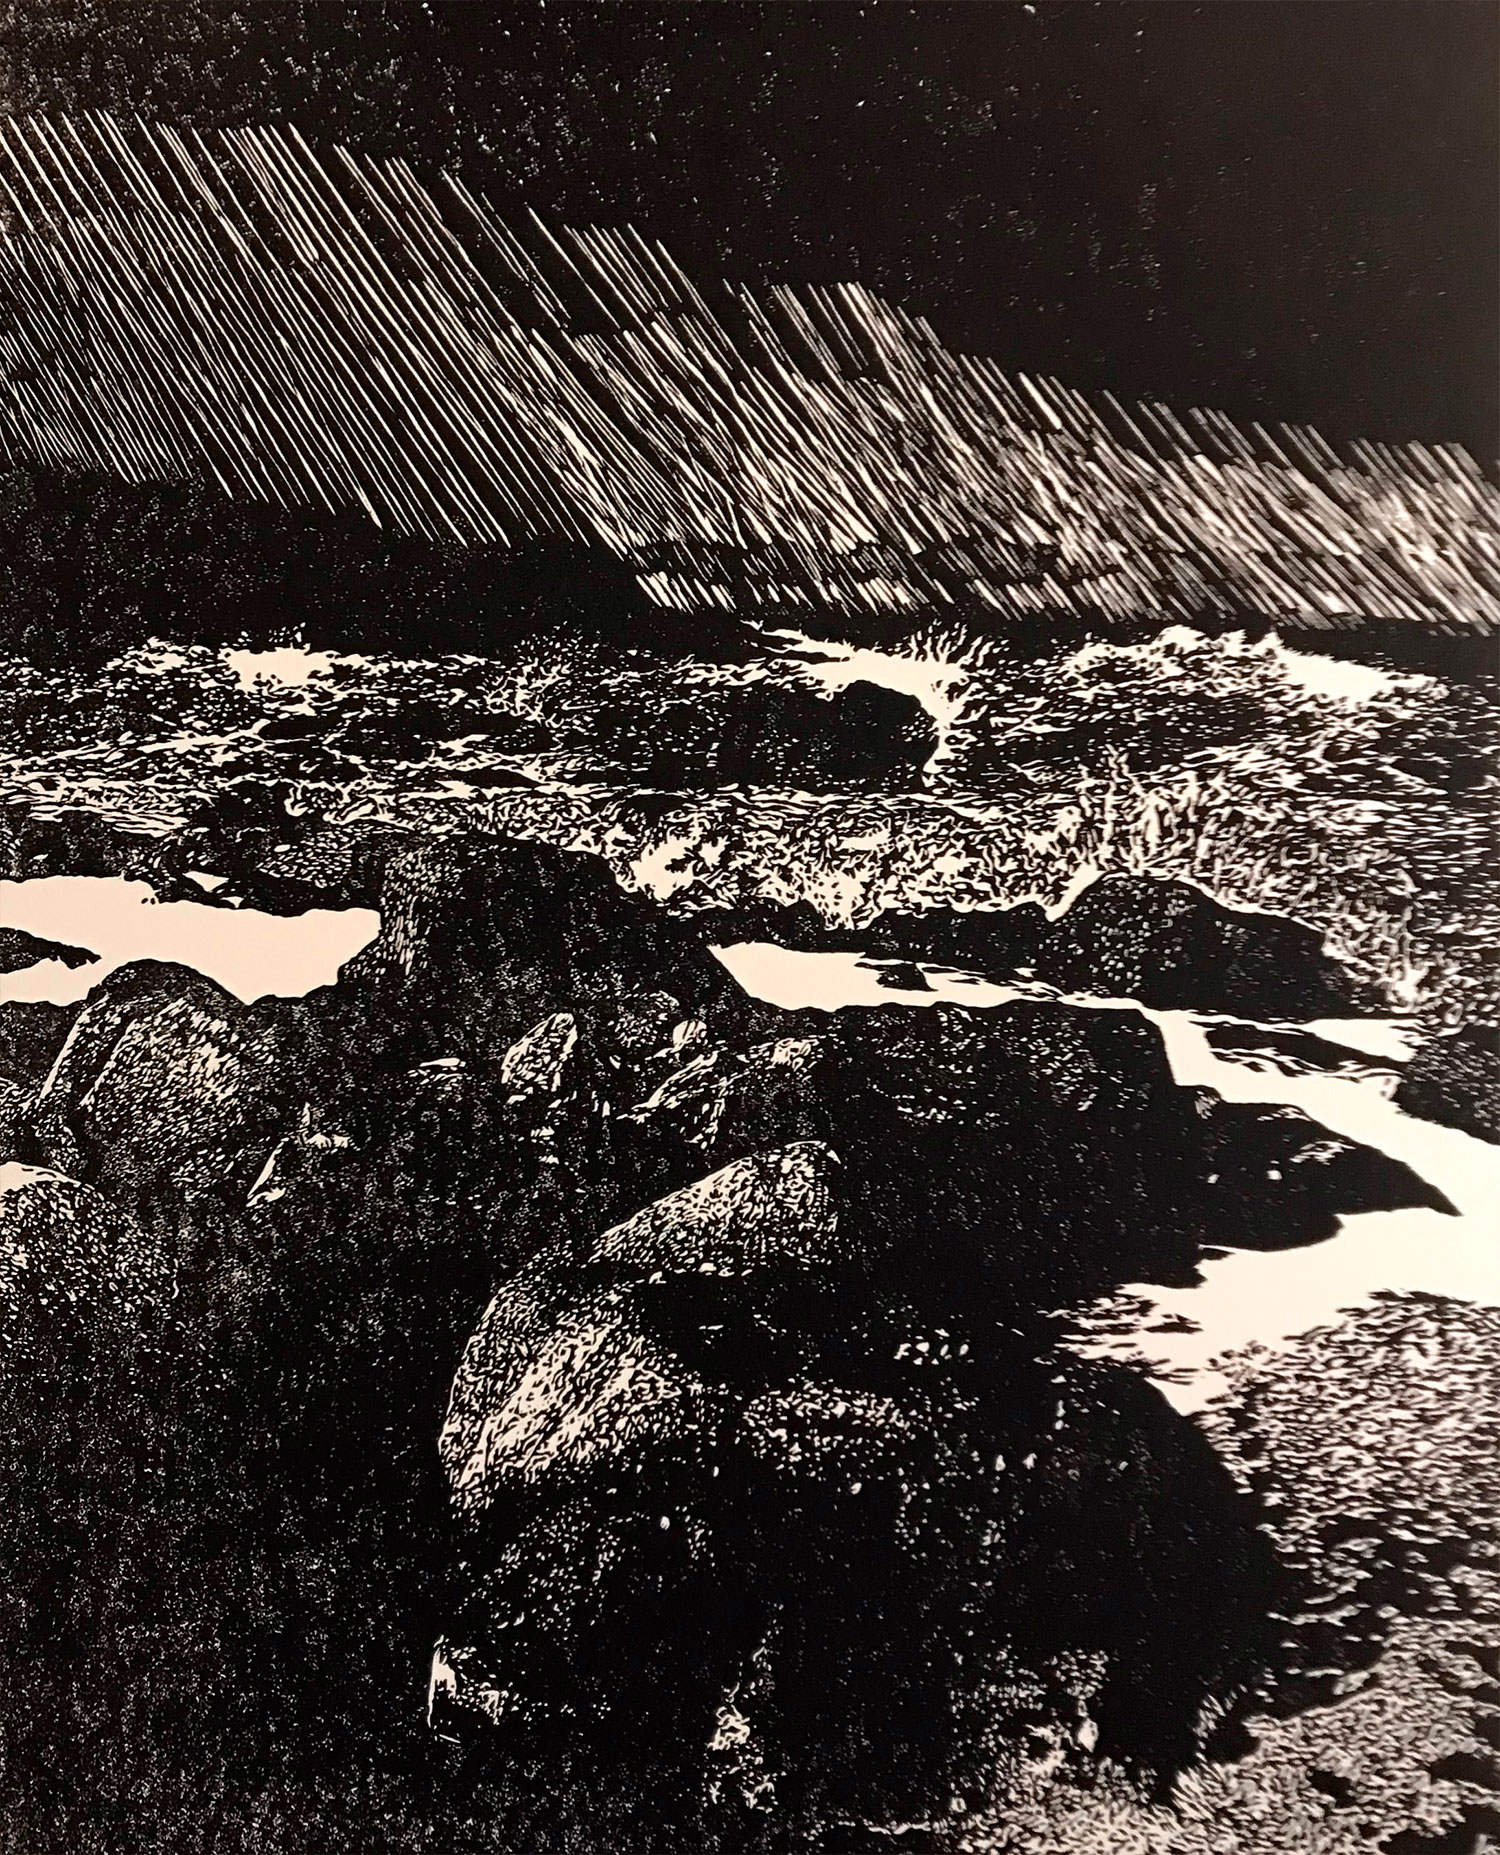
Above: Image 3 - the first proof
You need some kind of cutting guide on your lino. My method is to trasnfer the final image from my iPad over to my computer. From there, I print the image onto ordinary computer printer paper, which I stick, using PVA glue, face-down onto the lino block. When the paper is dry I dampen it and rub away the paper fibres, leaving the computer ink on the lino. When that is dry again, I rub olive oil into the surface to make any remaining paper fibres permanently transparent - then I start cutting.
Unusually for one of my projects, the cutting of this block didn't take too long - about 24 hours in total.
With the cutting finished, I made a proof using black ink to check that I'd cut the image to the standard I wanted.
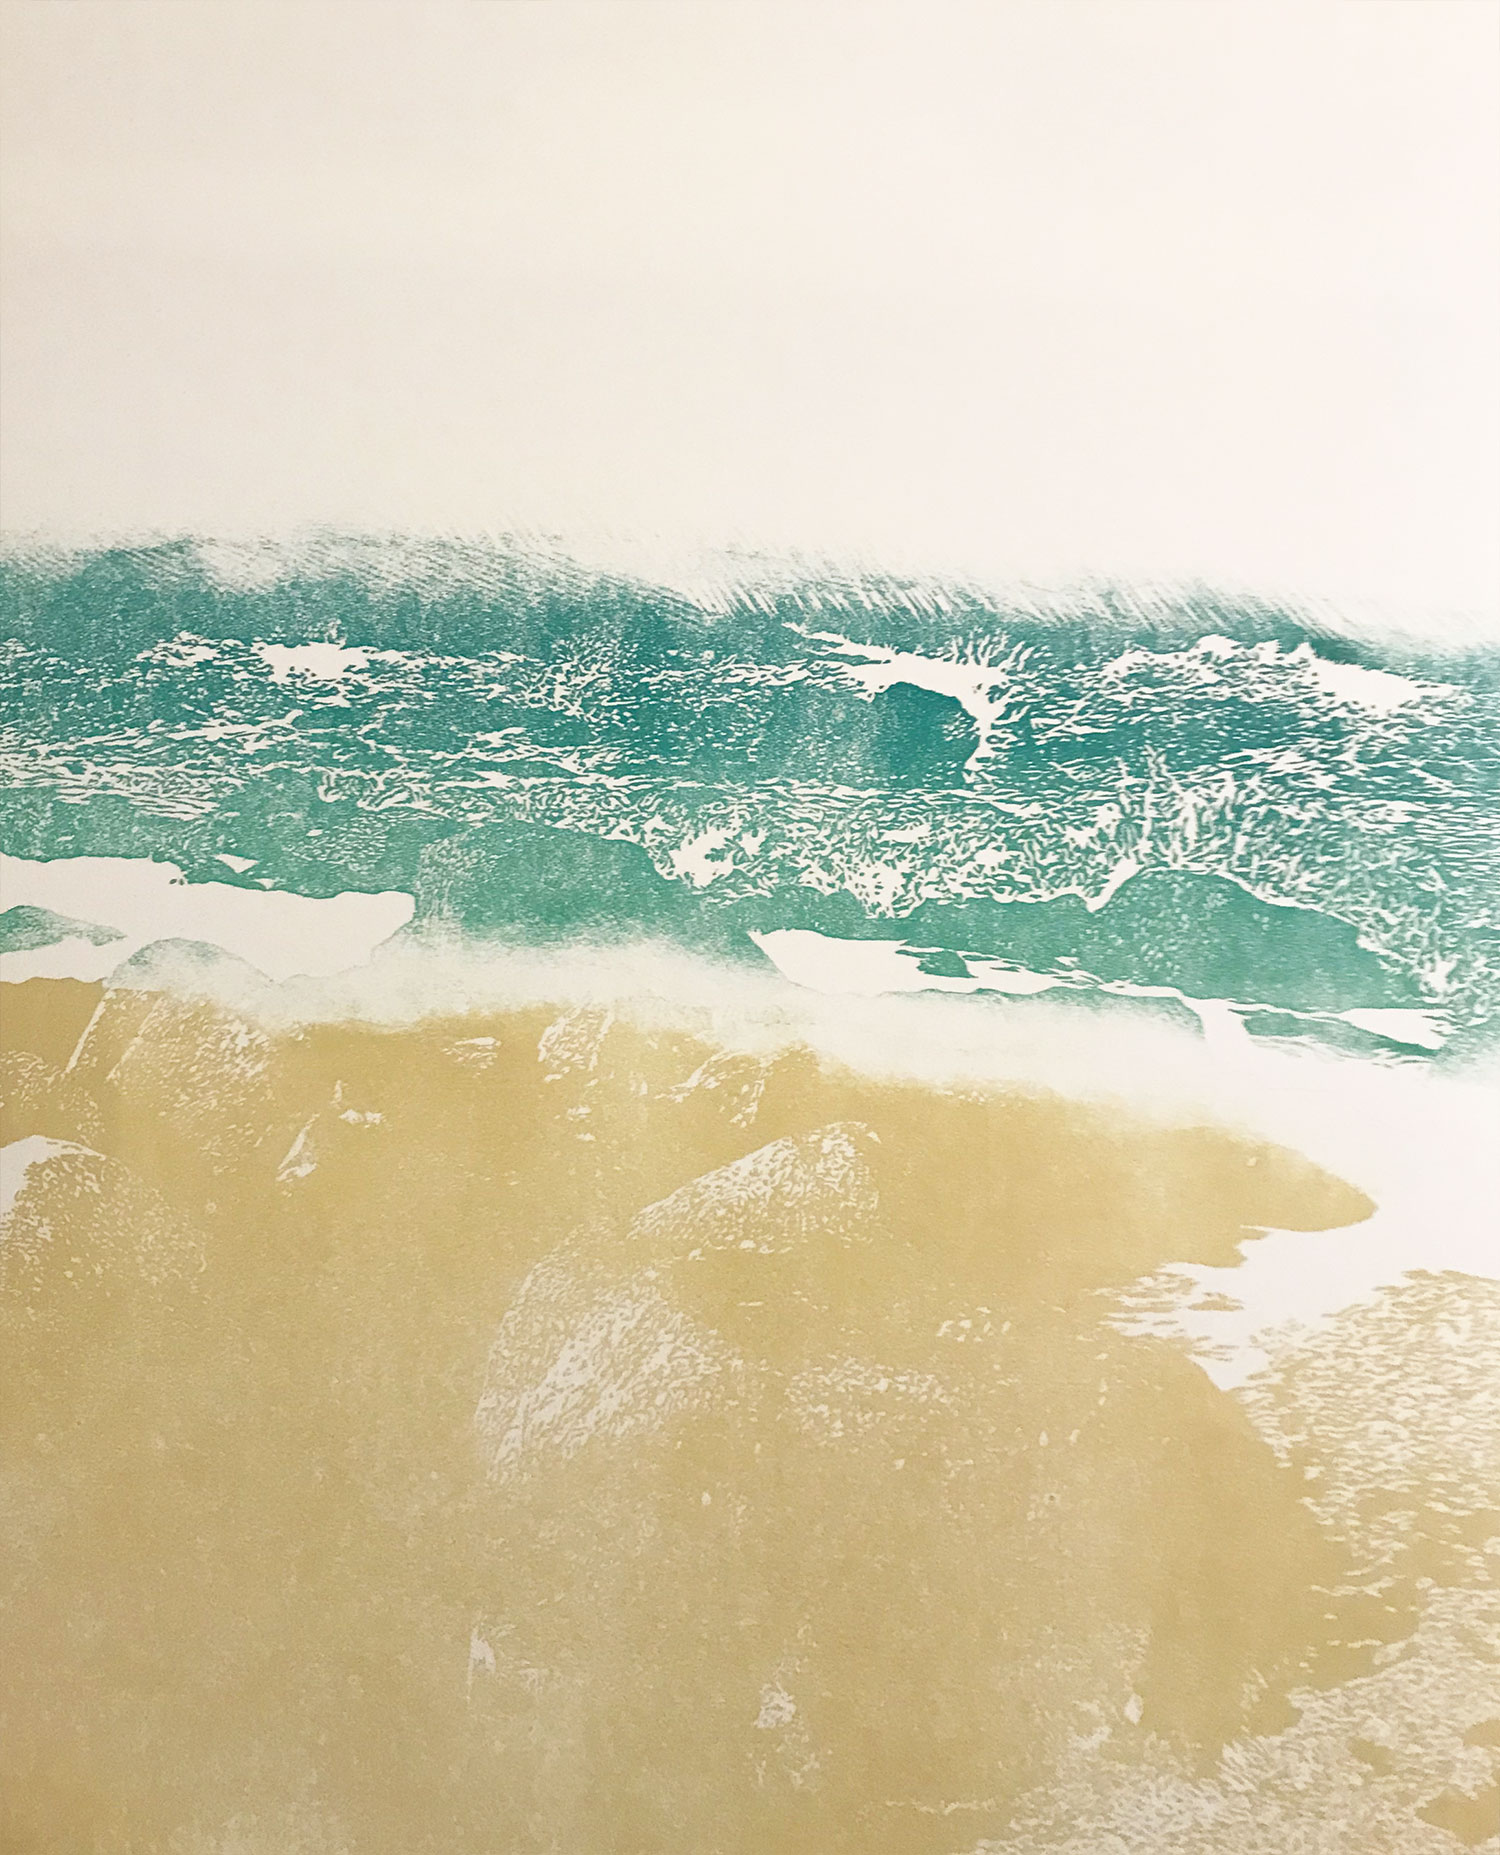
Above: Image 4 - the first stage of printing
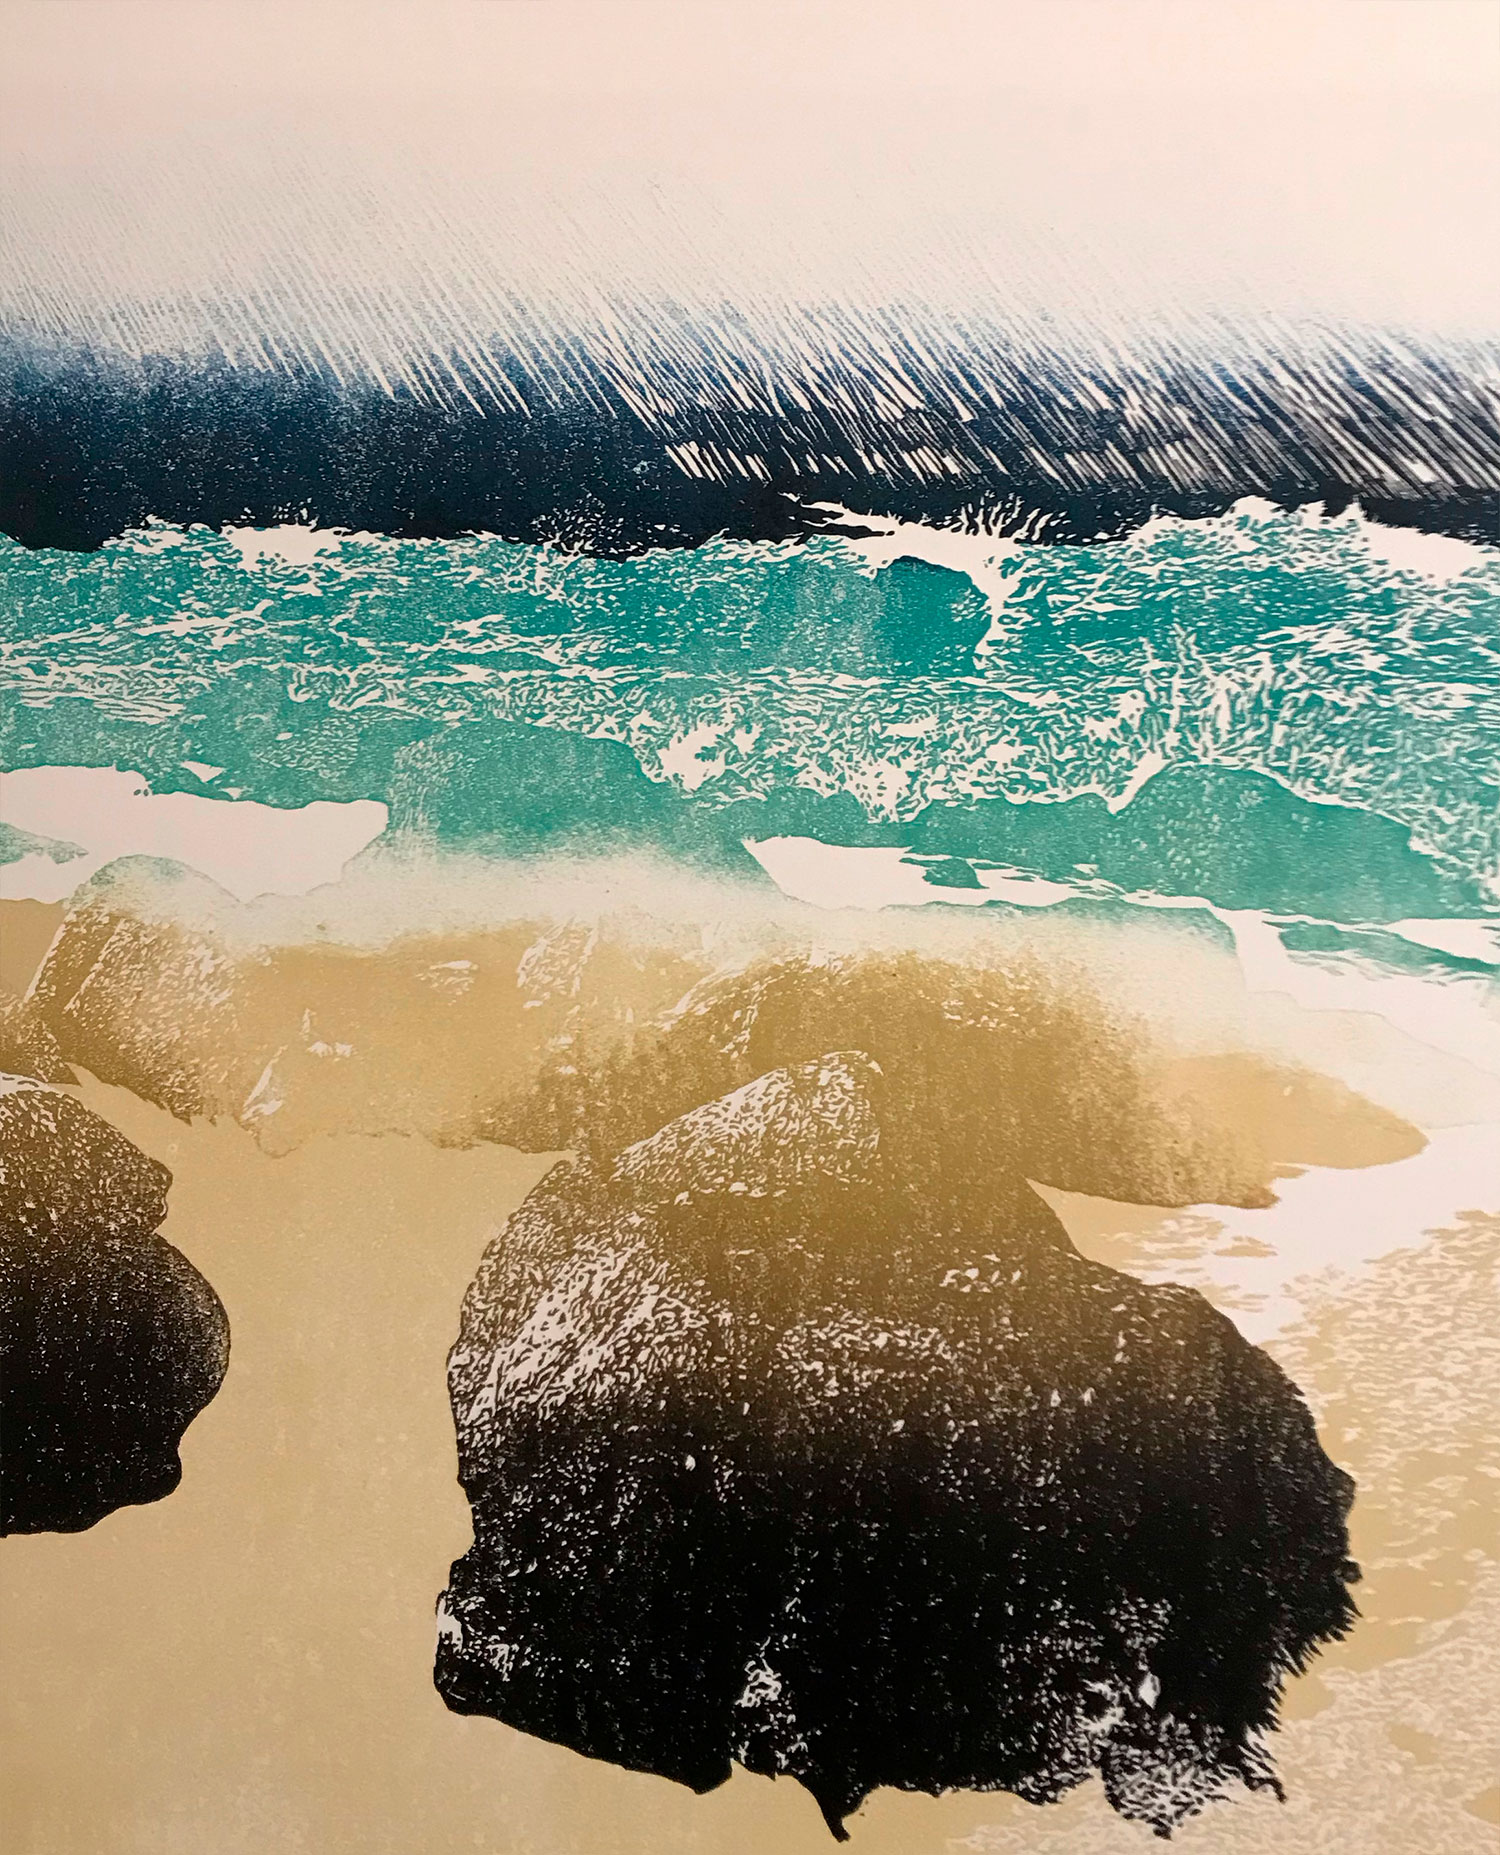
The basic principal with reduction printing is that the first colour you print is usually the lightest colour. In this case, the lightest colours were the green of the sea and the pale ochre of the sand. Because these two colours don't come into contact with each other on the final print I was able to print both at the same time.
I apply the ink with rollers, and I 'blur' the edges of the inked area with a cloth to avoid them being visible beneath later layers of ink.
I printed this image 26 times. So after this stage, 26 is the maximum number of prints I can produce for this edition! The trick is to print sufficient copies at the start so you end up close to your desired edition size by the end. These days, I manage not to lose too many prints along the way (due to errors etc) - so, worst-case, I'm expecting to get an edition of 15, best-case 20. Commercially-speaking, a larger number of prints makes sense, but I know I'm in for 4-5 print stages, where each stage will take me a day (I use Graphic Chemical water-based inks, which dry quite quickly)... so I reckon life is too short to spend any more time on printing a larger edition (like a lot of printmakers, I find the printing stage the least enjoyable, as it's repetitive and it kills my back to be standing for so long!)
Above: Image 5 - the first reduction stage
With the lightest colours printed, the next stage is to cut away the lino where you want to retain those light colours (obviously ensuring that you've printed beyond the area you want to keep!).
The image above is the original block - I've marked in pencil where I now intend to cut away the lino that has served its purpose in relation to the first pair of colours.
Above: Image 6 - the second print run
Once again, I'm selectively inking the block. In this case, I'm printing a grade across the foreground boulders.
My cunning plan, as it were, is to repeat this effect on the receding layers of boulders. To achieve this, I need to print the grade onto the nearest ones, which I then need to cut away, before printing the next closest, and so on, until all the boulders have been printed.
Above: Image 7 - preparing for the third print run
I was about to cut away the foreground boulders when it occurred to me that the largest one would look better with some additional drawn elements (fissures and shadows). You can see the results of that additional detail at the bottom of the photo above. When I pulled the first print with this I was disappointed with the results - the lines were too strong and dominated the image in a bad way - so I cut some of the line away. There was still an issue until I tried dabbing off some of the ink from the lino before printing - then it started to work. So this was an unplanned part of the process, and, therefore, a bit risky - and it cost me three of my 26 prints!
I was about to cut away the foreground boulders when it occurred to me that the largest one would look better with some additional drawn elements (fissures and shadows). You can see the results of that additional detail at the bottom of the photo above. When I pulled the first print with this I was disappointed with the results - the lines were too strong and dominated the image in a bad way - so I cut some of the line away. There was still an issue until I tried dabbing off some of the ink from the lino before printing - then it started to work. So this was an unplanned part of the process, and, therefore, a bit risky - and it cost me three of my 26 prints!
Above: Image 8 - after the third print run
You can see the detail I left on the closest boulder (which includes the shadows on the limpet shells, which is one of the elements of the final print that I like the most!).
In this photo, it doesn't look like there's much of this detail to see, but with the variance in the printing of the grade on the boulders across individual prints, the affect differs and I'm glad I did it.
Above: Image 9 - during printing
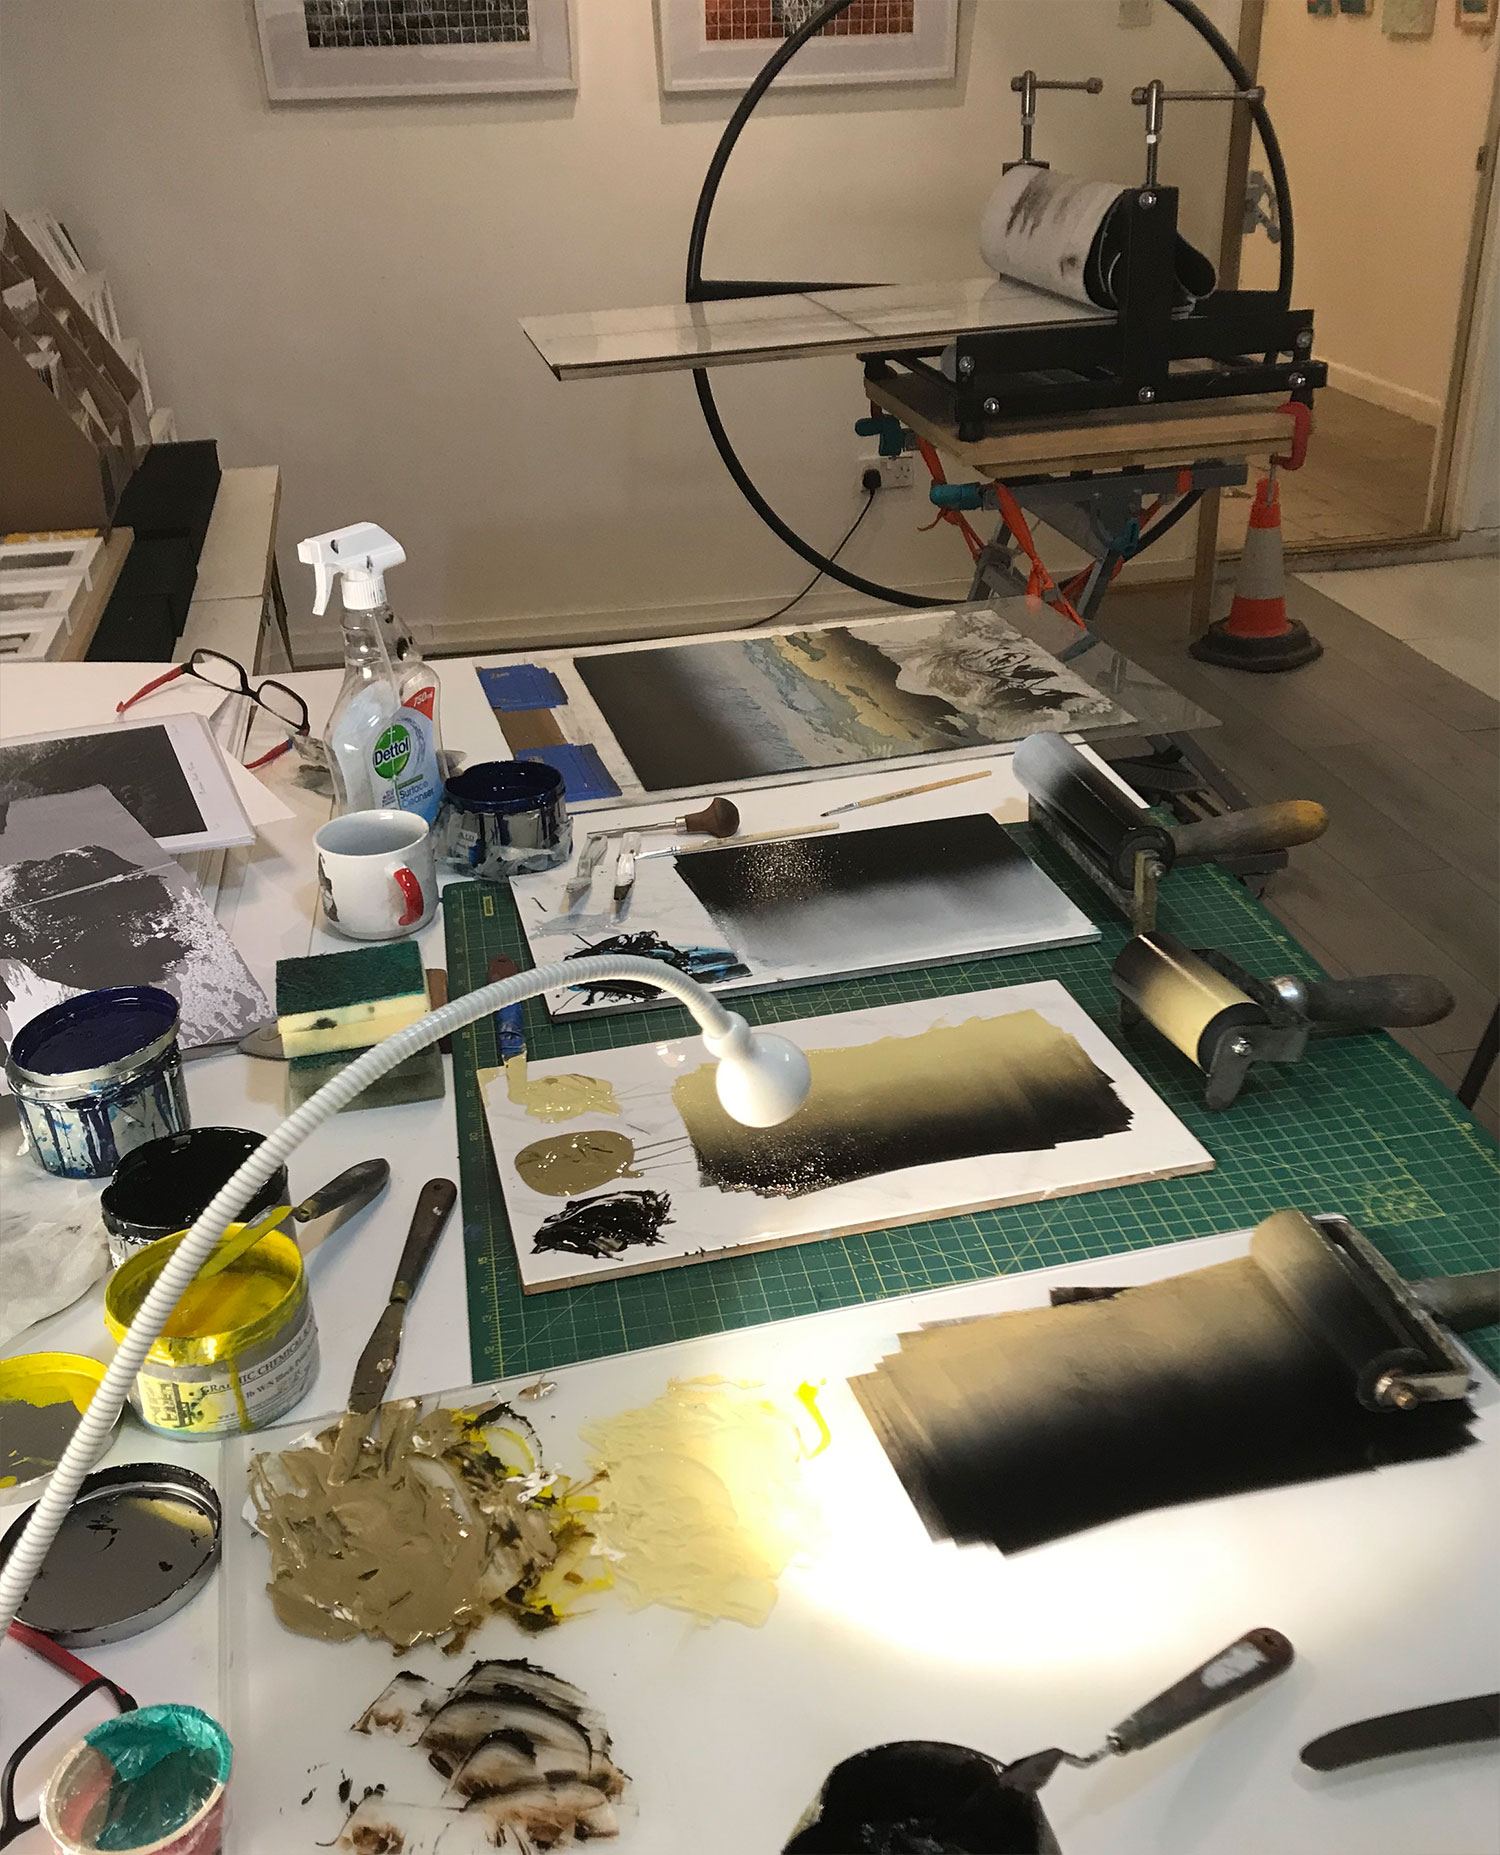
Here's a photo of my studio during the production of this print.
I do most of my printing using the etching press in the background, although, for this print, I also used a spoon at times.
Various inks on the go... there are grades for the sky section and for the boulders (two versions of the browns for reasons I won't bother to explain!).
You can see the inked block in this photo.
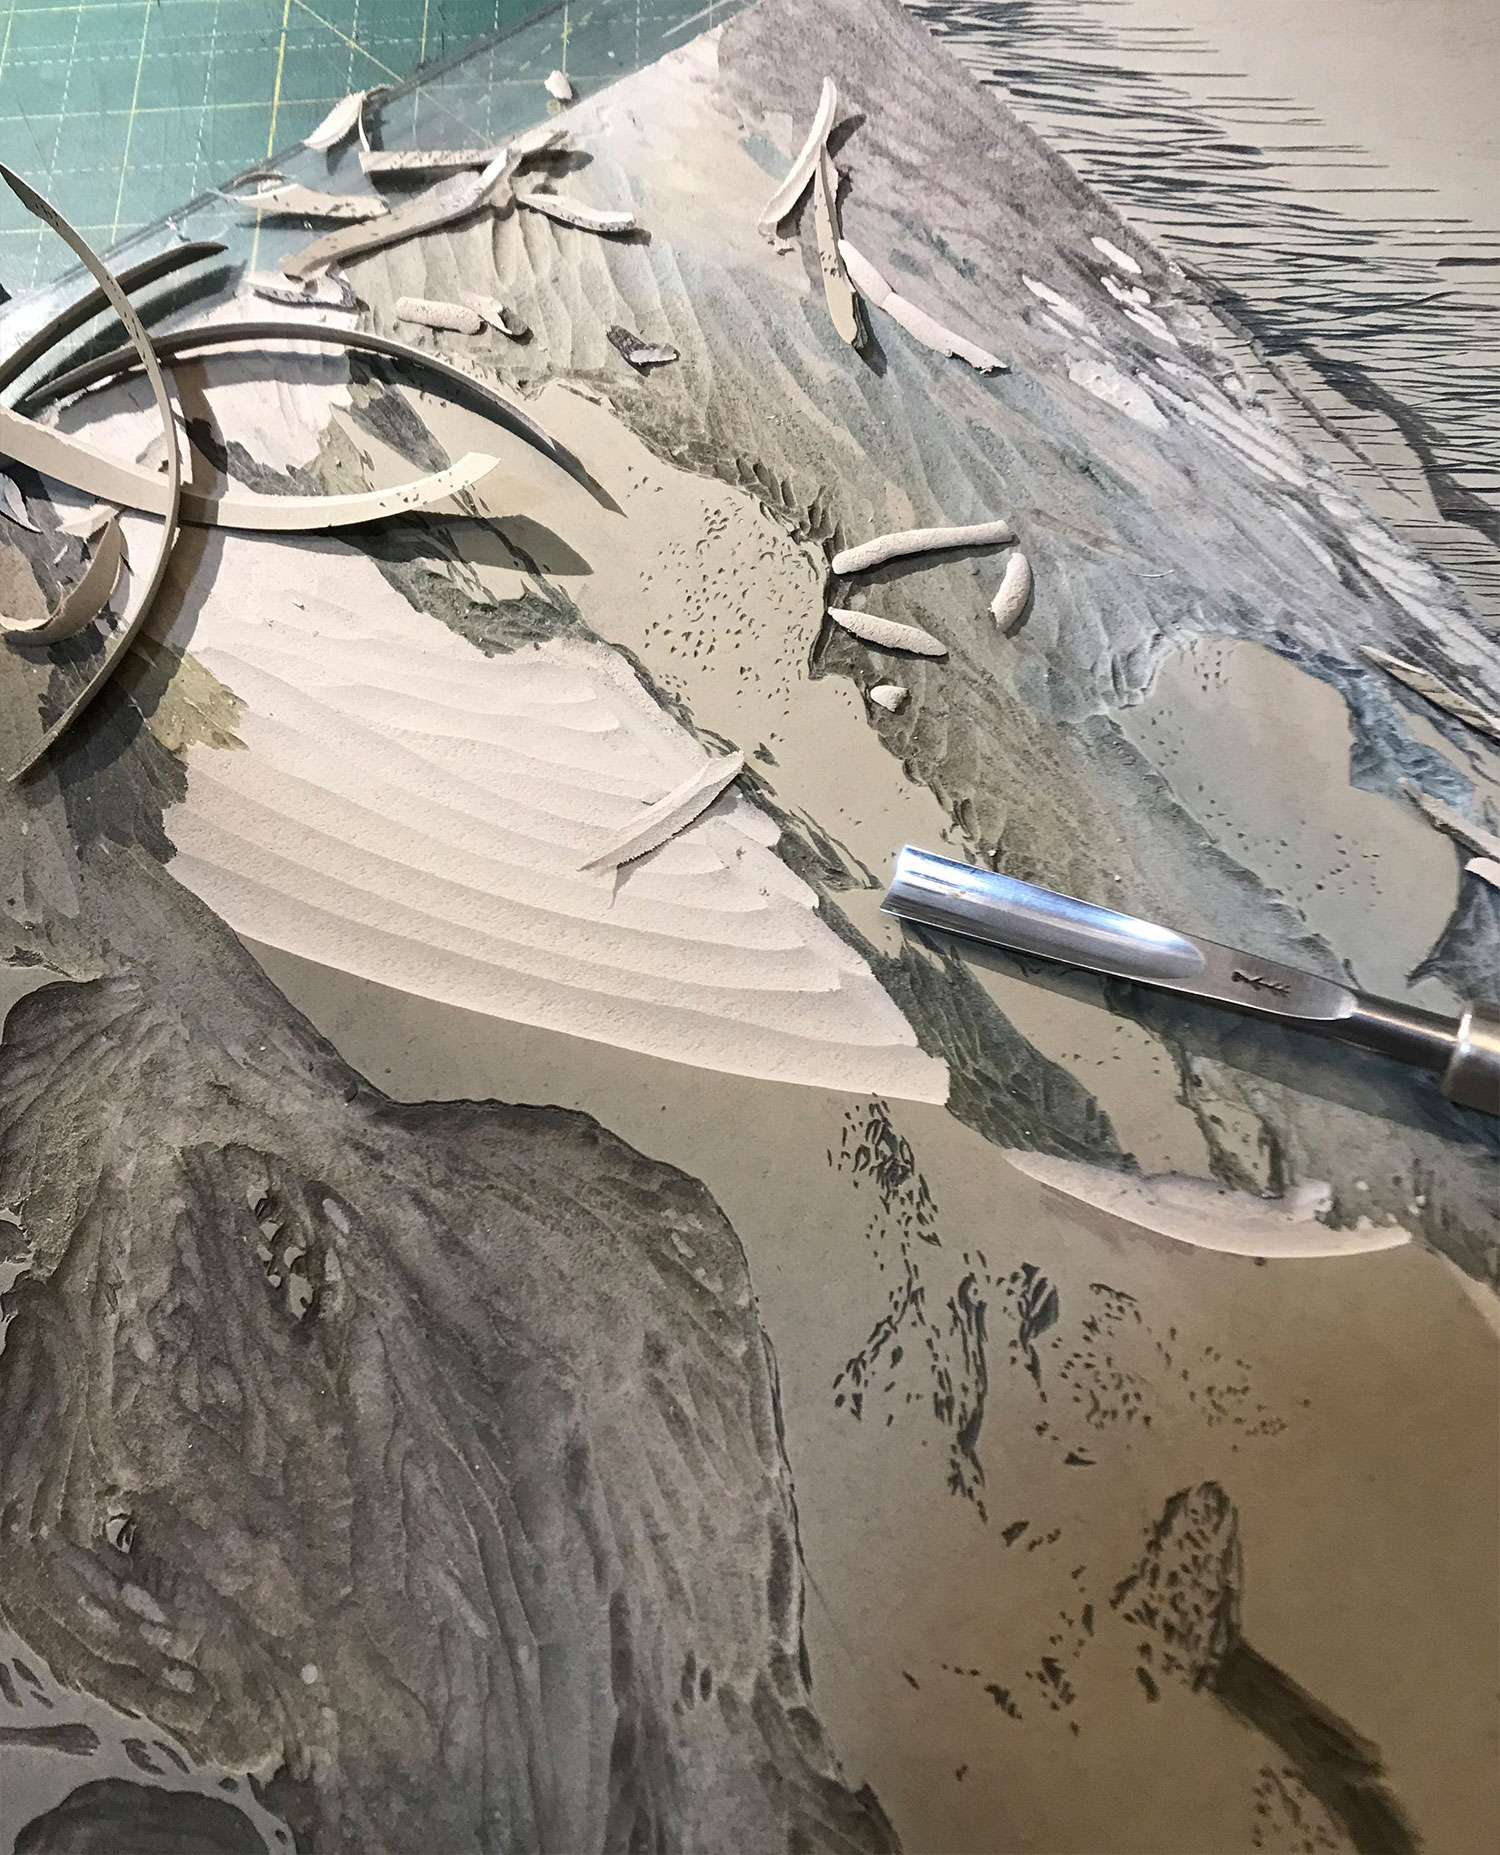
Above: Image 10 - More reduction
This is a relatively significant image.
What you can see here is one of the later-stage reduction cuts. I took this picture to capture that moment of cutting away lino that had previously been painstakingly cut - reduction printing is destructive!
But... what this image captures is an area that I've cut that I shouldn't have removed! There's a boulder about two layers back that should have been left on the block so it could have the grade applied to it. I didn't realise that I'd cut it away until I pulled a print at this stage.
As noted above, there's no way back once you've removed lino from the block!
Fortunately, the lost section was relatively small and easy enough to recreate on an additional piece of lino... see next image!
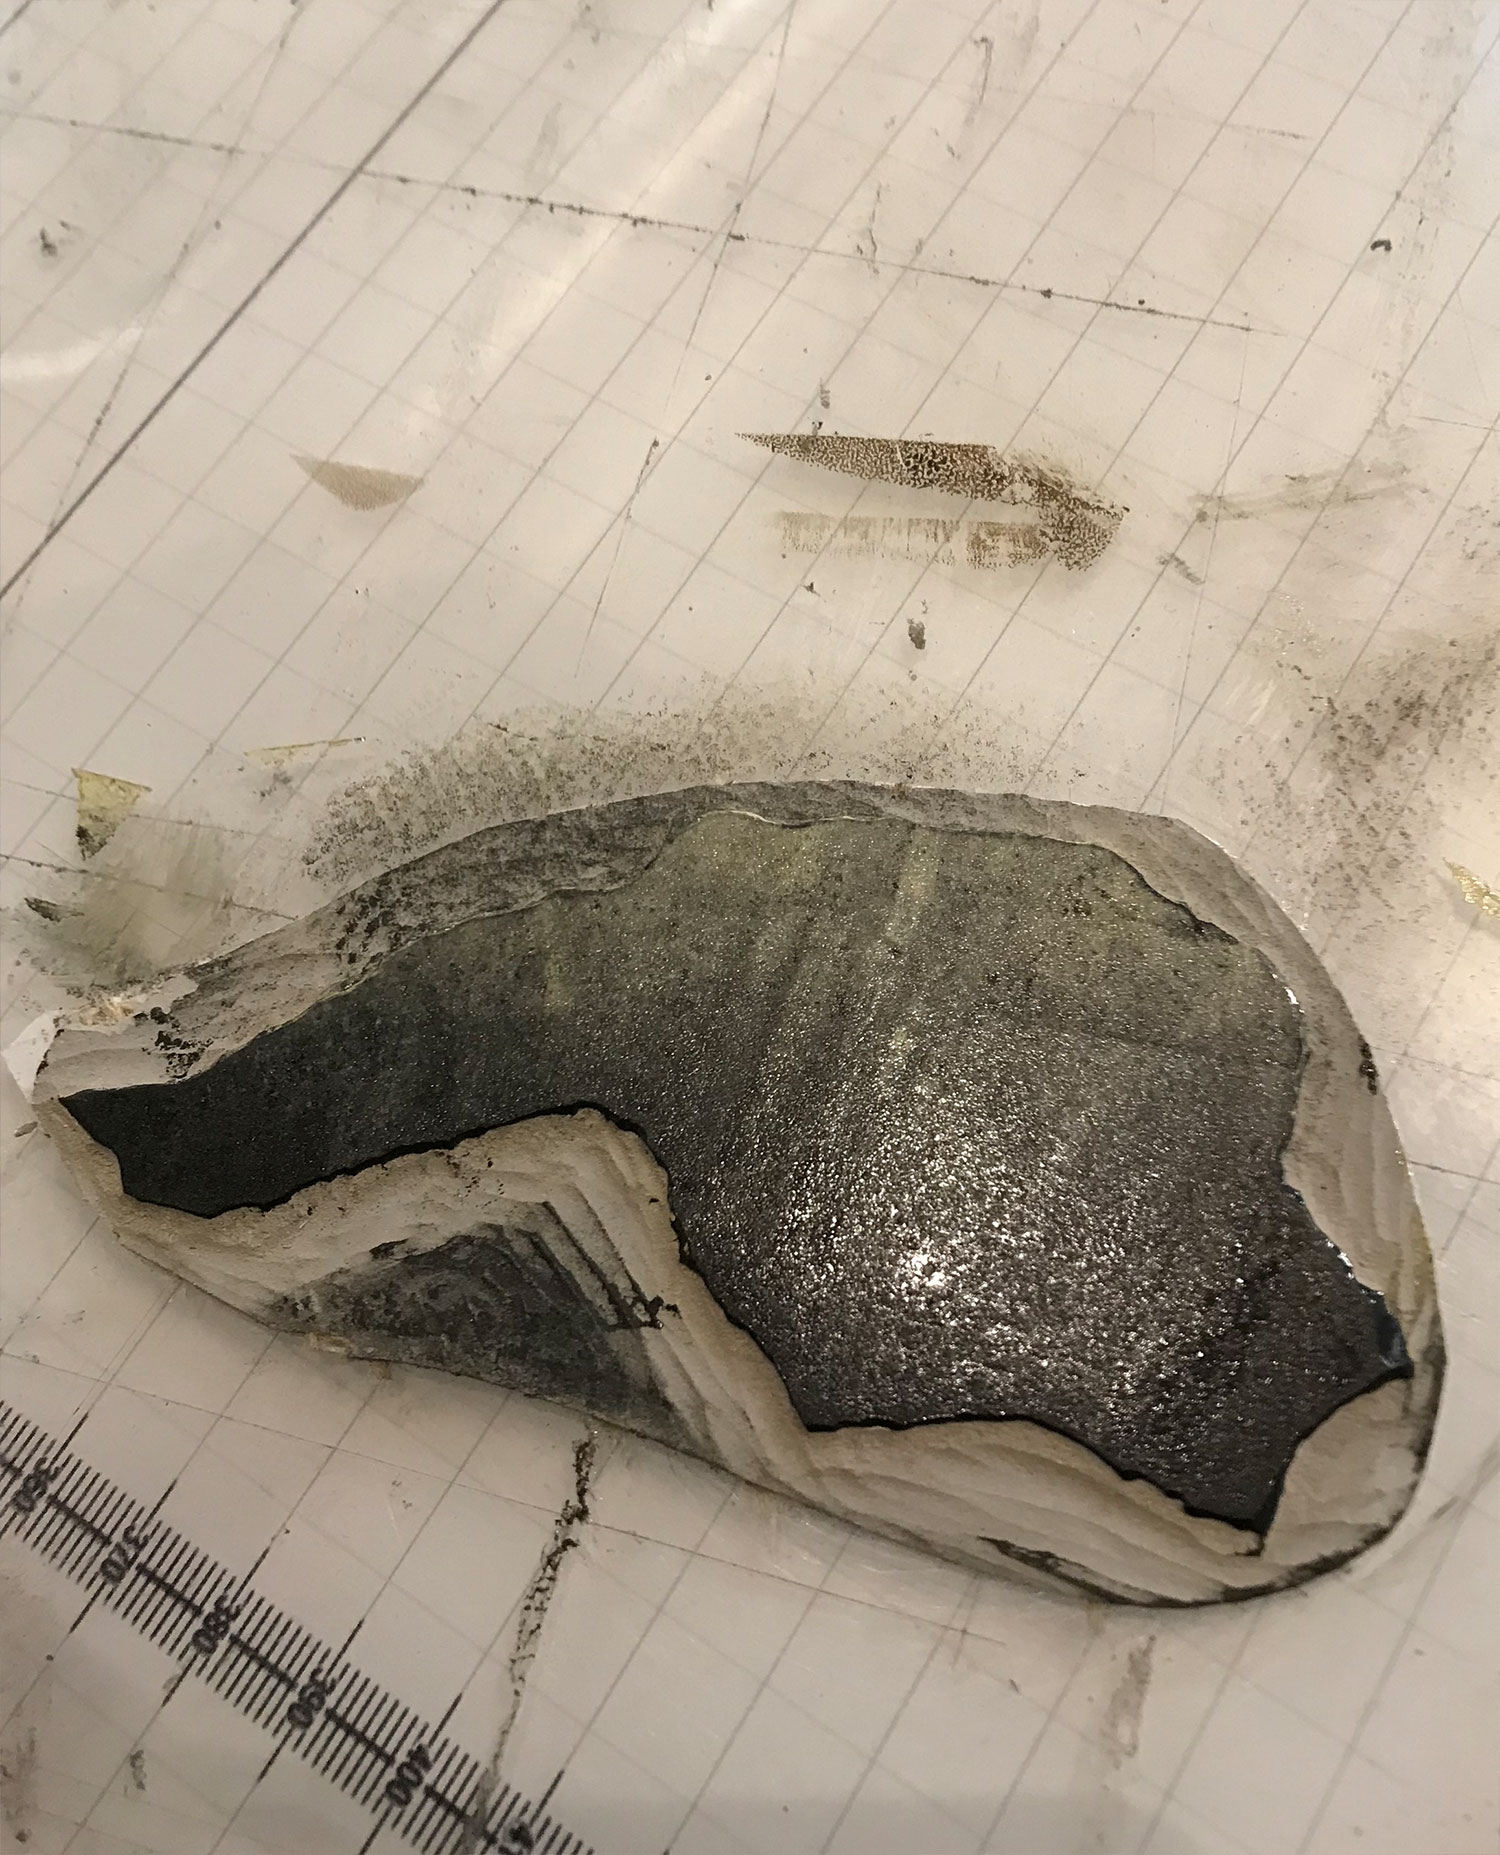
Above: Image 11 - Emergency action!
By this stage, I'd finished with the original lino block, which was now a pale imitation of its former self, as most of it had been cut away. But I needed to replace the section I'd accidentally cut away (see notes under image 10!).
So this is a second block, already positioned in place and inked up.
It's worth noting that this mistake meant that I had to print an extra run (I think I would have been able to ink this section to enable it to be printed at the same time as printing other sections). On the plus side, though, because I was working with this small piece of lino, I was able to do some quite creative things with the inking, so, apart from the limpet shells (see above) the different textures I achieved on this boulder are, for me, the best part of the print!
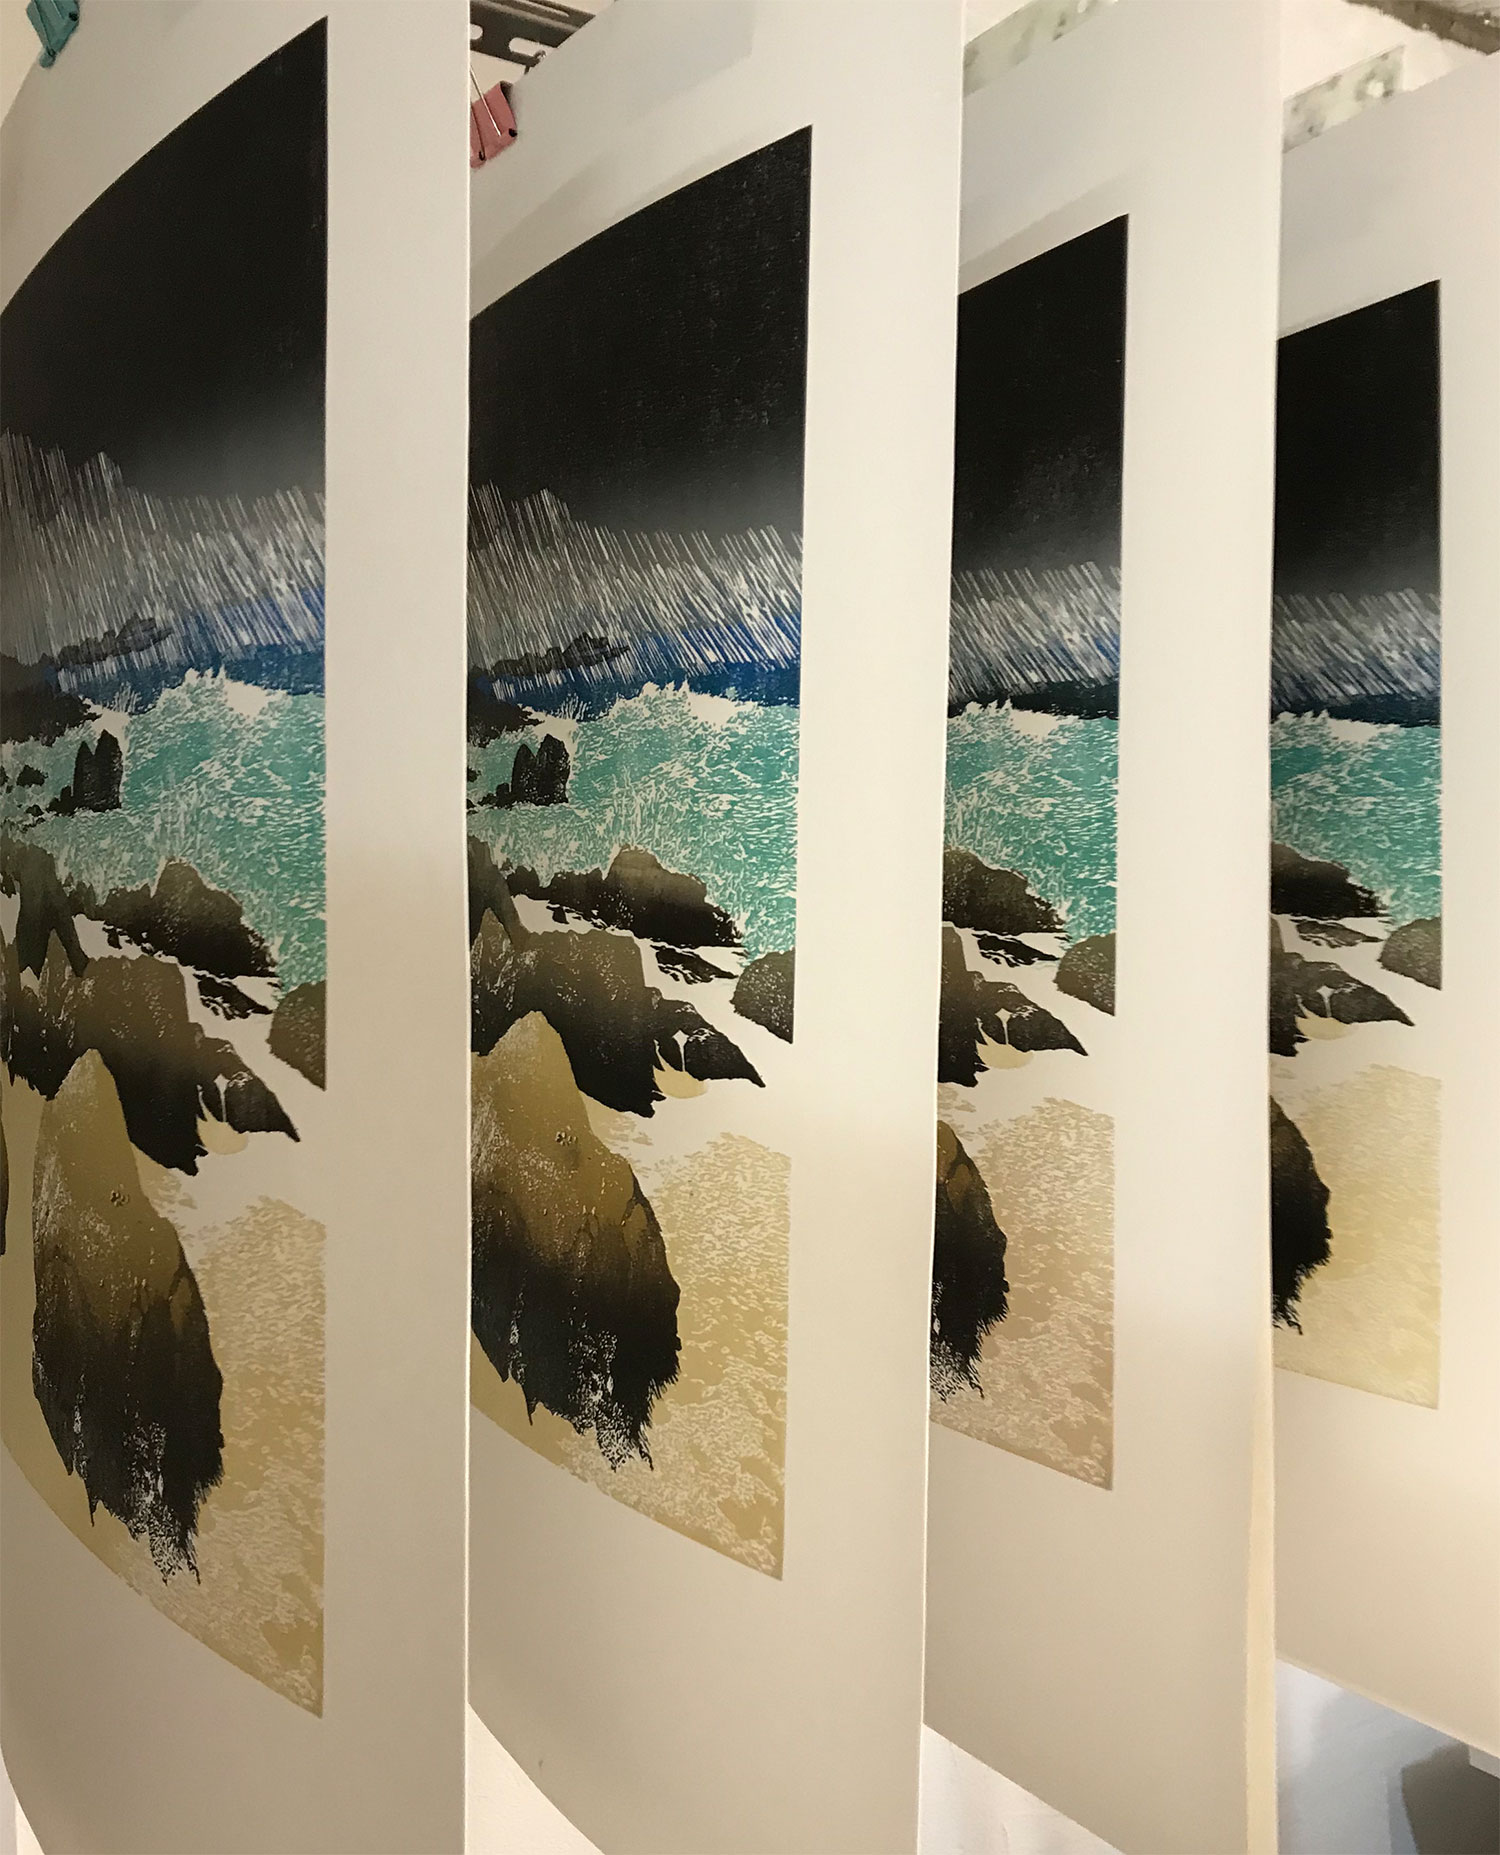
Above: Image 12 - Finished prints drying
It's always satisfying to get to this stage!
It's always satisfying to get to this stage!
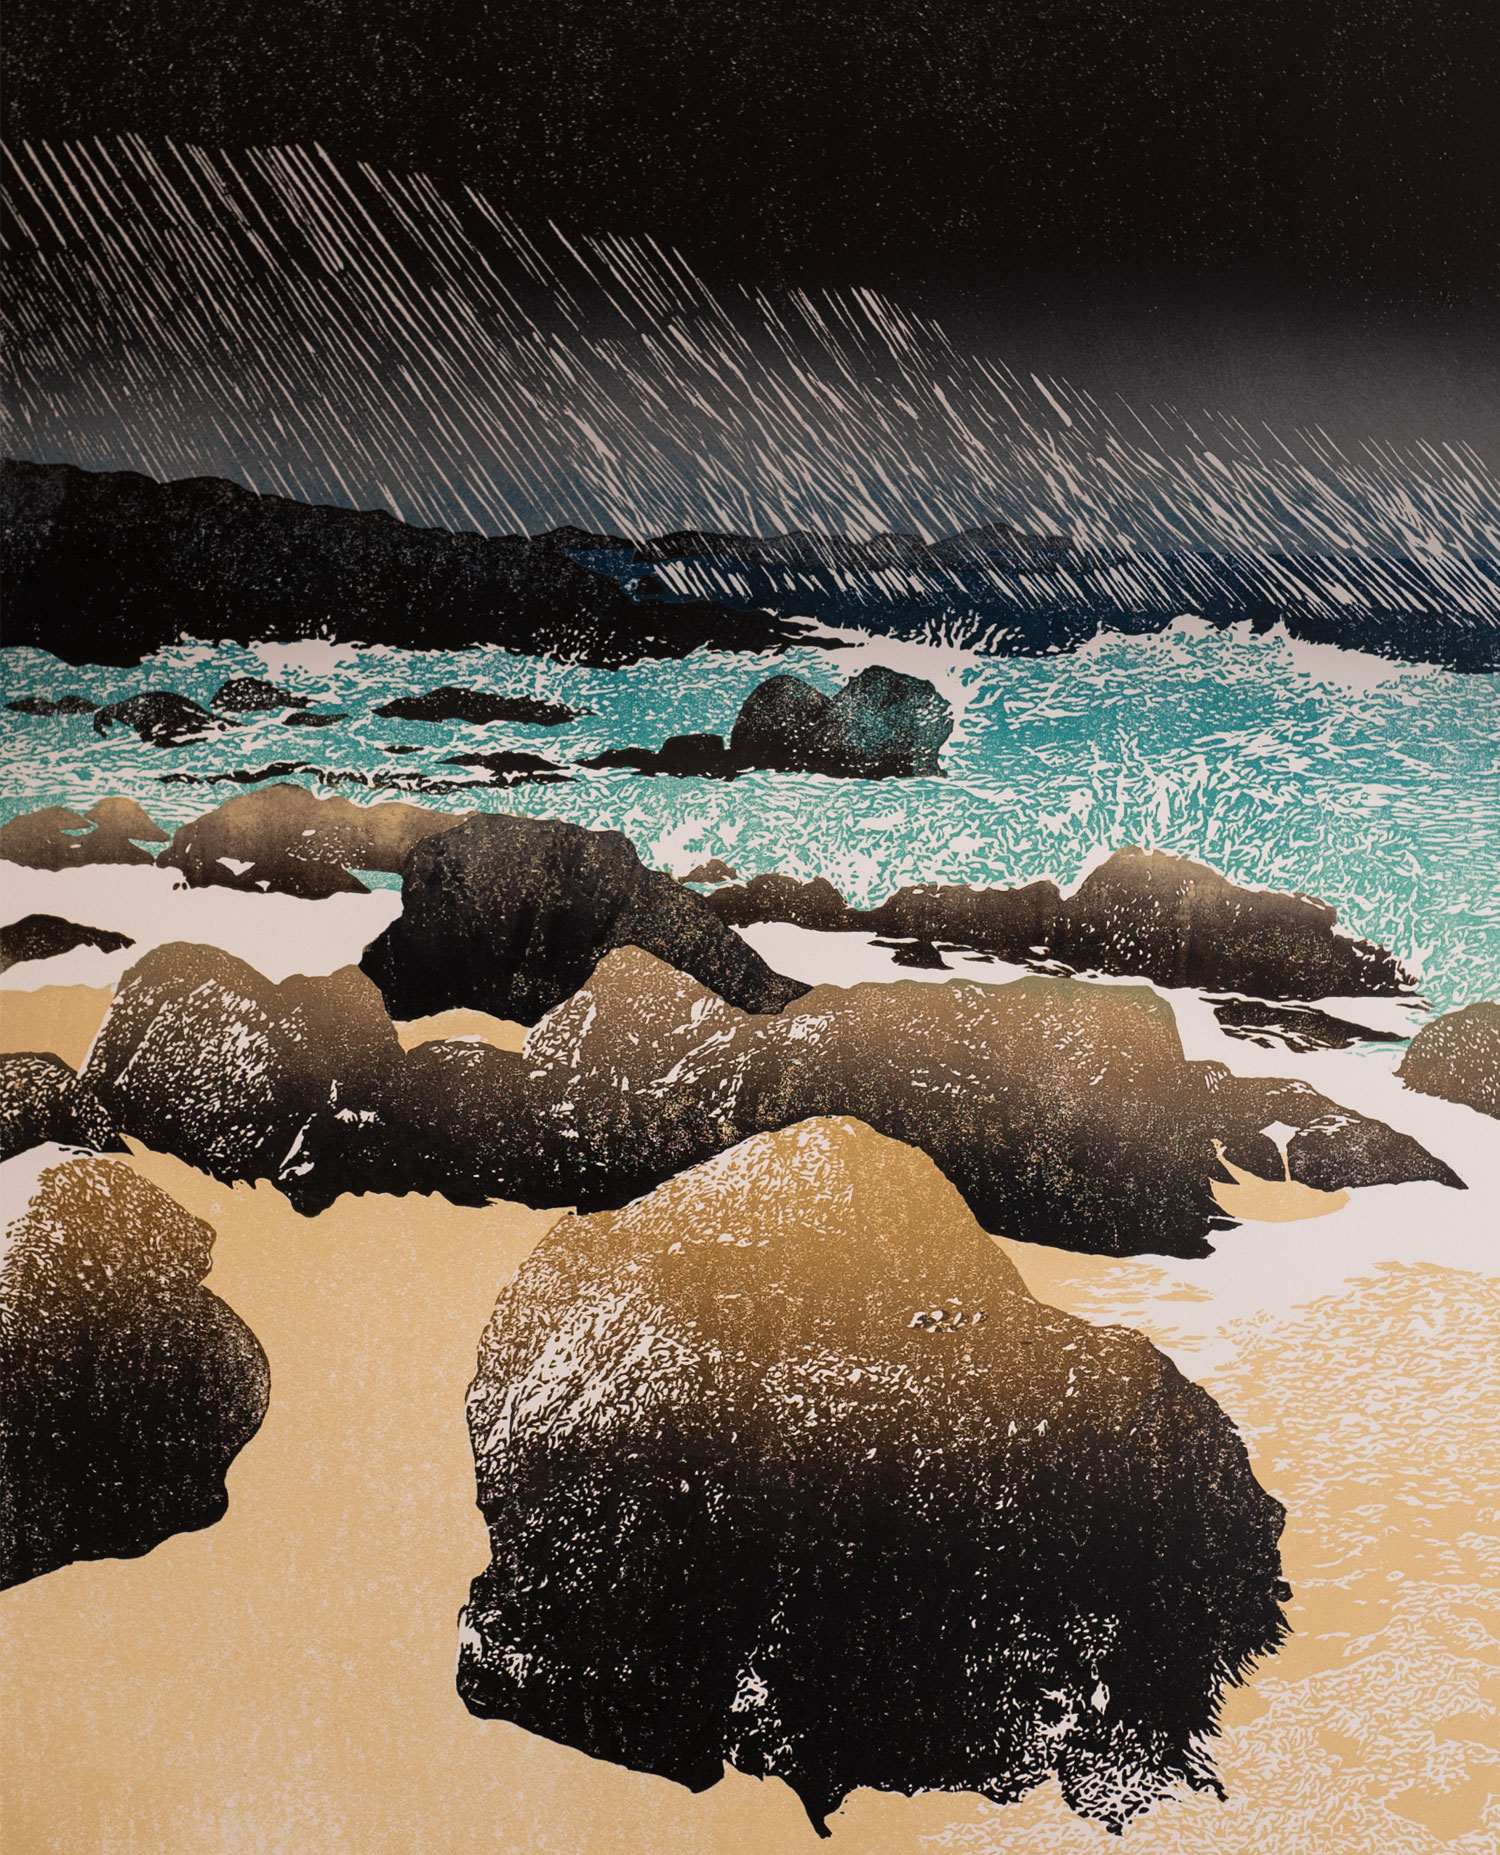
Above: Image 13 - The finished print!
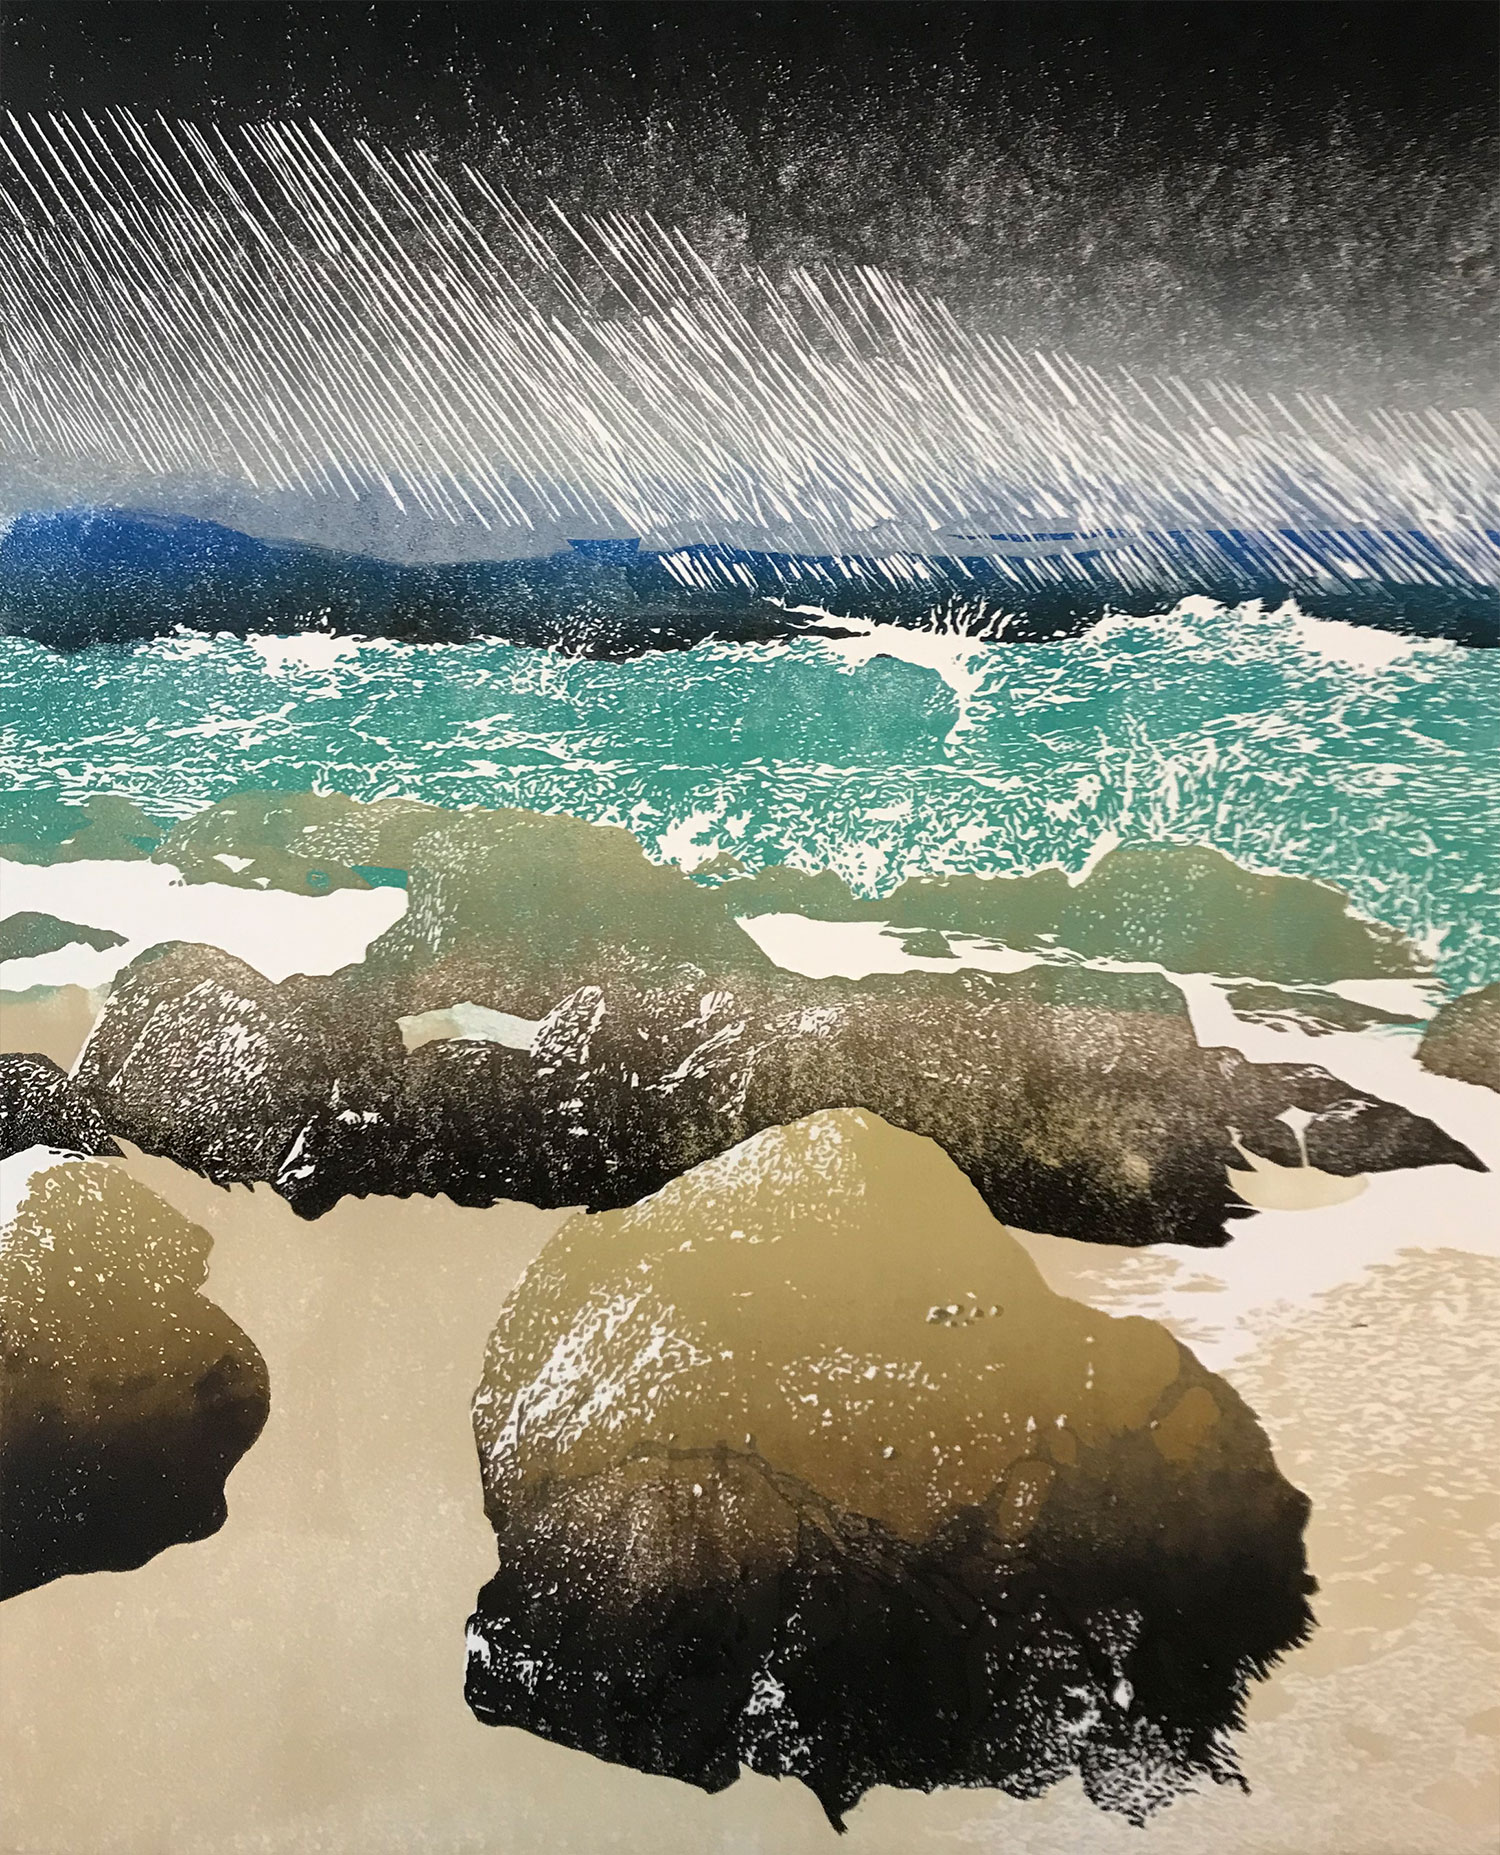
Reduction printing is a very creative, but stressful, process - especially if you're printing as many runs as this (I think it totalled 5 in the end - most of the runs included printing two sections of the image).
And you have to be prepared for the possibility that it might all go very wrong... there's a definite element of unpredictability involved.
In the end, I produced 19 prints, having set out with a maximum of 26. The edition is 18, with the 19th going into my portfolio as an 'artists' proof'. I could have made the edition 19 and kept one for the portfolio, but 19 sounds like I'd missed my target number, in a way that 18 doesn't. I realise that makes very little sense... :-)
You can buy your copy of 'Arrival' from my shop by clicking here!
Connect


My newsletter: